


Science and art integration sparks both curiosity and creativity, making learning more engaging for kids. Whether you're a parent exploring science craft ideas at home or a teacher in search of interactive classroom projects, this blend of creativity and learning offers something for everyone. From body parts science projects to a colourful water cycle science project, these activities encourage hands-on exploration. Perfect for science models for Class 3 and 4 or even simple science projects for Class 7, these science art and craft ideas make learning fun, visual, and memorable. Dive into our top 10 projects that mix education with imagination!
1. Friction Project for Science
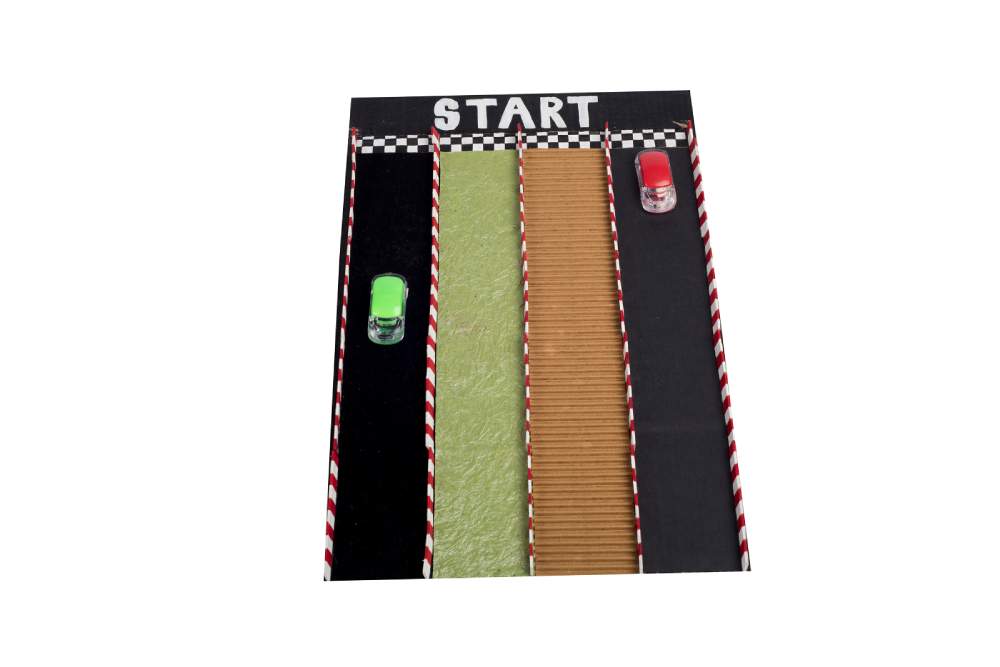
Explore the science of friction by creating a simple and interactive track! Through this activity, kids can explore science and art integration by seeing how materials influence motion creatively.
Materials Needed:
-
Fevicol A+
-
Fevicryl Acrylic Colours
-
Sketch Pens
-
Pencil
-
Scale
-
Cutter
-
Scissors
-
Cardboard Sheet
-
Strips Of Different Materials – Sand Paper
-
Oil Paper
-
Velvet Cloth
-
Satin
-
Wool
-
Corrugated Strip
-
Wooden Blocks/ Toy Car/ Ping Pong Balls
-
Ice Cream Sticks
-
Fine Art Brushes
Divide a corrugated sheet into four parts and label the top "START." Stick strips of different materials in each section using Fevicol A+. Decorate the board with Fevicryl Acrylic Colours. Modify ice cream sticks to create dividers and attach them securely with glue. Build a slanted base using a cardboard carton, painted for a polished look. Place the prepared friction board on this base and test how toy cars or ping-pong balls move across different materials. This hands-on activity teaches the science behind friction playfully and engagingly.
Fun Fact: Did you know friction is why we don’t slip while walking? It keeps us steady on our feet!
Ready to see how friction works? Explore the detailed steps for the Friction Project for Science and bring this board to life!
2. Light Craft Science Project
Brighten up learning with this activity, one of the fun science experiments at home that teaches kids about light.

Materials Needed:
-
Fevicol MR
-
Rangeela Moulding Dough
-
Pencil
-
Felt Pens
-
Scissors
-
Scale
-
Colourful Chart Papers
-
Pipe Cleaners
Start by drawing a central hexagon on a sheet of paper, then surround it with six smaller hexagons. Cut out these hexagons and fold them into mini cards. Write "Light" in the centre hexagon and explain related concepts like reflection and refraction in the others. This interactive chart serves as a great visual aid for understanding the principles of light.
Activity Extension: Test how light reflects on different surfaces using a flashlight!
Let’s shed some light on science! Discover how to create the Light Craft Science Project with step-by-step guidance.
3. DIY Water Cycle Science Craft
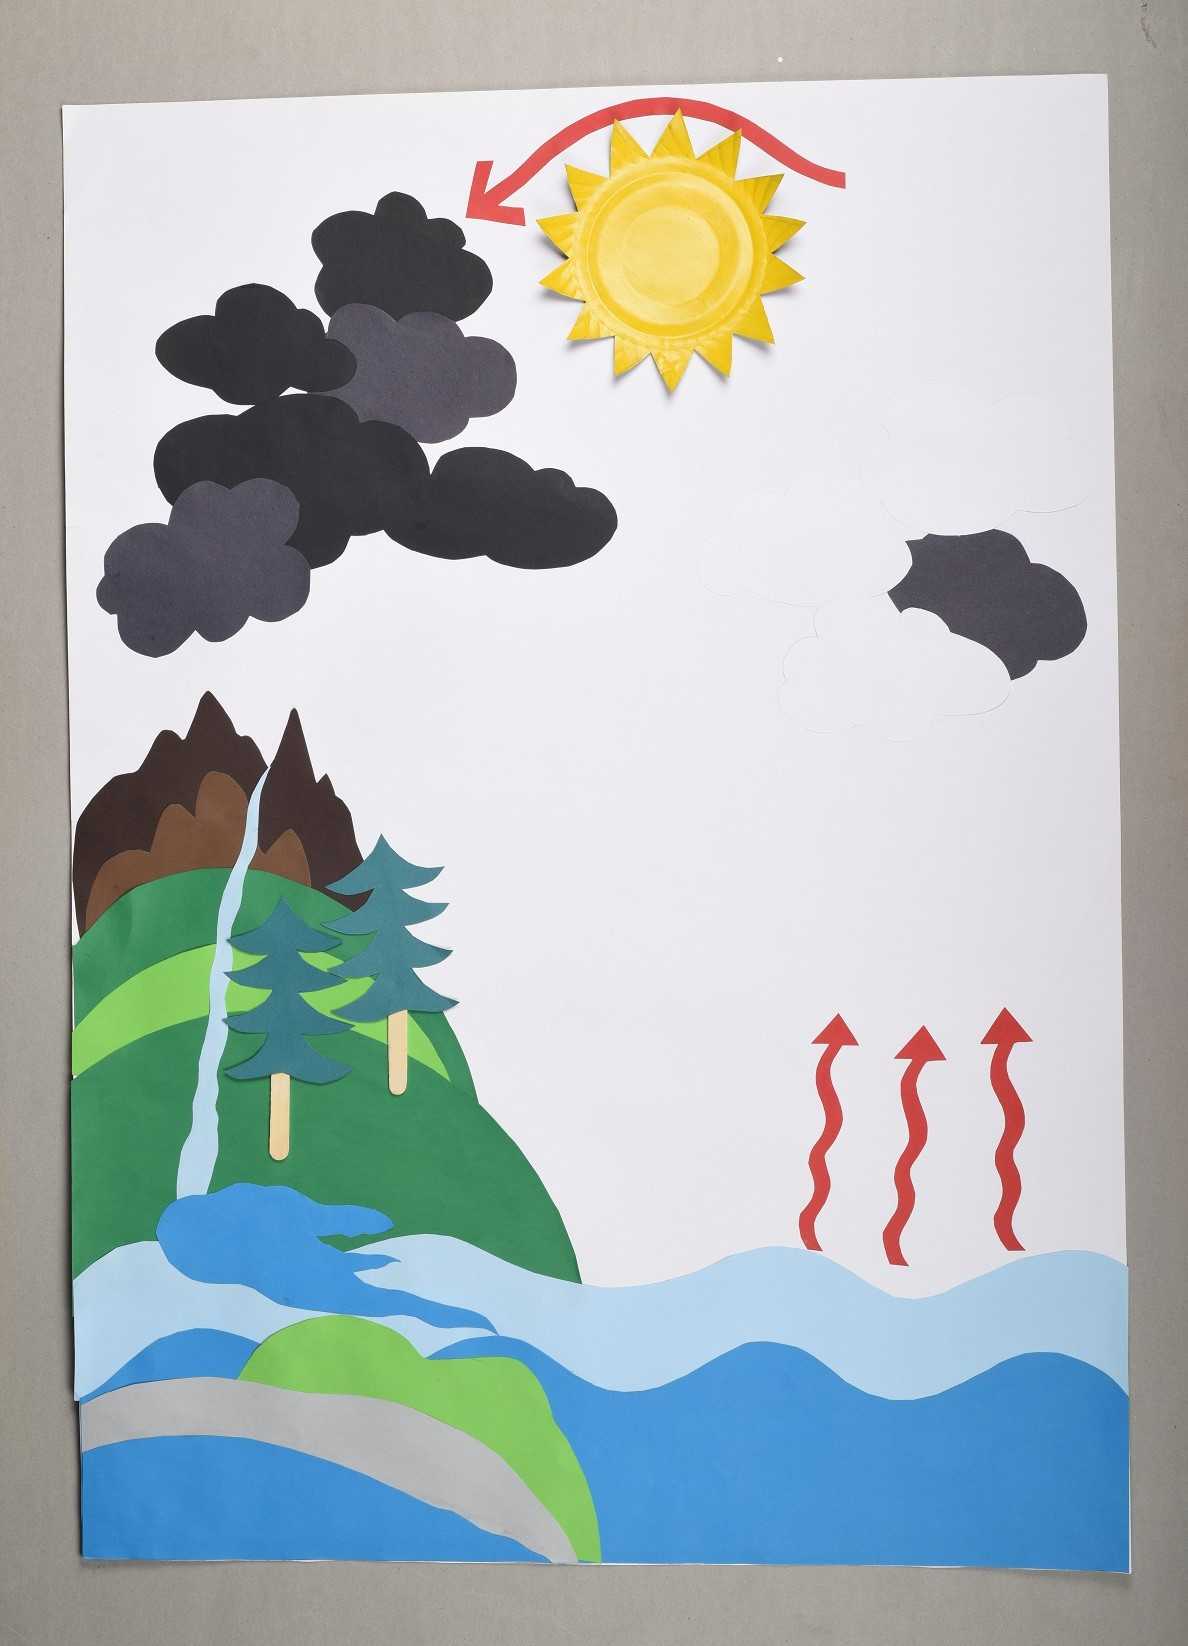
This water cycle project teaches kids about evaporation, condensation, precipitation, and collection through a creative chart.
Materials Needed:
-
Fevicol A+
-
Fevicryl Acrylic Colours
-
Scissors
-
Pencil
-
Scale
-
Colourful Chart Papers
-
Paper Plate
-
Ice-cream Sticks
Cut out shapes representing the sun, clouds, trees, and water droplets using chart paper. Paint a small paper plate to resemble the sun and attach it to the chart paper. Use ice cream sticks as tree trunks and arrange all the elements to depict evaporation, condensation, and precipitation. This vibrant activity is one of the hands-on science projects that makes the water cycle easy to visualise.
Fun Fact: Water from the oceans can travel as far as your backyard when it rains!
Follow the flow! Dive into the full instructions for the DIY Water Cycle Science Craft and bring the water cycle to life.
4. Create Your DNA Model
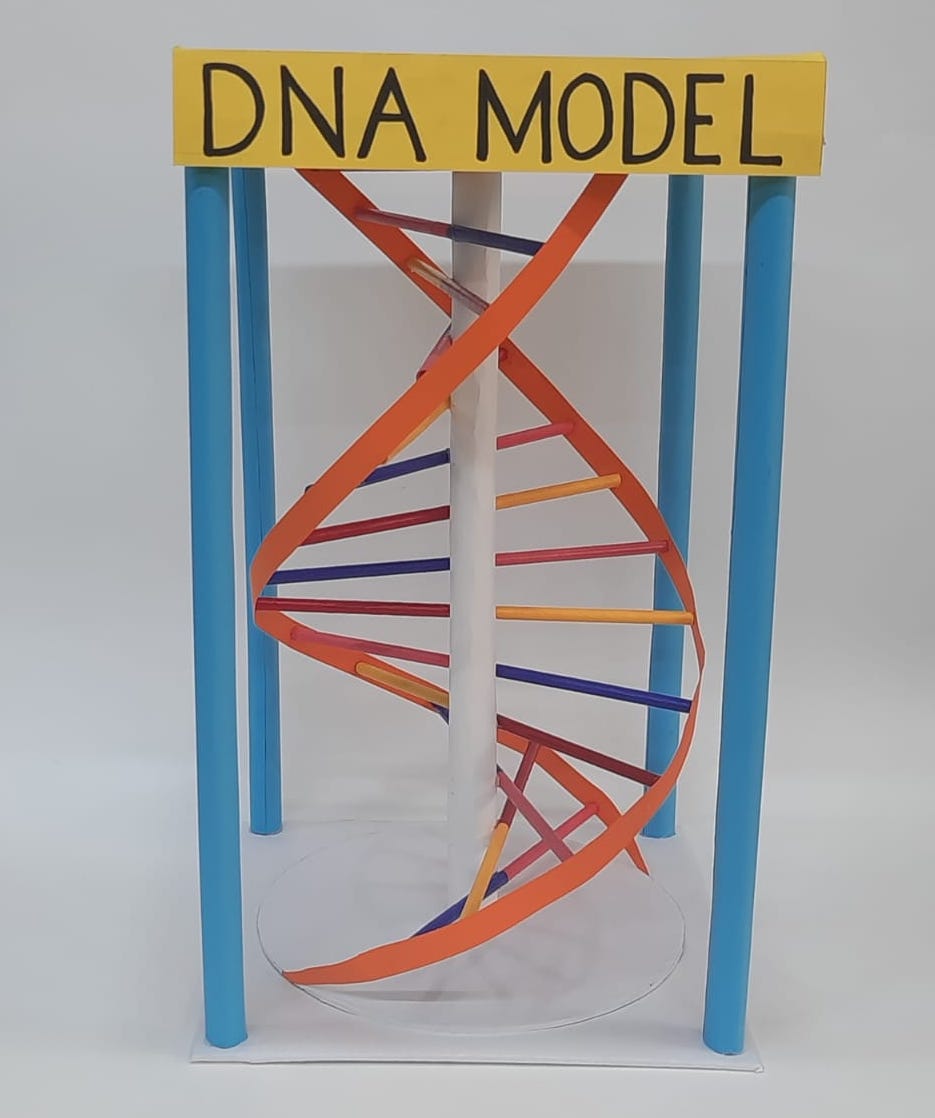
Dive into biology by crafting a model of DNA, the blueprint of life!
Materials Needed:
-
Fevicol A+
-
Fevicryl Acrylic Colour
-
Fine Art Brushes
-
Corrugated Sheet
-
Coloured Chart Papers
-
Paper Straw
-
Scale
-
Pencil
-
Paper Cutter.
Cut a corrugated sheet into coiled strips to form the DNA’s double helix. Paint paper straws in different colours and attach them to the coils to represent the base pairs. Assemble the DNA model on a sturdy base, labelling each part. This is one of the easy science crafts that combines biology and creativity to explore the blueprint of life.
Activity Extension: Use the model to explain how traits like eye colour are passed down from parents to children.
Decode the secrets of life! Learn how to craft the Create Your DNA Model with detailed steps.
5. Smart City Science Project
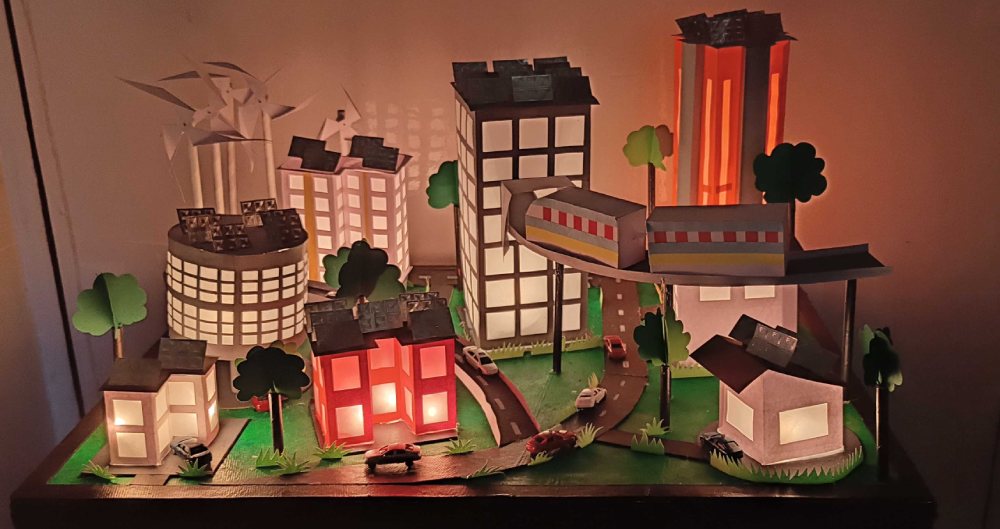
Build a 3D smart city model while learning about sustainable energy and innovative technologies.
Materials Needed:
-
Fevicol A+
-
Fevicryl Acrylic Colour
-
Silver Craft Paper Metallic Finish
-
Coloured Card Paper
-
Gateway sheets
-
Scale
-
Pencil
-
Paper cutter
-
Paper Straw
-
Fine Art Brushes
-
Fairy Lights
Construct buildings from card paper, adding colourful accents and functional details like windows. Use painted paper straws for structural support. Arrange the buildings on a painted mount board and insert fairy lights for illumination. Include elements like trees, solar panels, and windmills made from chart paper and straws to illustrate sustainable energy solutions. This immersive activity doubles as one of the fun science experiments at home, letting kids imagine futuristic cities.
Fun Fact: Smart cities save energy and reduce pollution through advanced technology!
Bring your futuristic city to life! Follow the guide for the Smart City Science Project and light up your model.
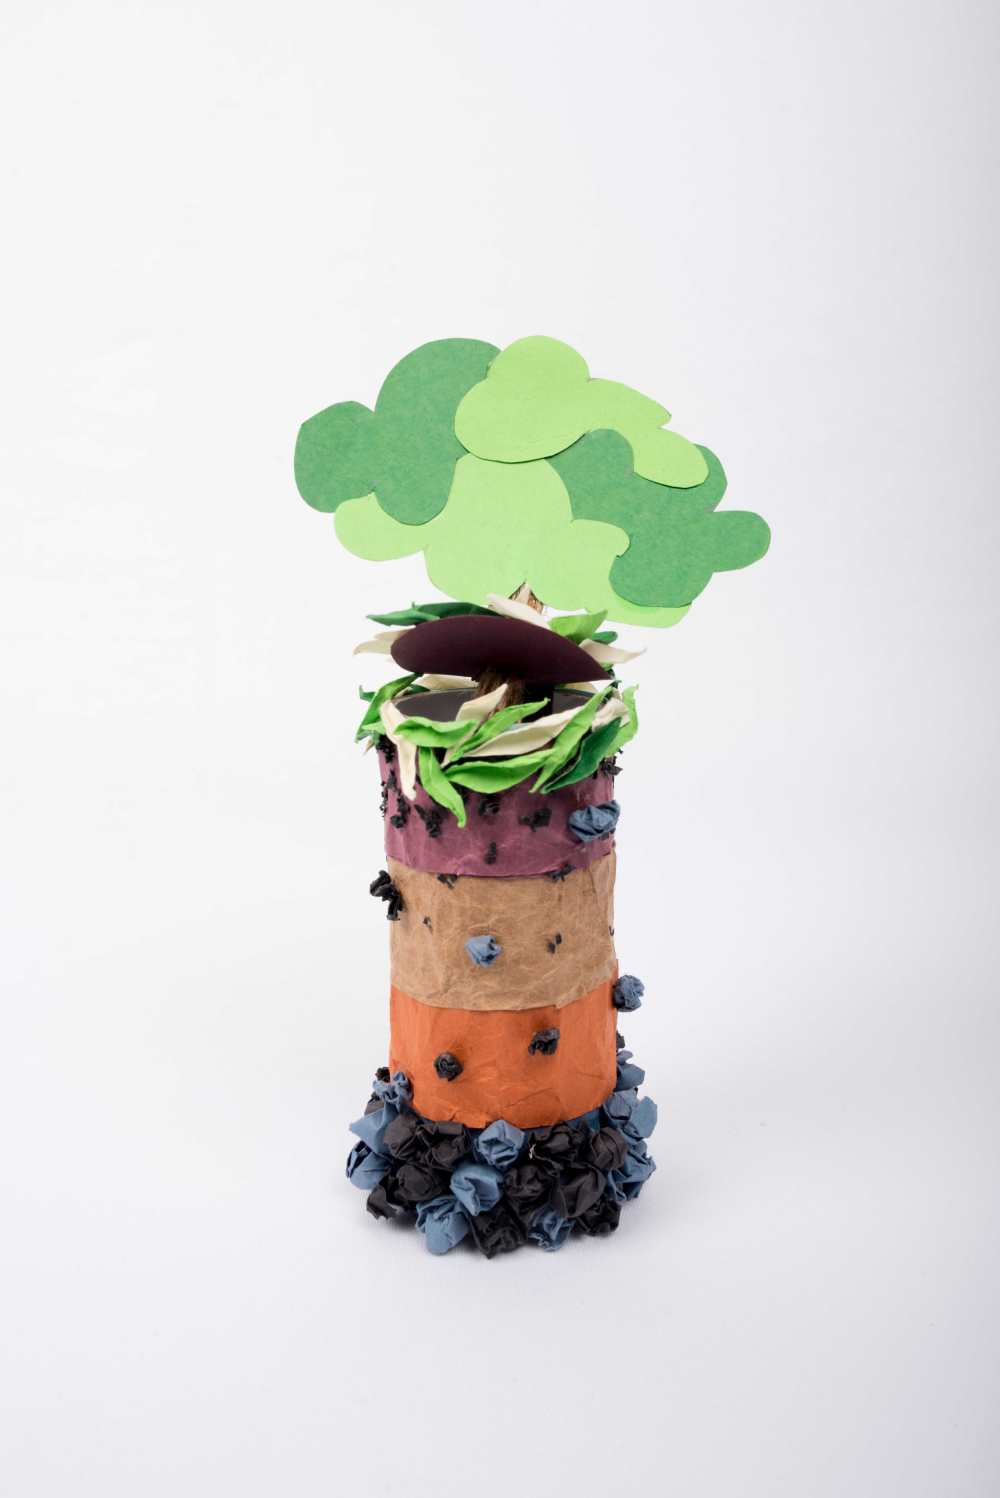
6. Soil Profile Project
Understand the layers of soil with this hands-on diorama craft.
Materials Needed:
-
Fevicol MR
-
Rangeela Moulding Dough
-
Pencil
-
Scale
-
Scissors
-
Colourful Chart Papers
-
Empty Tissue Roll Tube
-
Jute Cord
Wrap the tissue roll tube with crumpled paper strips to represent soil layers. Add moulded elements like rocks, roots, and leaves for realism. Create a tree with a jute cord trunk and paper leaves, inserting it into the top of the roll. This hands-on project is an excellent way to teach kids about soil while exploring science and art integration.
Activity Extension: Research how plants absorb water from different soil layers!
Dig deeper into soil science! Build your own Soil Profile Project with this complete guide.
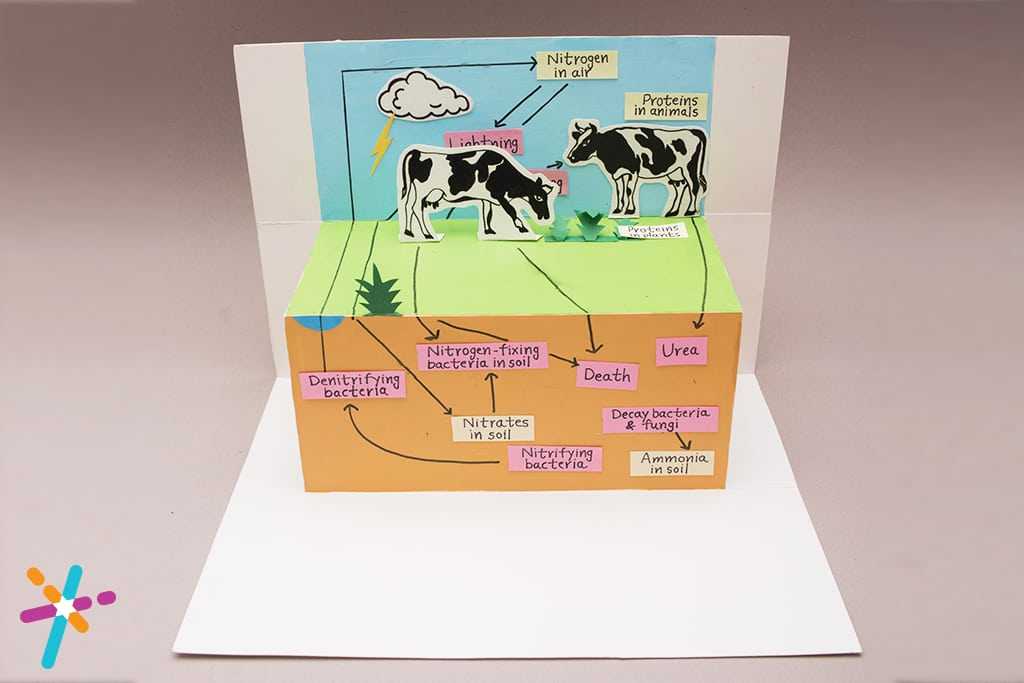
7. Nitrogen Cycle Pop-Up Card
This is one of the easy science crafts that helps kids learn about the nitrogen cycle through a fun pop-up card.
Materials Needed:
-
Fevicol Ele
-
Pencil
-
Eraser
-
Ruler
-
Marker
-
Fine Art Brushes
-
White A3 Sheet
-
Coloured Chart Papers Quilling Strips (pink, white)
-
Rangeela Tempera Colours
Fold an A3 sheet and cut out a rectangle in the centre. Push this section inward to create a pop-up effect. Paint the background to depict natural elements like grass and clouds. Add paper cutouts of cows, lightning, and arrows to show the nitrogen cycle. Label each stage, turning this card into a 3D educational tool.
Did You Know? Lightning helps convert nitrogen into a form plants can use!
Pop into the nitrogen cycle! Follow the steps to create the Nitrogen Cycle Pop-Up Card and make learning fun.
8. Anatomy of a Human Heart
Teach anatomy with this intricate model of the human heart made from quilling strips.

Materials Needed:
-
Fevicol MR
-
Mount Board
-
Quilling Strips
-
Scissors
-
Pencil
-
Scale
-
Barbeque Stick
Draw a heart diagram on a mount board. Use quilling strips to form shapes like triangles and domes, and glue them to the board to replicate the heart’s anatomy. This craft highlights the beauty of science and art integration, turning a heart model into a tactile way to learn human biology.
Fun Fact: Your heart beats about 100,000 times a day!
Discover the heart of the matter! Master the details of the Anatomy of a Human Heart model with this guide.
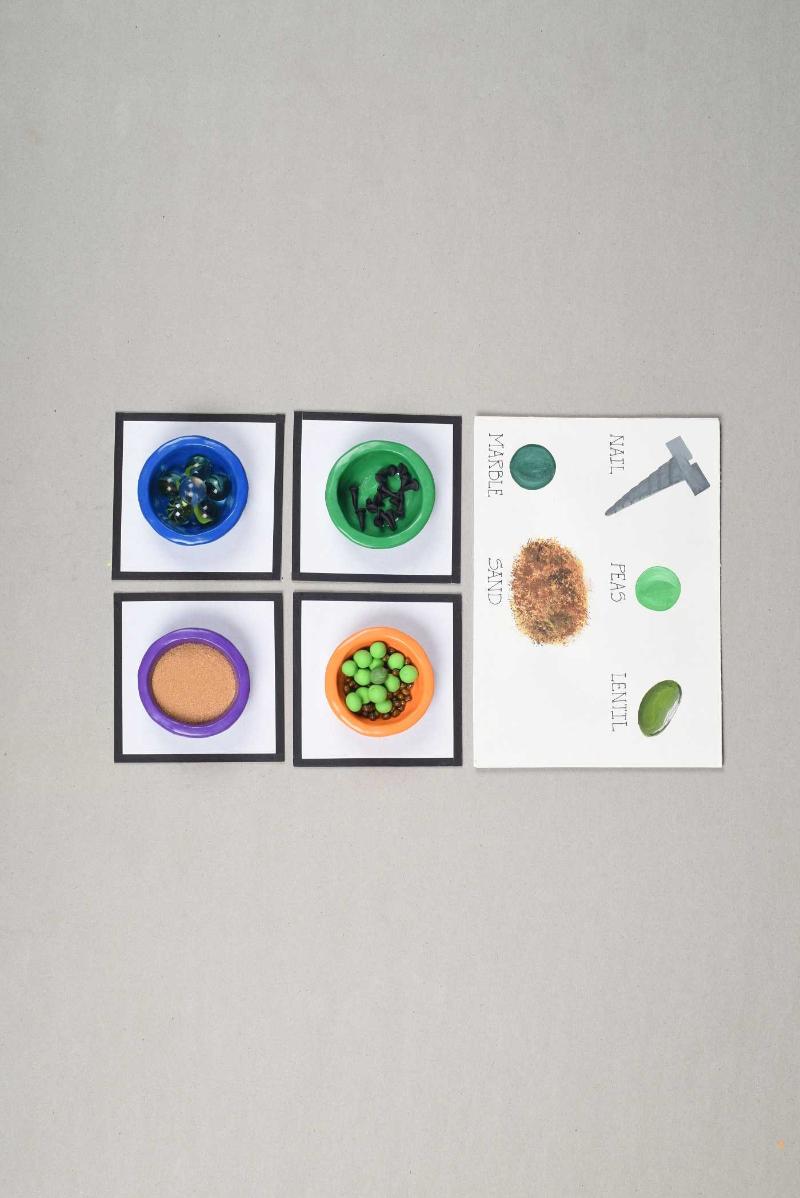
9. Separating Mixtures Science Craft
Discover how different materials can be separated using sieves and creative tools.
Materials Needed:
-
Fevicol A+
-
Rangeela Creative Clay
-
Rangeela Tempera Colours
-
Pencil
-
Scissors
-
Scale
-
Mount Board
-
Quilling Strips
-
Mesh
-
Lentils
-
Marbles
-
Sand
Cut the mount board into sections and create clay bowls for holding materials. Paint the components and assemble them into a working model. Use mesh of varying sizes to demonstrate separation techniques like sieving and filtration. This project is a practical way to understand material properties.
Activity Extension: Try creating your mixtures to experiment further!
Separate the science from the mystery! Learn how to make the Separating Mixtures Science Craft with these steps.
10. DIY Marine Ecosystem Craft
Create a miniature marine ecosystem and learn about ocean life.

Materials Needed:
-
Fevicryl Acrylic Colours Cutter
-
Fevicol A+
-
Scissors
-
Pencil
-
Fine Art Brushes
-
Sponge
-
Corrugated Sheets
-
Carton
-
Cotton
-
Coloured Chart paper
-
Animals Images
Paint the inside of a box to represent the ocean floor and sky. Add cotton clouds, chart paper trees, and images of marine animals to complete the ecosystem. Assemble and decorate with Fevicol A+ for a realistic touch.
Fun Fact: Oceans cover more than 70% of Earth’s surface!
Dive into the deep blue! Build your own DIY Marine Ecosystem Craft with this detailed tutorial.
And it’s a Wrap!
These projects highlight the wonders of science and art integration, offering opportunities to spark curiosity, foster creativity, and strengthen family or classroom bonds. Try these hands-on science projects to make learning an adventure and share your creations with others. Who knows? These fun science experiments at home might inspire the next generation of scientists and artists!


