


DNA Model Project Paper – Cardboard DNA Model & DIY Science Activity | Fevicreate - Activity Single - FeviCreate
Build a DNA Model with a Simple DIY Craft
Create a Hands-On DNA Model Craft for Fun Science Learning. Craft a fun and colorful DNA model using simple materials. This hands-on activity helps learners of all ages understand genetics and the double helix structure through creative crafting.
Paper Crafting Brand me 30 to 60 mins 9 to 14 years Science Class 6


Steps to Create this Activity
Login to see steps

Step - 01
To construct a DNA model, take a corrugated sheet, draw and cut out squares measuring 23 cm, a circle measuring with diameter 20cm.

Step - 02
Using Fevicol A+, cover the cut-outs with the help of white chart paper and let it dry.

Step - 03
To create DNA structure, take a corrugated sheet roll into a coil measuring the width of 2cm and length 34cm and stick the edges with the help of Fevicol A+ and let it dry. Draw and cut out a strip using white chart for covering the coil.

Step - 04
With the help of the cutout cover the coil as shown and seal the edges with the help of Fevicol A+ and let it dry. With the help of scale and pencil make markings onto the coil by dividing it into equal distance measuring 2.5 cm as shown in the image.

Step - 05
Take some paper straws, paint them into 2 different colours of your choice using Fevicryl Acrylic Colour with the help of fine art brushes and let it dry.

Step - 06
Using Fevicol A+, stick paper straw in a twirl manner onto the marking made as shown in the image.

Step - 07
Your structure would like this once all the straws are stuck.

Step - 08
Using Fevicol A+, assemble the cut-outs as shown in the image I.e., square, circle and a DNA structure, now following a DNA structure stick chart paper strip as shown in the image and let it dry.

Step - 09
To create the structure holder, take corrugated sheet and make 4 coils measuring its width 2cm and its length 34cm seal the edges with the help of Fevicol A+ and let it dry. ow take any coloured chart paper cut out strips to cover the coils.

Step - 10
Using Fevicol A+, cover the coils with the help of cut-outs as shown in the image.

Step - 11
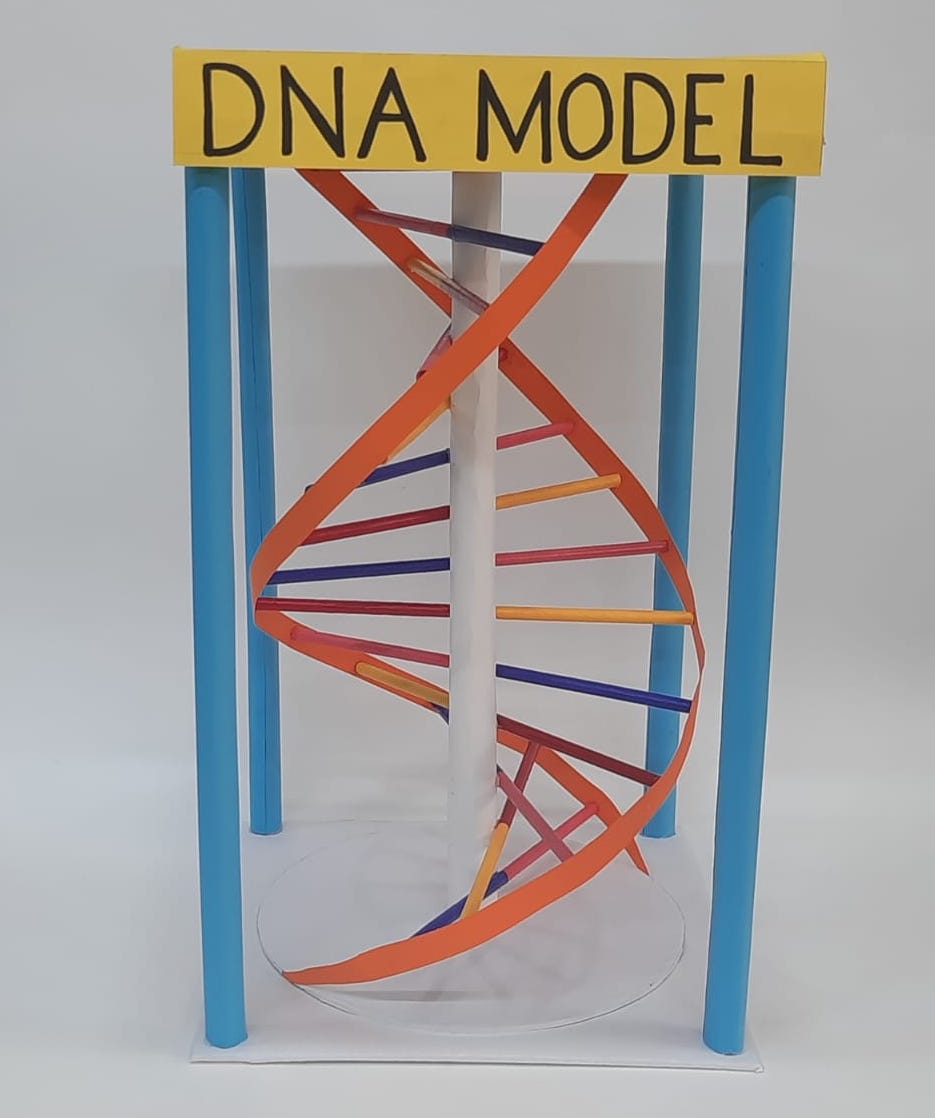
Using Fevicol A+, stick the coils on the edges of the structure as shown. Now take any coloured chart paper and label it as DNA MODEL and stick it as shown and let it dry. Your handmade DNA Model is ready!
Steps to Create this Activity
Login to see steps
Step - 01
To construct a DNA model, take a corrugated sheet, draw and cut out squares measuring 23 cm, a circle measuring with diameter 20cm.
Step - 02
Using Fevicol A+, cover the cut-outs with the help of white chart paper and let it dry.
Step - 03
To create DNA structure, take a corrugated sheet roll into a coil measuring the width of 2cm and length 34cm and stick the edges with the help of Fevicol A+ and let it dry. Draw and cut out a strip using white chart for covering the coil.
Step - 04
With the help of the cutout cover the coil as shown and seal the edges with the help of Fevicol A+ and let it dry. With the help of scale and pencil make markings onto the coil by dividing it into equal distance measuring 2.5 cm as shown in the image.
Step - 05
Take some paper straws, paint them into 2 different colours of your choice using Fevicryl Acrylic Colour with the help of fine art brushes and let it dry.
Step - 06
Using Fevicol A+, stick paper straw in a twirl manner onto the marking made as shown in the image.
Step - 07
Your structure would like this once all the straws are stuck.
Step - 08
Using Fevicol A+, assemble the cut-outs as shown in the image I.e., square, circle and a DNA structure, now following a DNA structure stick chart paper strip as shown in the image and let it dry.
Step - 09
To create the structure holder, take corrugated sheet and make 4 coils measuring its width 2cm and its length 34cm seal the edges with the help of Fevicol A+ and let it dry. ow take any coloured chart paper cut out strips to cover the coils.
Step - 10
Using Fevicol A+, cover the coils with the help of cut-outs as shown in the image.
Step - 11
Using Fevicol A+, stick the coils on the edges of the structure as shown. Now take any coloured chart paper and label it as DNA MODEL and stick it as shown and let it dry. Your handmade DNA Model is ready!


