


DIY Christmas Tree Craft to Add a Handcrafted for Seasonal Decorations - Activity Single - FeviCreate
Create a Handcrafted Christmas Tree with DIY Steps
This simple DIY Christmas tree craft brings a handmade element to your holiday decor. With easy-to-follow steps, it’s the perfect way to add a unique, personal touch to your festive decorations.
Painting Celebration 30 to 60 mins 9 to 14 years Art & Craft Class 7


Steps to Create this Activity
Login to see steps

Step - 01
On a red chart paper, draw the diagram shown in the image, using a pencil and scale.

Step - 02
Cut them with scissors and fold the flaps.

Step - 03
Referring to the template given, draw the diagrams of doors.

Step - 04
Cut them with a paper cutter from three ends, as shown.

Step - 05
Using Fevistik Power, seal the edges creating a conical structure.

Step - 06
Similarly, to create a conical structure inside, on a sheet of green chart paper, draw the diagram as shown in the image, using a pencil and scale.

Step - 07
Cut them with scissors and fold the flaps. With a pencil, draw the diagrams of door contours and write Christmas messages inside it. Use your imagination or refer to the given image.

Step - 08
Using Rangeela Tempera Colours of your choice, paint the elements shown using Fine Art brushes; let it dry. To enhance the elements, use Rangeela Paper Glitter, as shown.

Step - 09
Using Fevistik Power, seal the edges creating a conical structure; let it dry.

Step - 10
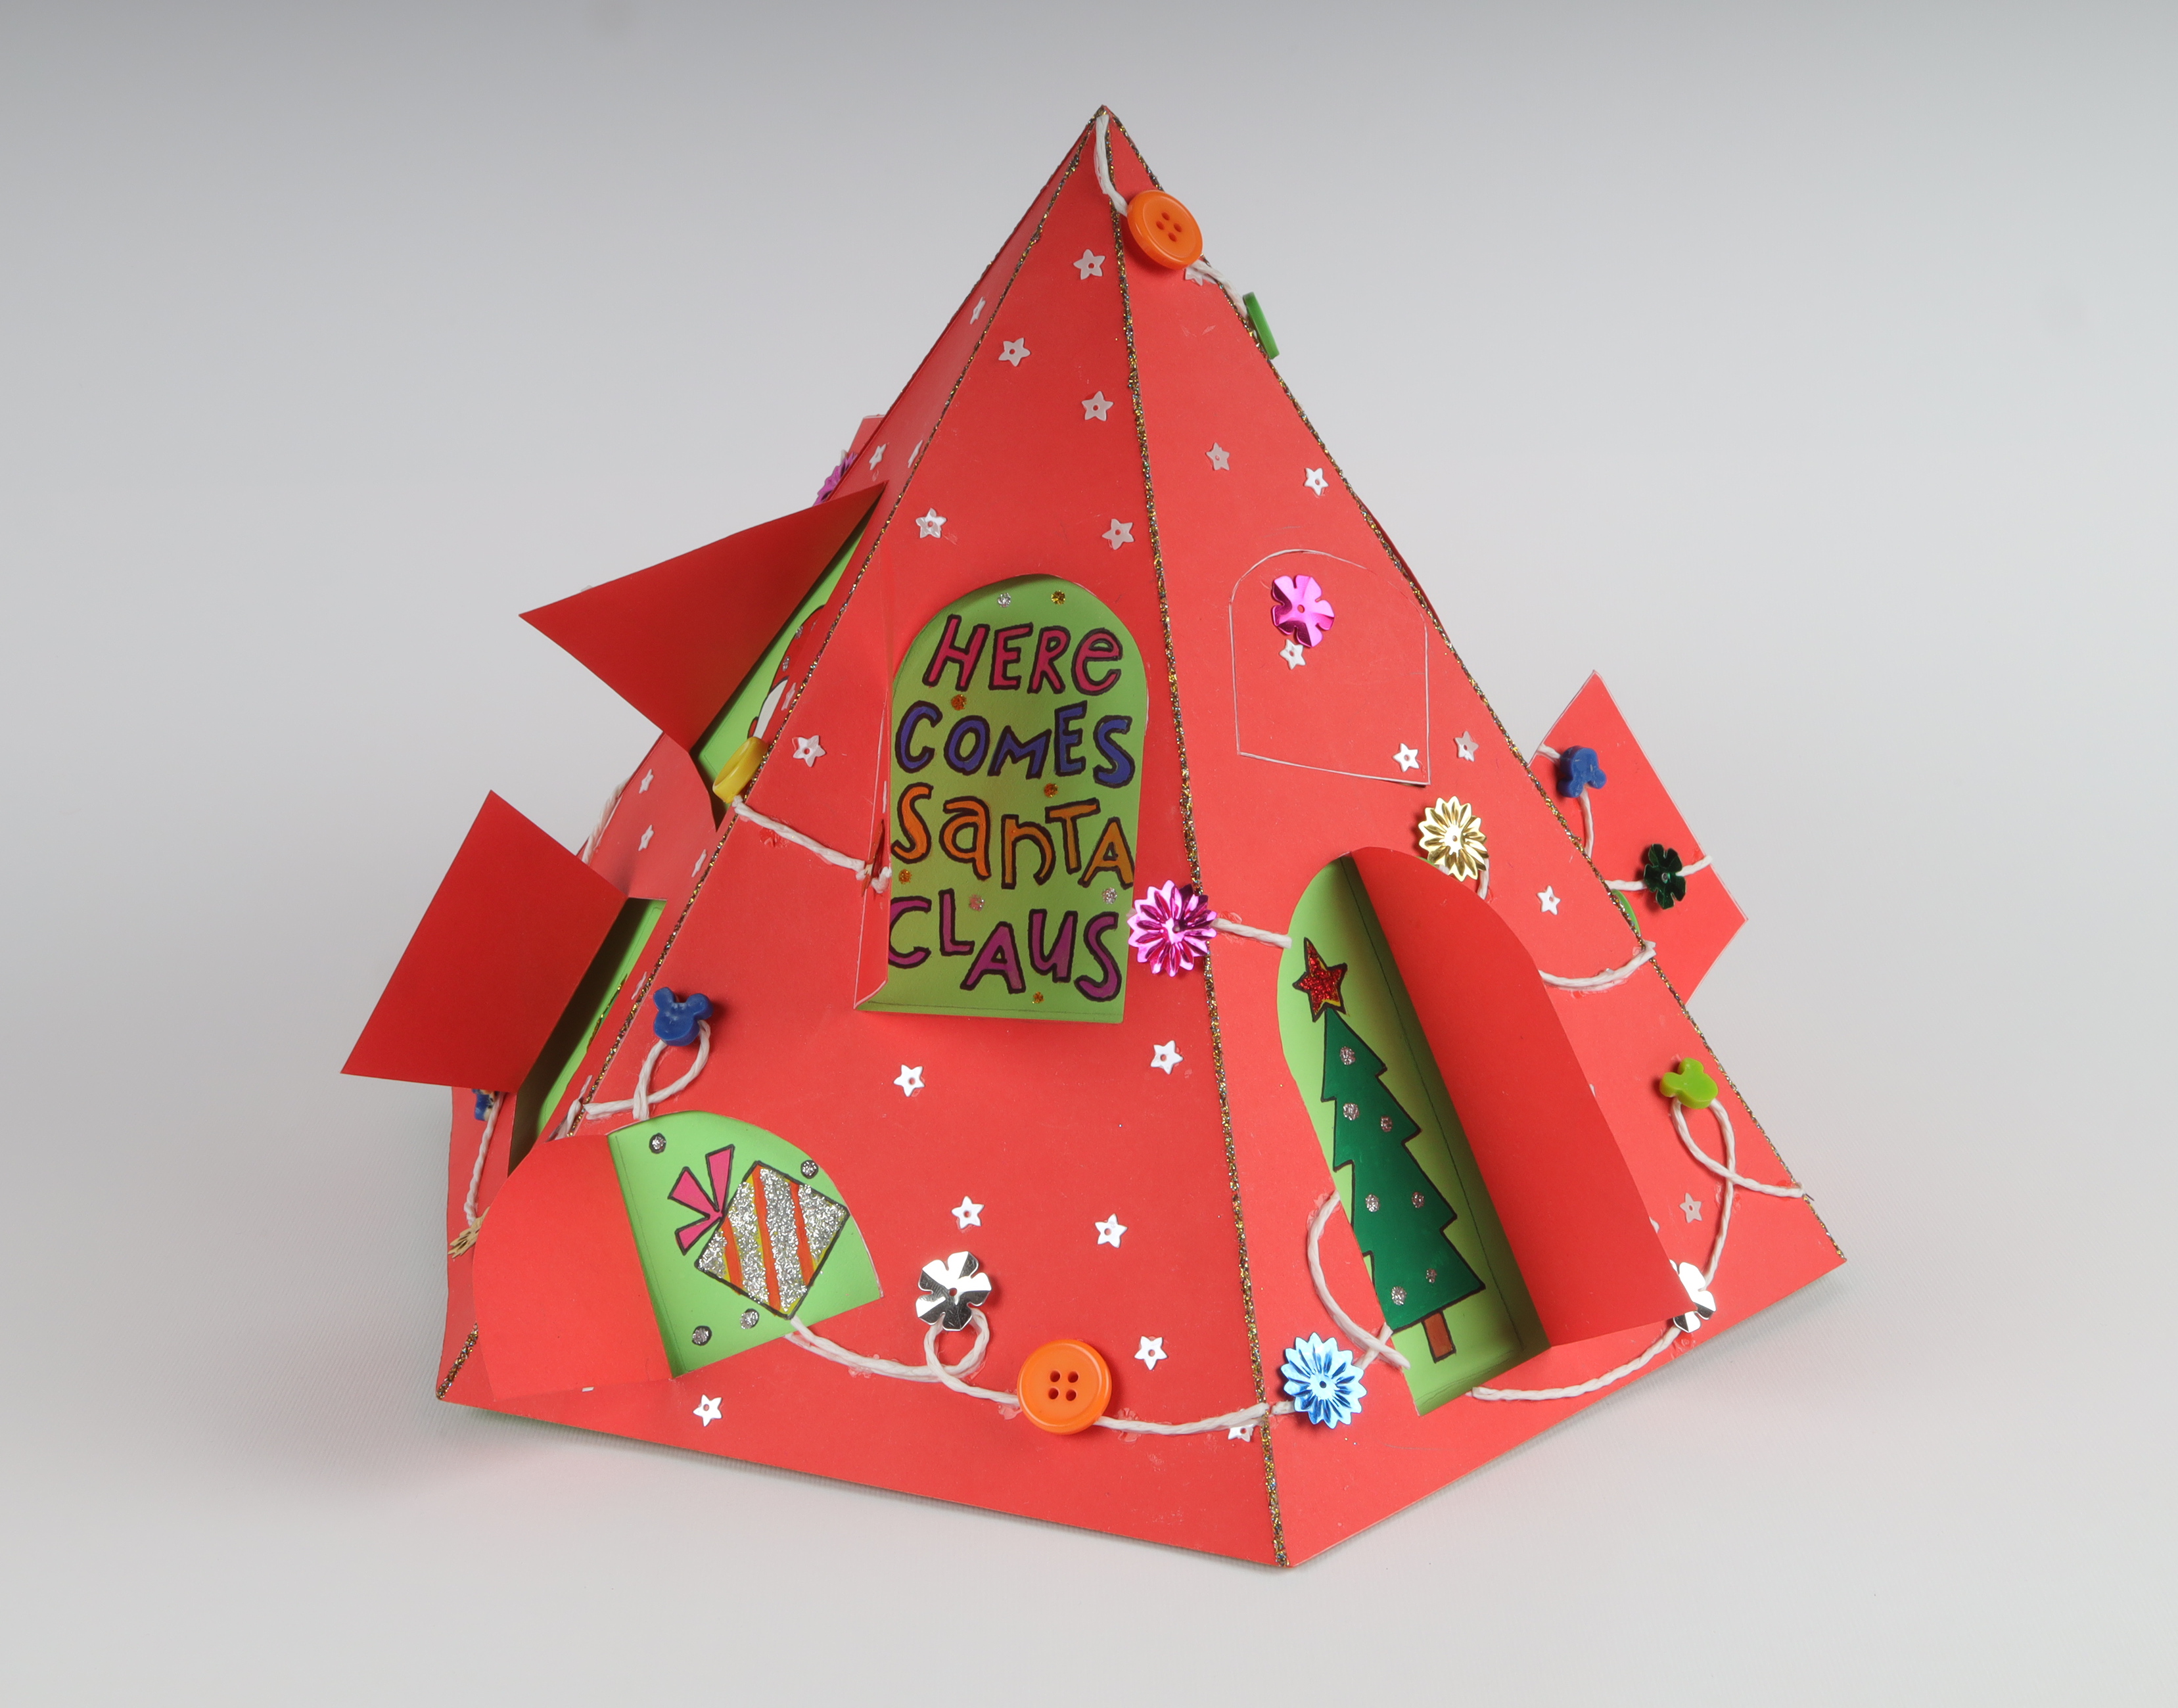
Using Fevistik Power, assemble both the structures as shown. Make sure the doors are in alignment with the doors drawn on the below structure.

Step - 11
To enhance, stick a white paper cord randomly as shown across the structure, using Fevistik Power; let it dry. Stick buttons, sequins and other decorative elements onto the cord as well as randomly.

Step -12
Design Template
Steps to Create this Activity
Login to see steps
Step - 01
On a red chart paper, draw the diagram shown in the image, using a pencil and scale.
Step - 02
Cut them with scissors and fold the flaps.
Step - 03
Referring to the template given, draw the diagrams of doors.
Step - 04
Cut them with a paper cutter from three ends, as shown.
Step - 05
Using Fevistik Power, seal the edges creating a conical structure.
Step - 06
Similarly, to create a conical structure inside, on a sheet of green chart paper, draw the diagram as shown in the image, using a pencil and scale.
Step - 07
Cut them with scissors and fold the flaps. With a pencil, draw the diagrams of door contours and write Christmas messages inside it. Use your imagination or refer to the given image.
Step - 08
Using Rangeela Tempera Colours of your choice, paint the elements shown using Fine Art brushes; let it dry. To enhance the elements, use Rangeela Paper Glitter, as shown.
Step - 09
Using Fevistik Power, seal the edges creating a conical structure; let it dry.
Step - 10
Using Fevistik Power, assemble both the structures as shown. Make sure the doors are in alignment with the doors drawn on the below structure.
Step - 11
To enhance, stick a white paper cord randomly as shown across the structure, using Fevistik Power; let it dry. Stick buttons, sequins and other decorative elements onto the cord as well as randomly.
Step -12
Design Template


