


Santa Mask Craft for Kids – Easy Christmas Paper Plate Activity - Activity Single - FeviCreate
Santa Mask
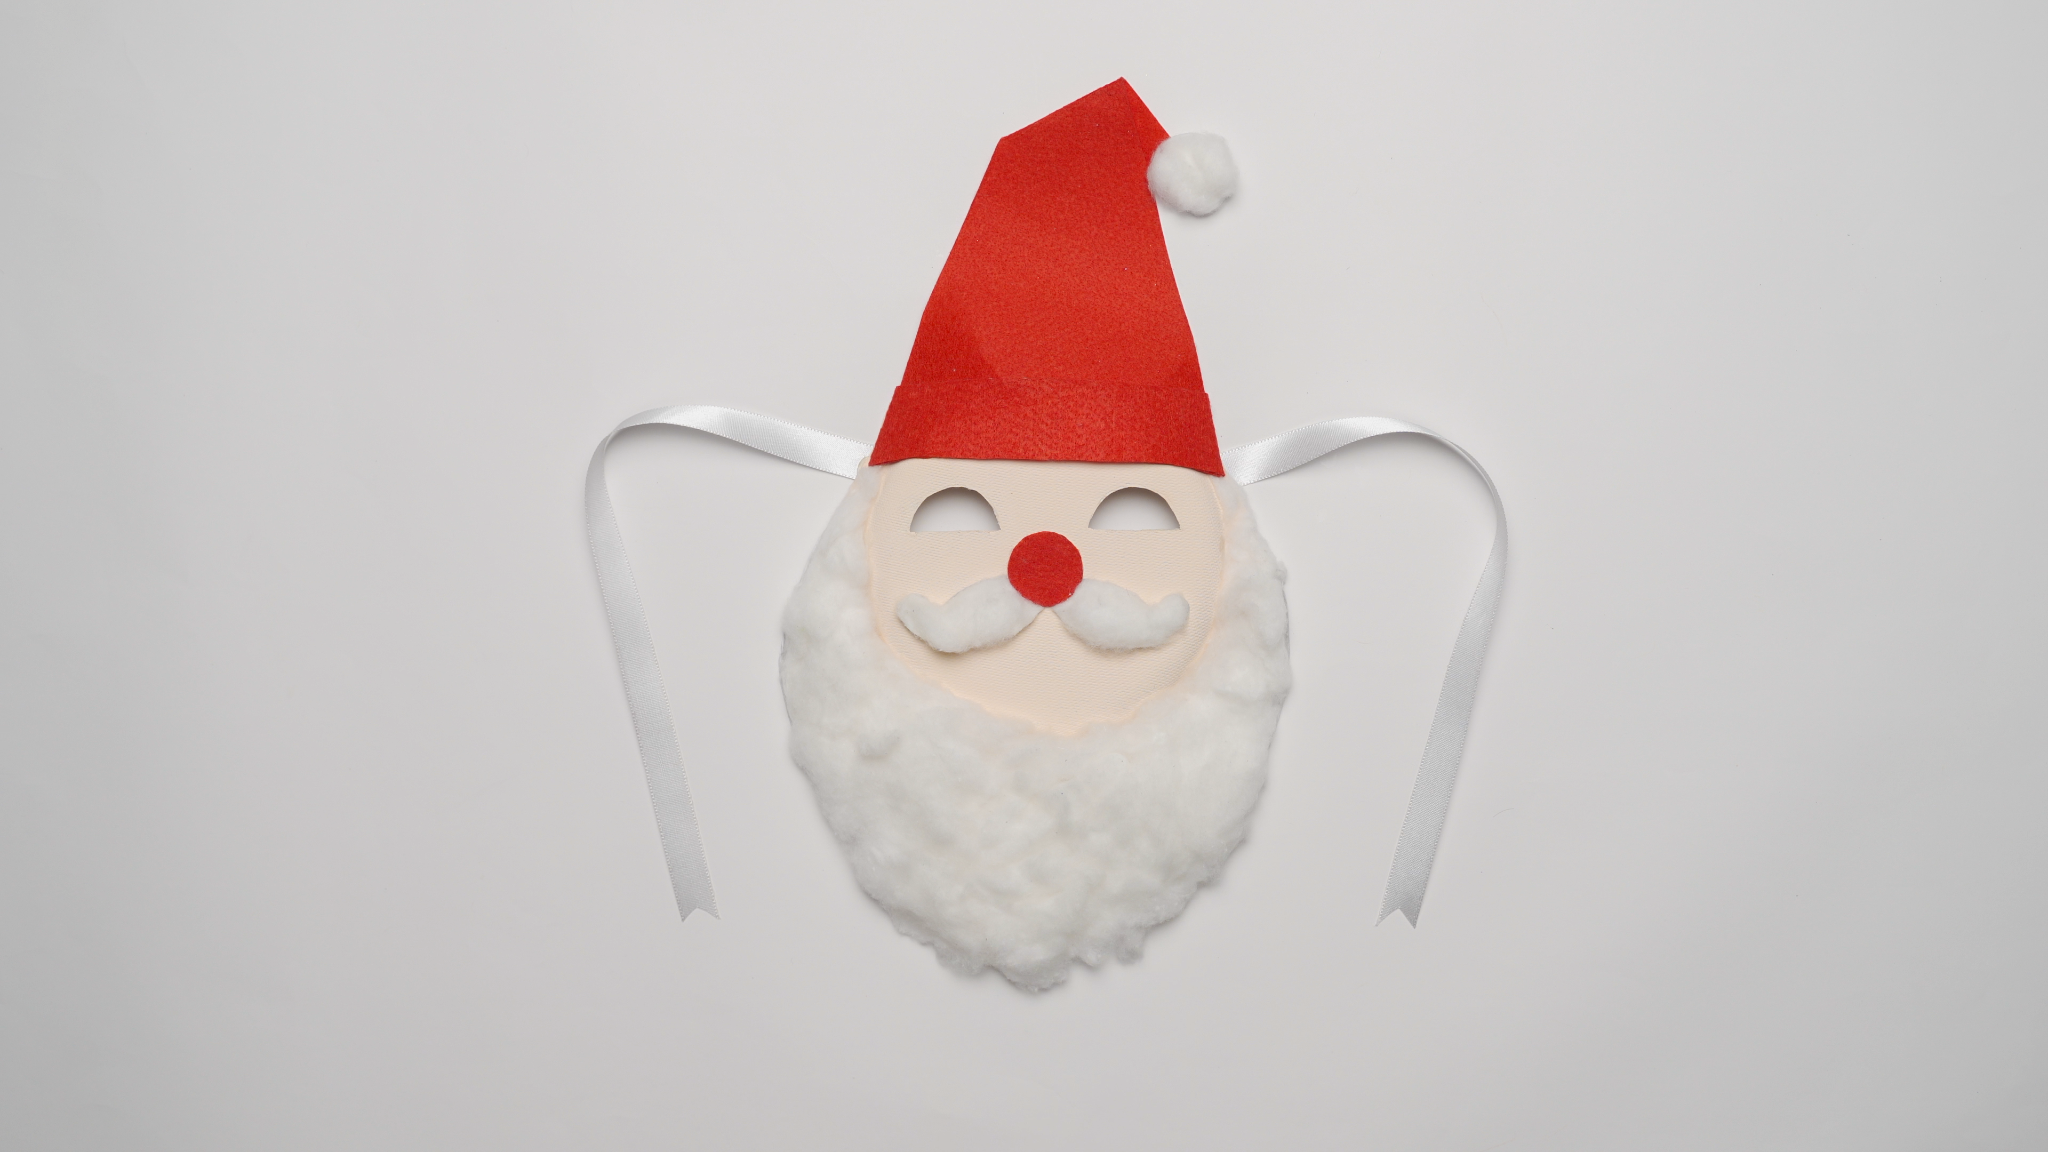
Create a fun Santa mask using a paper plate, cotton, and colourful paper. A simple and joyful Christmas craft kids can wear during festive celebrations.
Mixed Media Celebration 10 to 30 mins 6 to 8 years Art & Craft Class 2


Steps to Create this Activity
Login to see steps

Prepare the Face Base
Take a paper plate to serve as the base for Santa's face.

Draw the eyes
Use a pencil to draw two eye holes on the plate, ensuring they are positioned correctly for wearing the mask.

Paint and Cut the Eyes
Apply Fevicryl Acrylic Colour in a Flesh Tint over the center area of the paper plate to represent Santa's skin. Let the paint dry completely. Once dry, carefully use scissors to cut out the two eye holes.

Assemble Nose and Moustache
Take the red coloured paper and cut a small circle for Santa's nose. Take a small amount of cotton, shape it to form a bushy moustache, and then glue it just below the nose area using Fevicol MR. Take the red coloured paper and cut a large, triangular shape for the Santa cap. Take white paper and cut a small circle to serve as the pom-pom. Stick the white circle onto the tip of the red triangle.

Make the beard
Shape a large amount of cotton into a full beard shape and stick it onto the bottom half of the face plate using Fevicol MR. Next, secure the red and white cap to the top edge of the paper plate with Fevicol MR. Take the white ribbon or lace and cut two equal pieces. Apply Fevicol MR to one end of each ribbon piece and securely stick them to both the left and right sides of the mask's edge.

Add Tie Straps for Wearing
Once the glue is dry, your completed Paper Plate Santa Mask is ready to be tied at the back for a festive look!
Steps to Create this Activity
Login to see steps
Prepare the Face Base
Take a paper plate to serve as the base for Santa's face.
Draw the eyes
Use a pencil to draw two eye holes on the plate, ensuring they are positioned correctly for wearing the mask.
Paint and Cut the Eyes
Apply Fevicryl Acrylic Colour in a Flesh Tint over the center area of the paper plate to represent Santa's skin. Let the paint dry completely. Once dry, carefully use scissors to cut out the two eye holes.
Assemble Nose and Moustache
Take the red coloured paper and cut a small circle for Santa's nose. Take a small amount of cotton, shape it to form a bushy moustache, and then glue it just below the nose area using Fevicol MR. Take the red coloured paper and cut a large, triangular shape for the Santa cap. Take white paper and cut a small circle to serve as the pom-pom. Stick the white circle onto the tip of the red triangle.
Make the beard
Shape a large amount of cotton into a full beard shape and stick it onto the bottom half of the face plate using Fevicol MR. Next, secure the red and white cap to the top edge of the paper plate with Fevicol MR. Take the white ribbon or lace and cut two equal pieces. Apply Fevicol MR to one end of each ribbon piece and securely stick them to both the left and right sides of the mask's edge.
Add Tie Straps for Wearing
Once the glue is dry, your completed Paper Plate Santa Mask is ready to be tied at the back for a festive look!


