


Easy to Make Quilled Dream Catcher Craft for Kids - Activity Single - FeviCreate
Easy to Make Quilled DreamCatcher Craft Ideas for Kids
Craft your quilling dream catcher with Fevicreate's creative dream catcher craft ideas for kids. Click here to do a fun craft activity.
Paper Crafting Brand me 30 to 60 mins 9 to 14 years Art & Craft Class 6


Steps to Create this Activity
Login to see steps

Step - 01
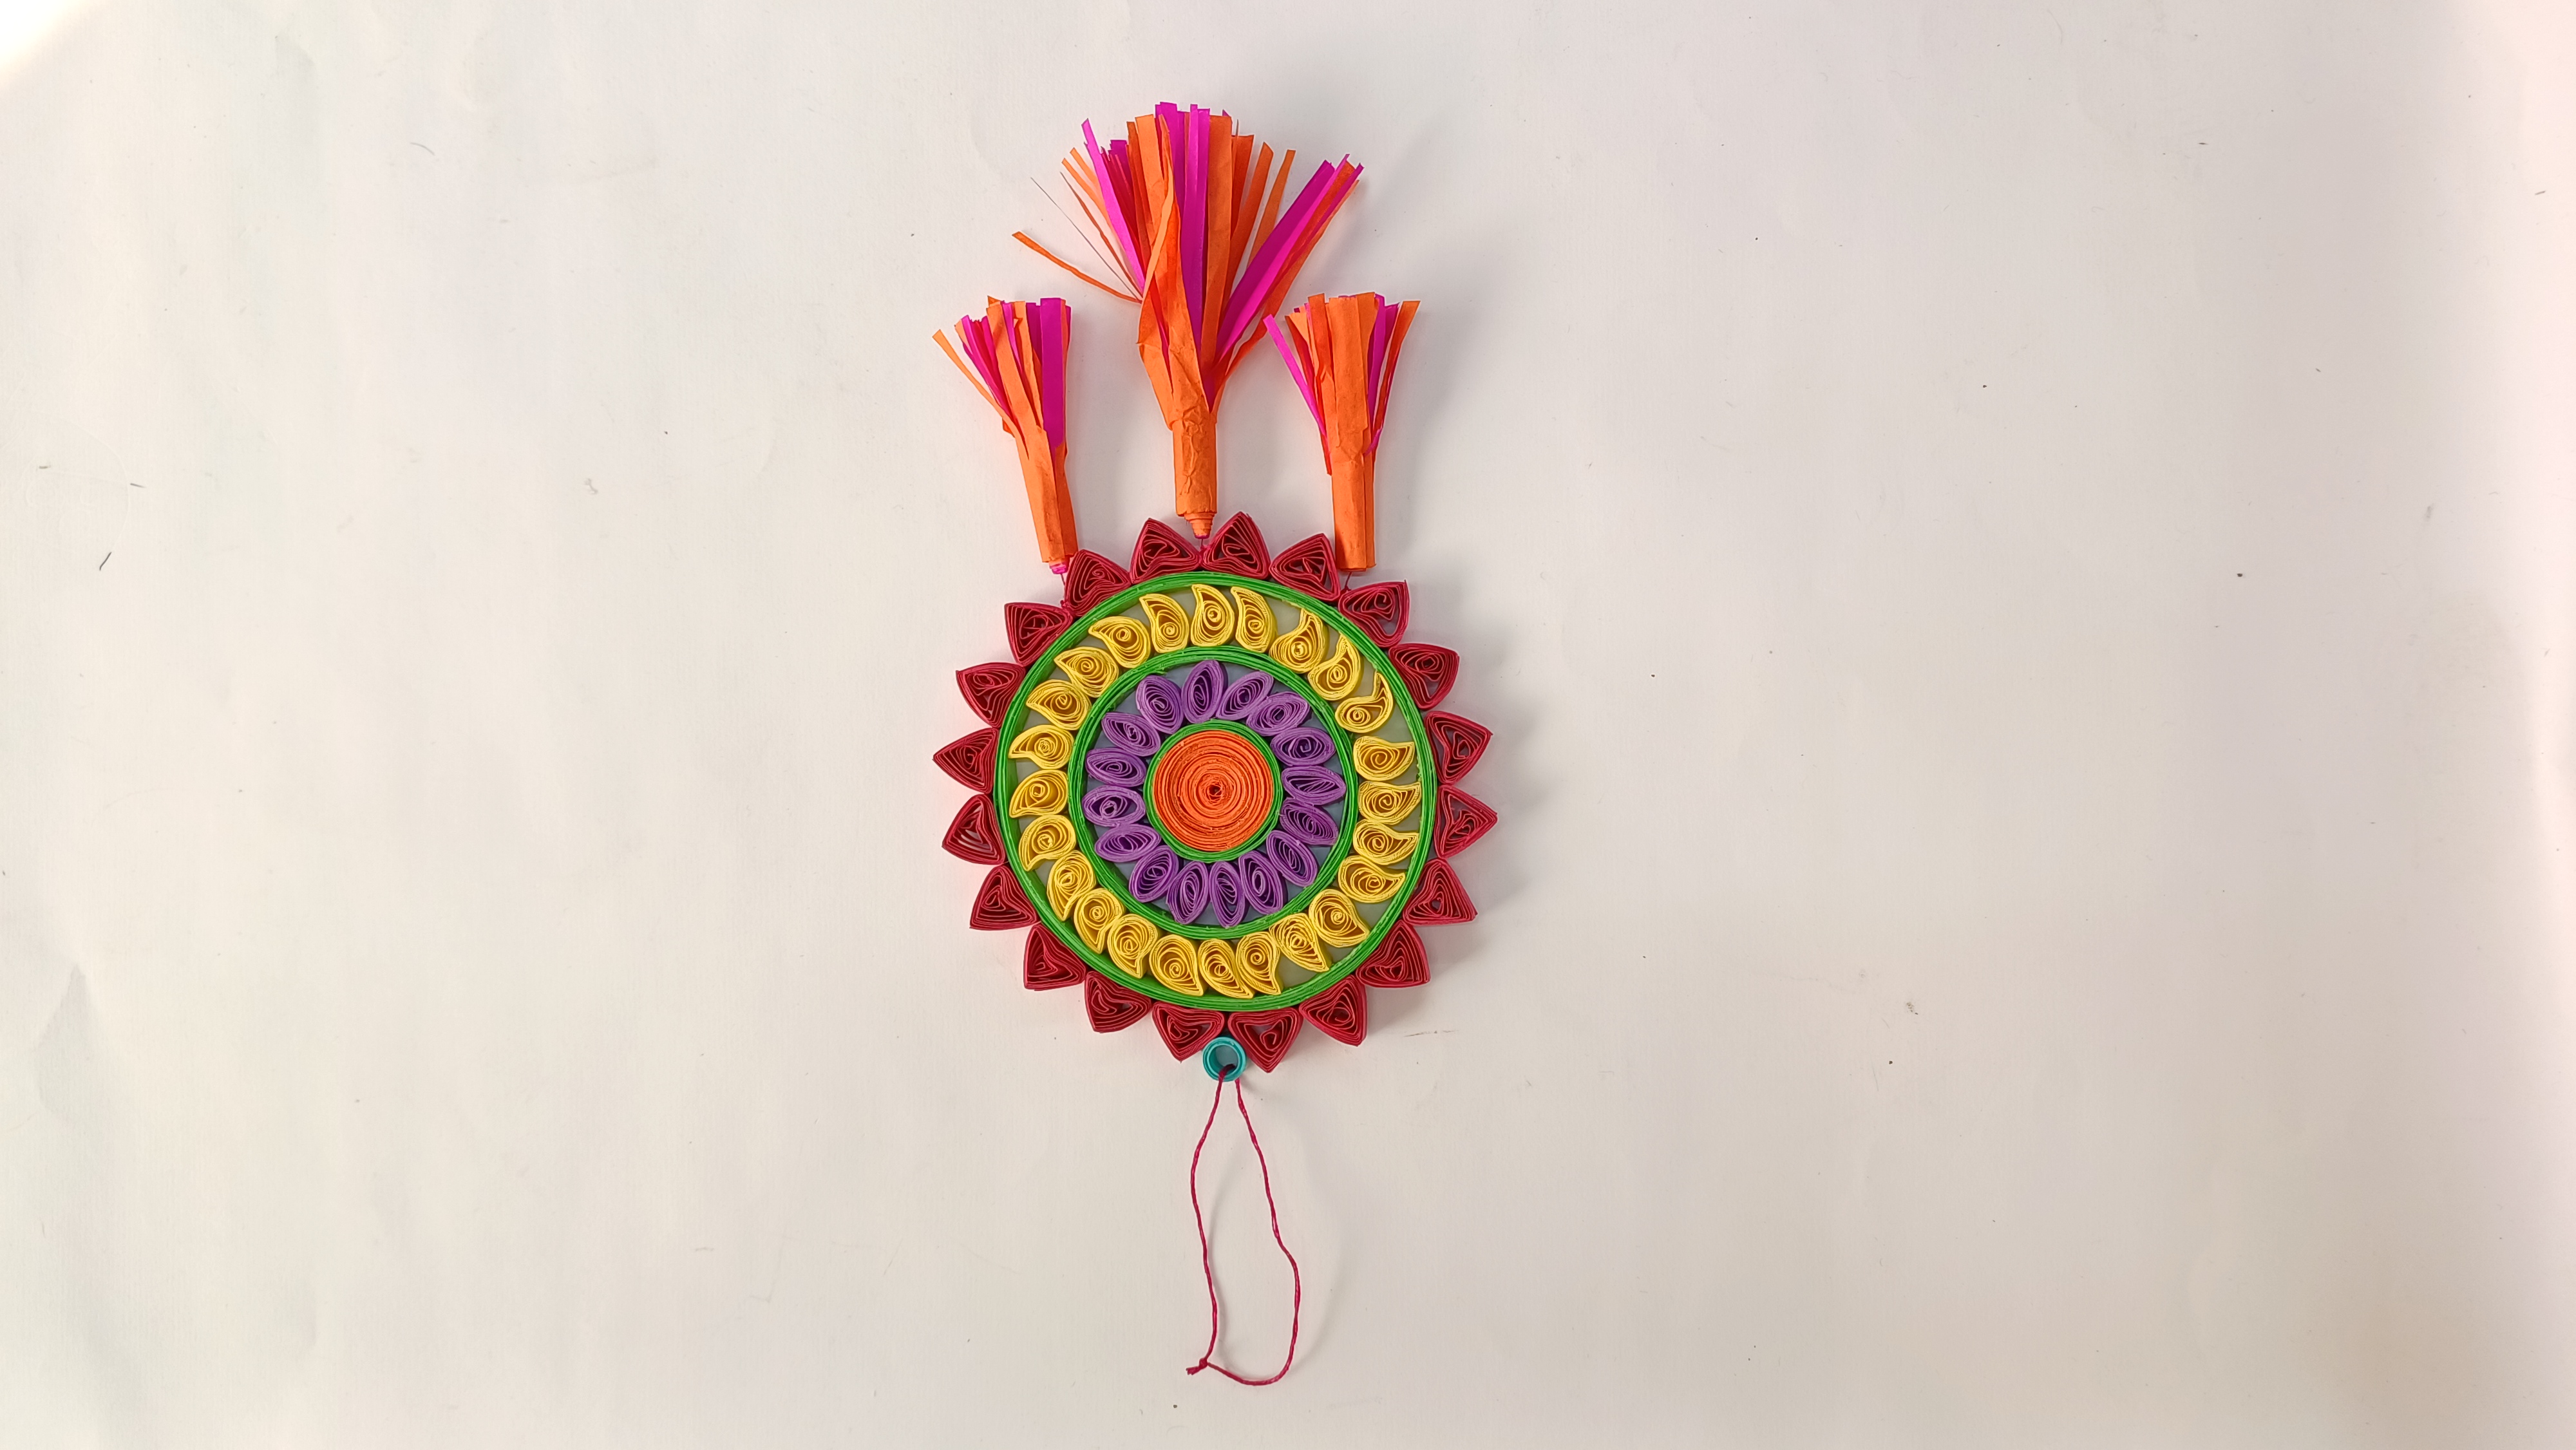
To quilled create dream catcher, take coloured quilling strips of your choice.

Step - 02
With the help of colored quilling strips of your choice, create three circular beams with diameters measuring 10cm, 6cm, and 3cm using Fevicol MR.

Step - 03
To create the center piece, take coloured quilling strips of your choice. Attach multiple quilling strips using Fevicol MR to make a big closed coil. With the help of a barbecue stick, start rolling the strip inwards and seal the edges using Fevicol MR. Ensure not to lose the grip while rolling, and make sure the closed coil made is proportionate to the smaller circular beam. Similarly, using the quilling strips, create multiple shapes:Petal shape: Loosen the coil a little and pinch it from either side.,Eye shape: Create a coil and pinch from any two sides.Heart-like shape: Create a coil, keeping one side pointy, and curve the ends above as shown in the image.Make sure to adjust the sizes of these shapes proportionately.

Step - 04
Using Fevicol MR, arrange the quilling pieces inside the circular beam structures as shown in the image.

Step - 05
Similarly, follow the same procedure to stick the rest of the quilling pieces as shown in the image.

Step - 06
To create tassels, take any two colored kite papers, draw and cut out strips with a width of approximately 2 inches. Overlap the strips and cut out fringes with the help of scissors.

Step - 07
Roll the fringed strips into a coil and seal the edges with the help of Fevicol MR. Attach any cord to the center of the tassel using Fevicol MR. Similarly, create two more tassels of different sizes.

Step - 08
Now assemble the tassels below using Fevicol MR, let it dry, and attach a cord holder to the structure as shown. Your handmade quilled dream catcher is ready!
Steps to Create this Activity
Login to see steps
Step - 01
To quilled create dream catcher, take coloured quilling strips of your choice.
Step - 02
With the help of colored quilling strips of your choice, create three circular beams with diameters measuring 10cm, 6cm, and 3cm using Fevicol MR.
Step - 03
To create the center piece, take coloured quilling strips of your choice. Attach multiple quilling strips using Fevicol MR to make a big closed coil. With the help of a barbecue stick, start rolling the strip inwards and seal the edges using Fevicol MR. Ensure not to lose the grip while rolling, and make sure the closed coil made is proportionate to the smaller circular beam. Similarly, using the quilling strips, create multiple shapes:Petal shape: Loosen the coil a little and pinch it from either side.,Eye shape: Create a coil and pinch from any two sides.Heart-like shape: Create a coil, keeping one side pointy, and curve the ends above as shown in the image.Make sure to adjust the sizes of these shapes proportionately.
Step - 04
Using Fevicol MR, arrange the quilling pieces inside the circular beam structures as shown in the image.
Step - 05
Similarly, follow the same procedure to stick the rest of the quilling pieces as shown in the image.
Step - 06
To create tassels, take any two colored kite papers, draw and cut out strips with a width of approximately 2 inches. Overlap the strips and cut out fringes with the help of scissors.
Step - 07
Roll the fringed strips into a coil and seal the edges with the help of Fevicol MR. Attach any cord to the center of the tassel using Fevicol MR. Similarly, create two more tassels of different sizes.
Step - 08
Now assemble the tassels below using Fevicol MR, let it dry, and attach a cord holder to the structure as shown. Your handmade quilled dream catcher is ready!


