


Phases of the Moon - Activity Single - FeviCreate
Phases of the Moon
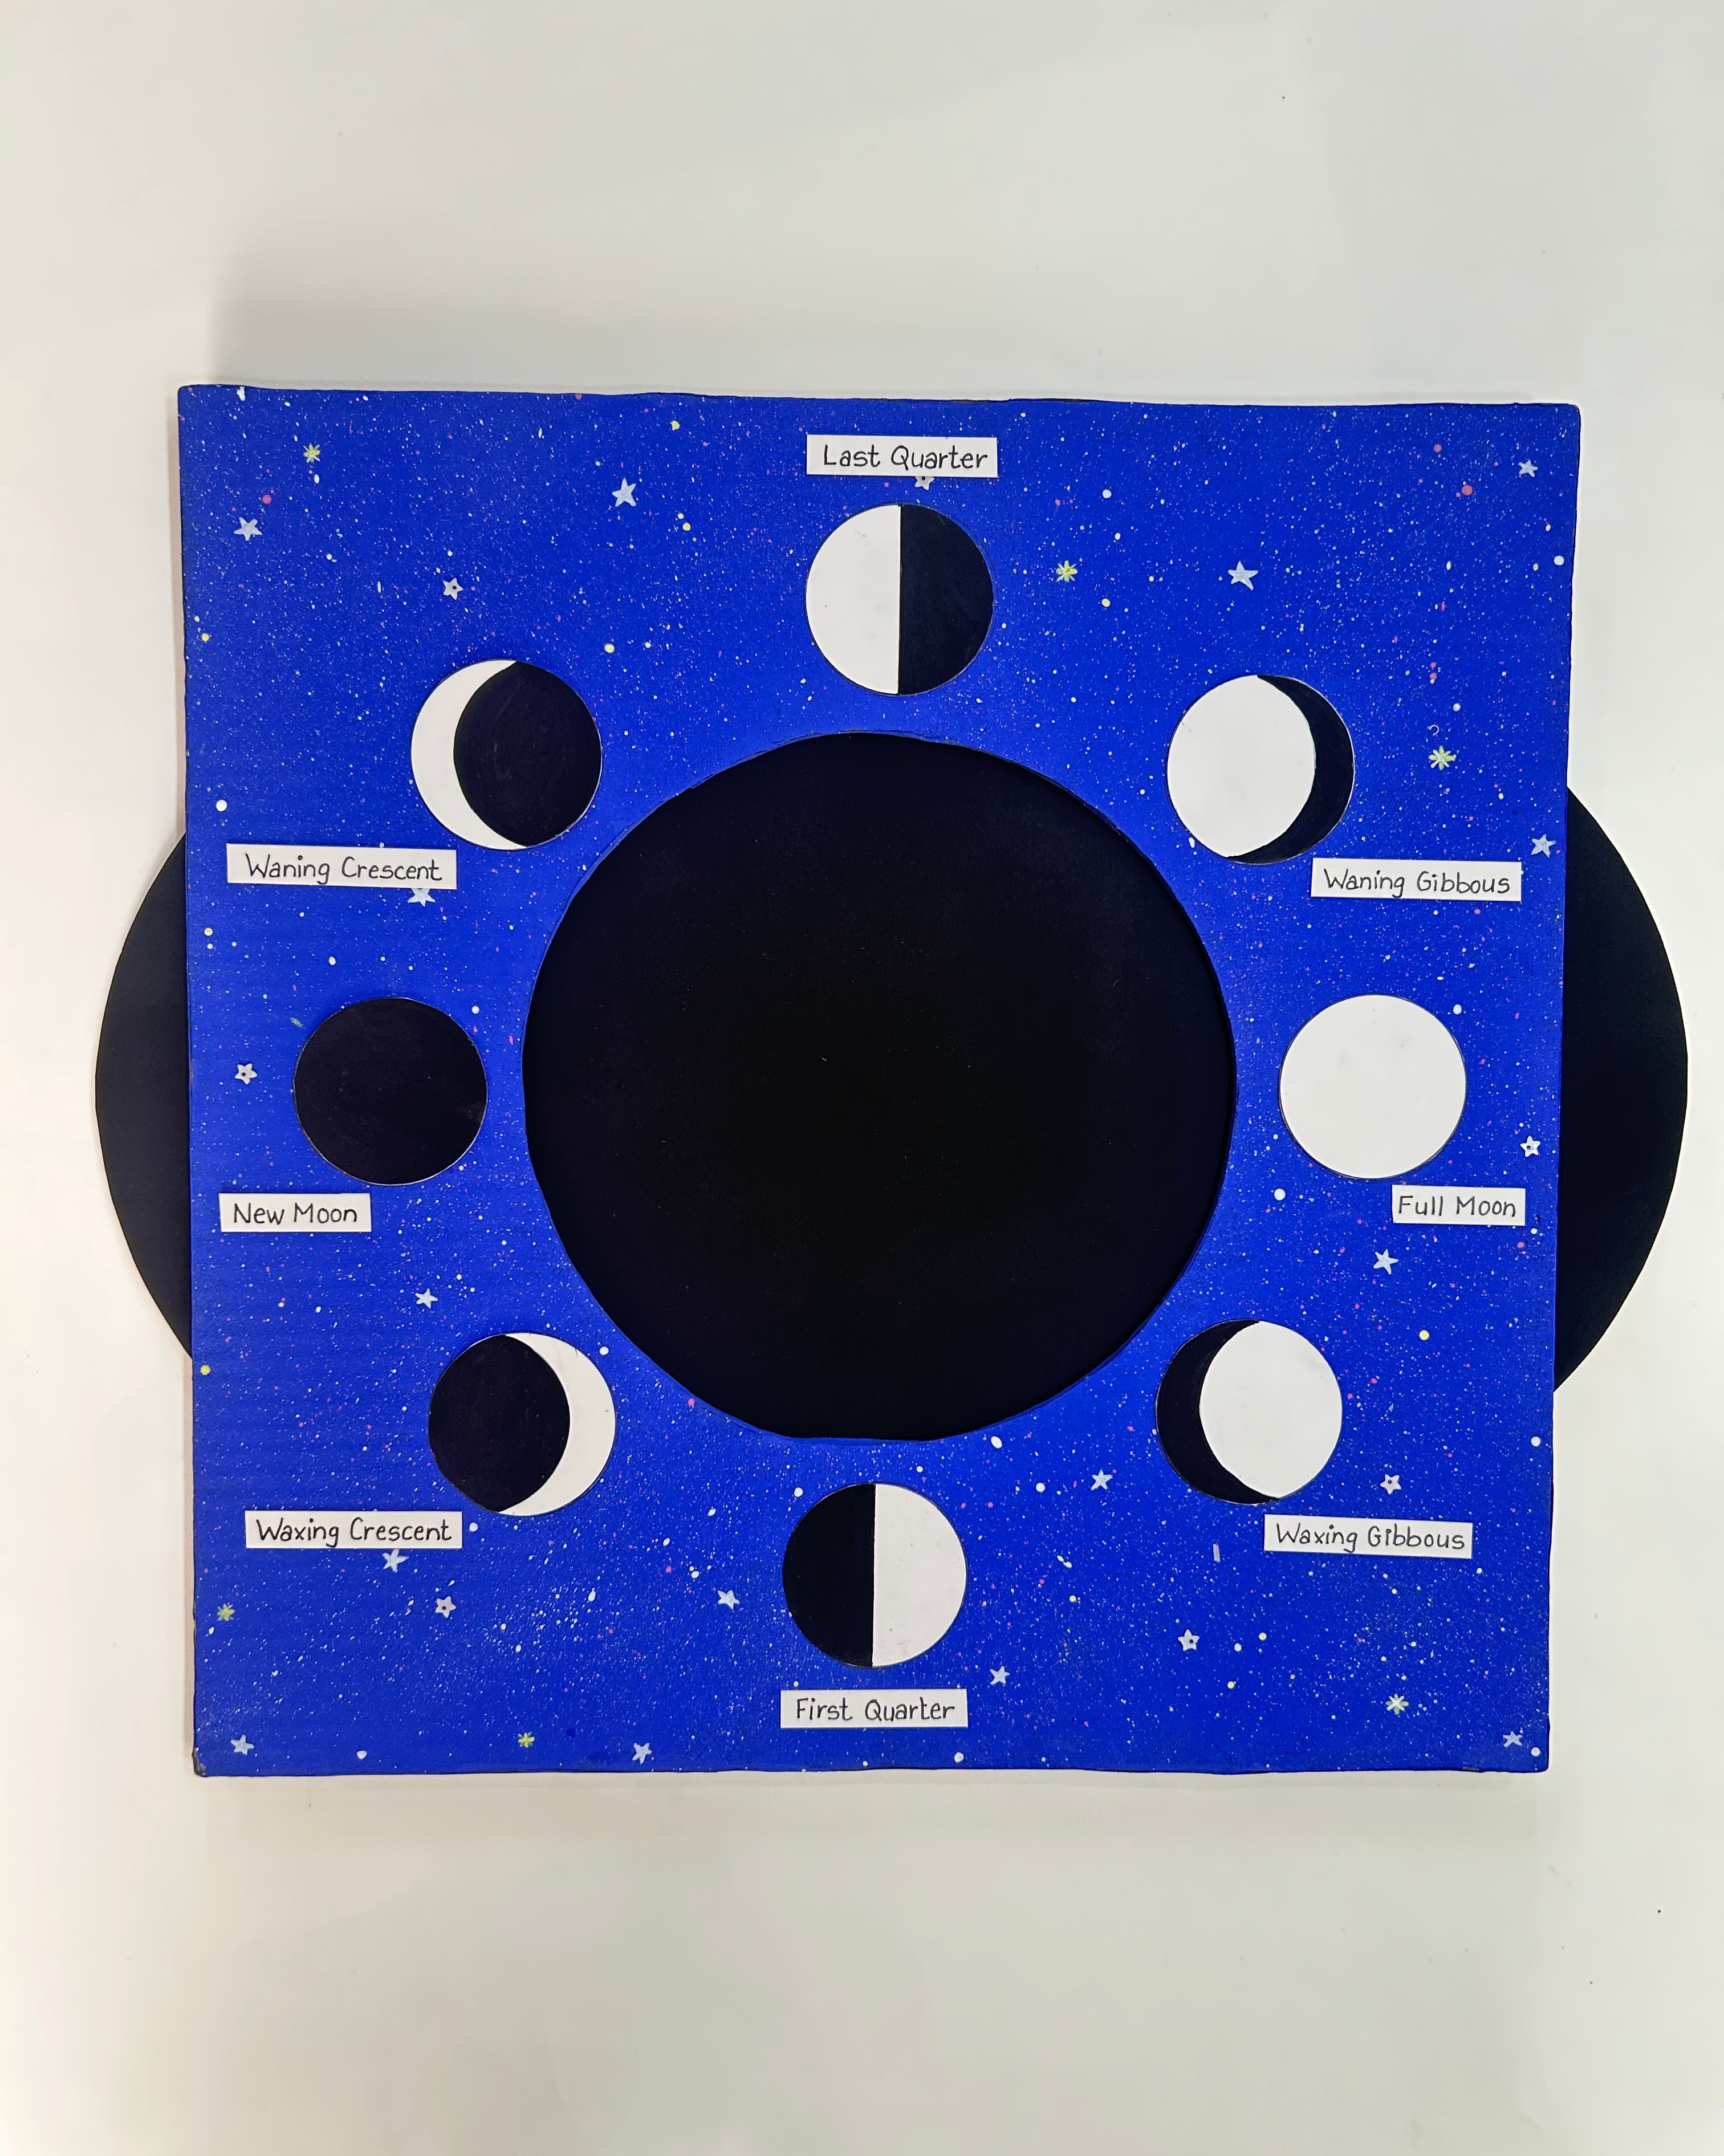
Explore the lunar cycle with a hands-on, sliding moon phases model! This interactive craft allows children to visually understand how the moon's appearance changes, making learning about astronomy engaging and fun.
Paper Crafting Science More than 60 mins 9 to 14 years Art & Craft Class 8


Steps to Create this Activity
Login to see steps

Step - 01
Take two corrugated sheets of 12 X 12inches each.

Step - 02
Stick the printout of the moon in the center of one corrugated sheet using Fevistik Power.

Step - 03
Paint the corrugated sheet with the hole in it with blue Rangeela Tempera Colour. Spray paint some white for starry night effect. You can also stick sequins with Fevistik Power for extra sparkle.

Step - 04
Draw eight circles on card paper, the same size as the moon circle you cut out. Paint them black and white to show the different moon phases (new moon, crescent, half-moon, gibbous, full moon). Cut them out.

Step - 05
Cut a broad rectangular strip from the thick card paper. Paint it black.

Step - 06
Stick two candy sticks above the black strip and two below, making tracks for the slider to move with Fevistik Power.

Step - 07
Glue the eight moon phase circles around the hole on the blue sheet. Use a pen or marker to write the name of each moon phase next to its circle.

Step - 08
PSlide the black strip between the candy stick tracks. Now, when you slide the black strip left and right, you'll see the different moon phases appear in the hole.
Steps to Create this Activity
Login to see steps
Step - 01
Take two corrugated sheets of 12 X 12inches each.
Step - 02
Stick the printout of the moon in the center of one corrugated sheet using Fevistik Power.
Step - 03
Paint the corrugated sheet with the hole in it with blue Rangeela Tempera Colour. Spray paint some white for starry night effect. You can also stick sequins with Fevistik Power for extra sparkle.
Step - 04
Draw eight circles on card paper, the same size as the moon circle you cut out. Paint them black and white to show the different moon phases (new moon, crescent, half-moon, gibbous, full moon). Cut them out.
Step - 05
Cut a broad rectangular strip from the thick card paper. Paint it black.
Step - 06
Stick two candy sticks above the black strip and two below, making tracks for the slider to move with Fevistik Power.
Step - 07
Glue the eight moon phase circles around the hole on the blue sheet. Use a pen or marker to write the name of each moon phase next to its circle.
Step - 08
PSlide the black strip between the candy stick tracks. Now, when you slide the black strip left and right, you'll see the different moon phases appear in the hole.


