


Mother’s Day Dangler Craft – Fun DIY Activity for Kids - Activity Single - FeviCreate
Create a Beautiful Mother’s Day Dangler – A Special Gift
Mother’s Day is the perfect time for kids to make something special! This DIY dangler is an easy and fun craft to show love and appreciation. With simple materials, they can create a beautiful decoration that will make Mom smile. Let them enjoy crafting while making a heartfelt gift. Follow the step-by-step guide and start crafting this lovely dangler today!
Paper Crafting Gifting 30 to 60 mins 9 to 14 years Art & Craft Class 7


Steps to Create this Activity
Login to see steps

Step - 01
To create a Mother's Day badge, take three colored chart papers of your choice. Draw and cut out three circles measuring the diameter: 10cm, 8cm, and 4cm. Take contrasting colored chart paper and cut out a strip about 2 inches wide. Take any three colored wool and kite papers and cut out strands as shown in the image.

Step - 02
After fan folding the strip, use Fevistik Power to stick the fanfold strip in a circular manner as shown in the image.

Step - 03
Using Fevistik Power, stick the circular cutouts onto the other side as shown, and let it dry.

Step - 04
To draw the mom figurine, take colored chart paper of your choice. Draw the diagram of your choice or refer to the template given. Using Rangeela Tempera Color of your choice, paint the figurine with the help of paint brushes, and let it dry. Cut it with the help of scissors.

Step - 05
Using Fevistik Power, stick the figurine onto the badge structure, and let it dry.

Step - 06
To create danglers, cut out strips of kite papers with a width of approximately 1cm. With the help of wool strands, create a braid as shown in the image.

Step - 07
Using Fevistik Power, stick the dangler below the badge structure as shown, and let it dry.

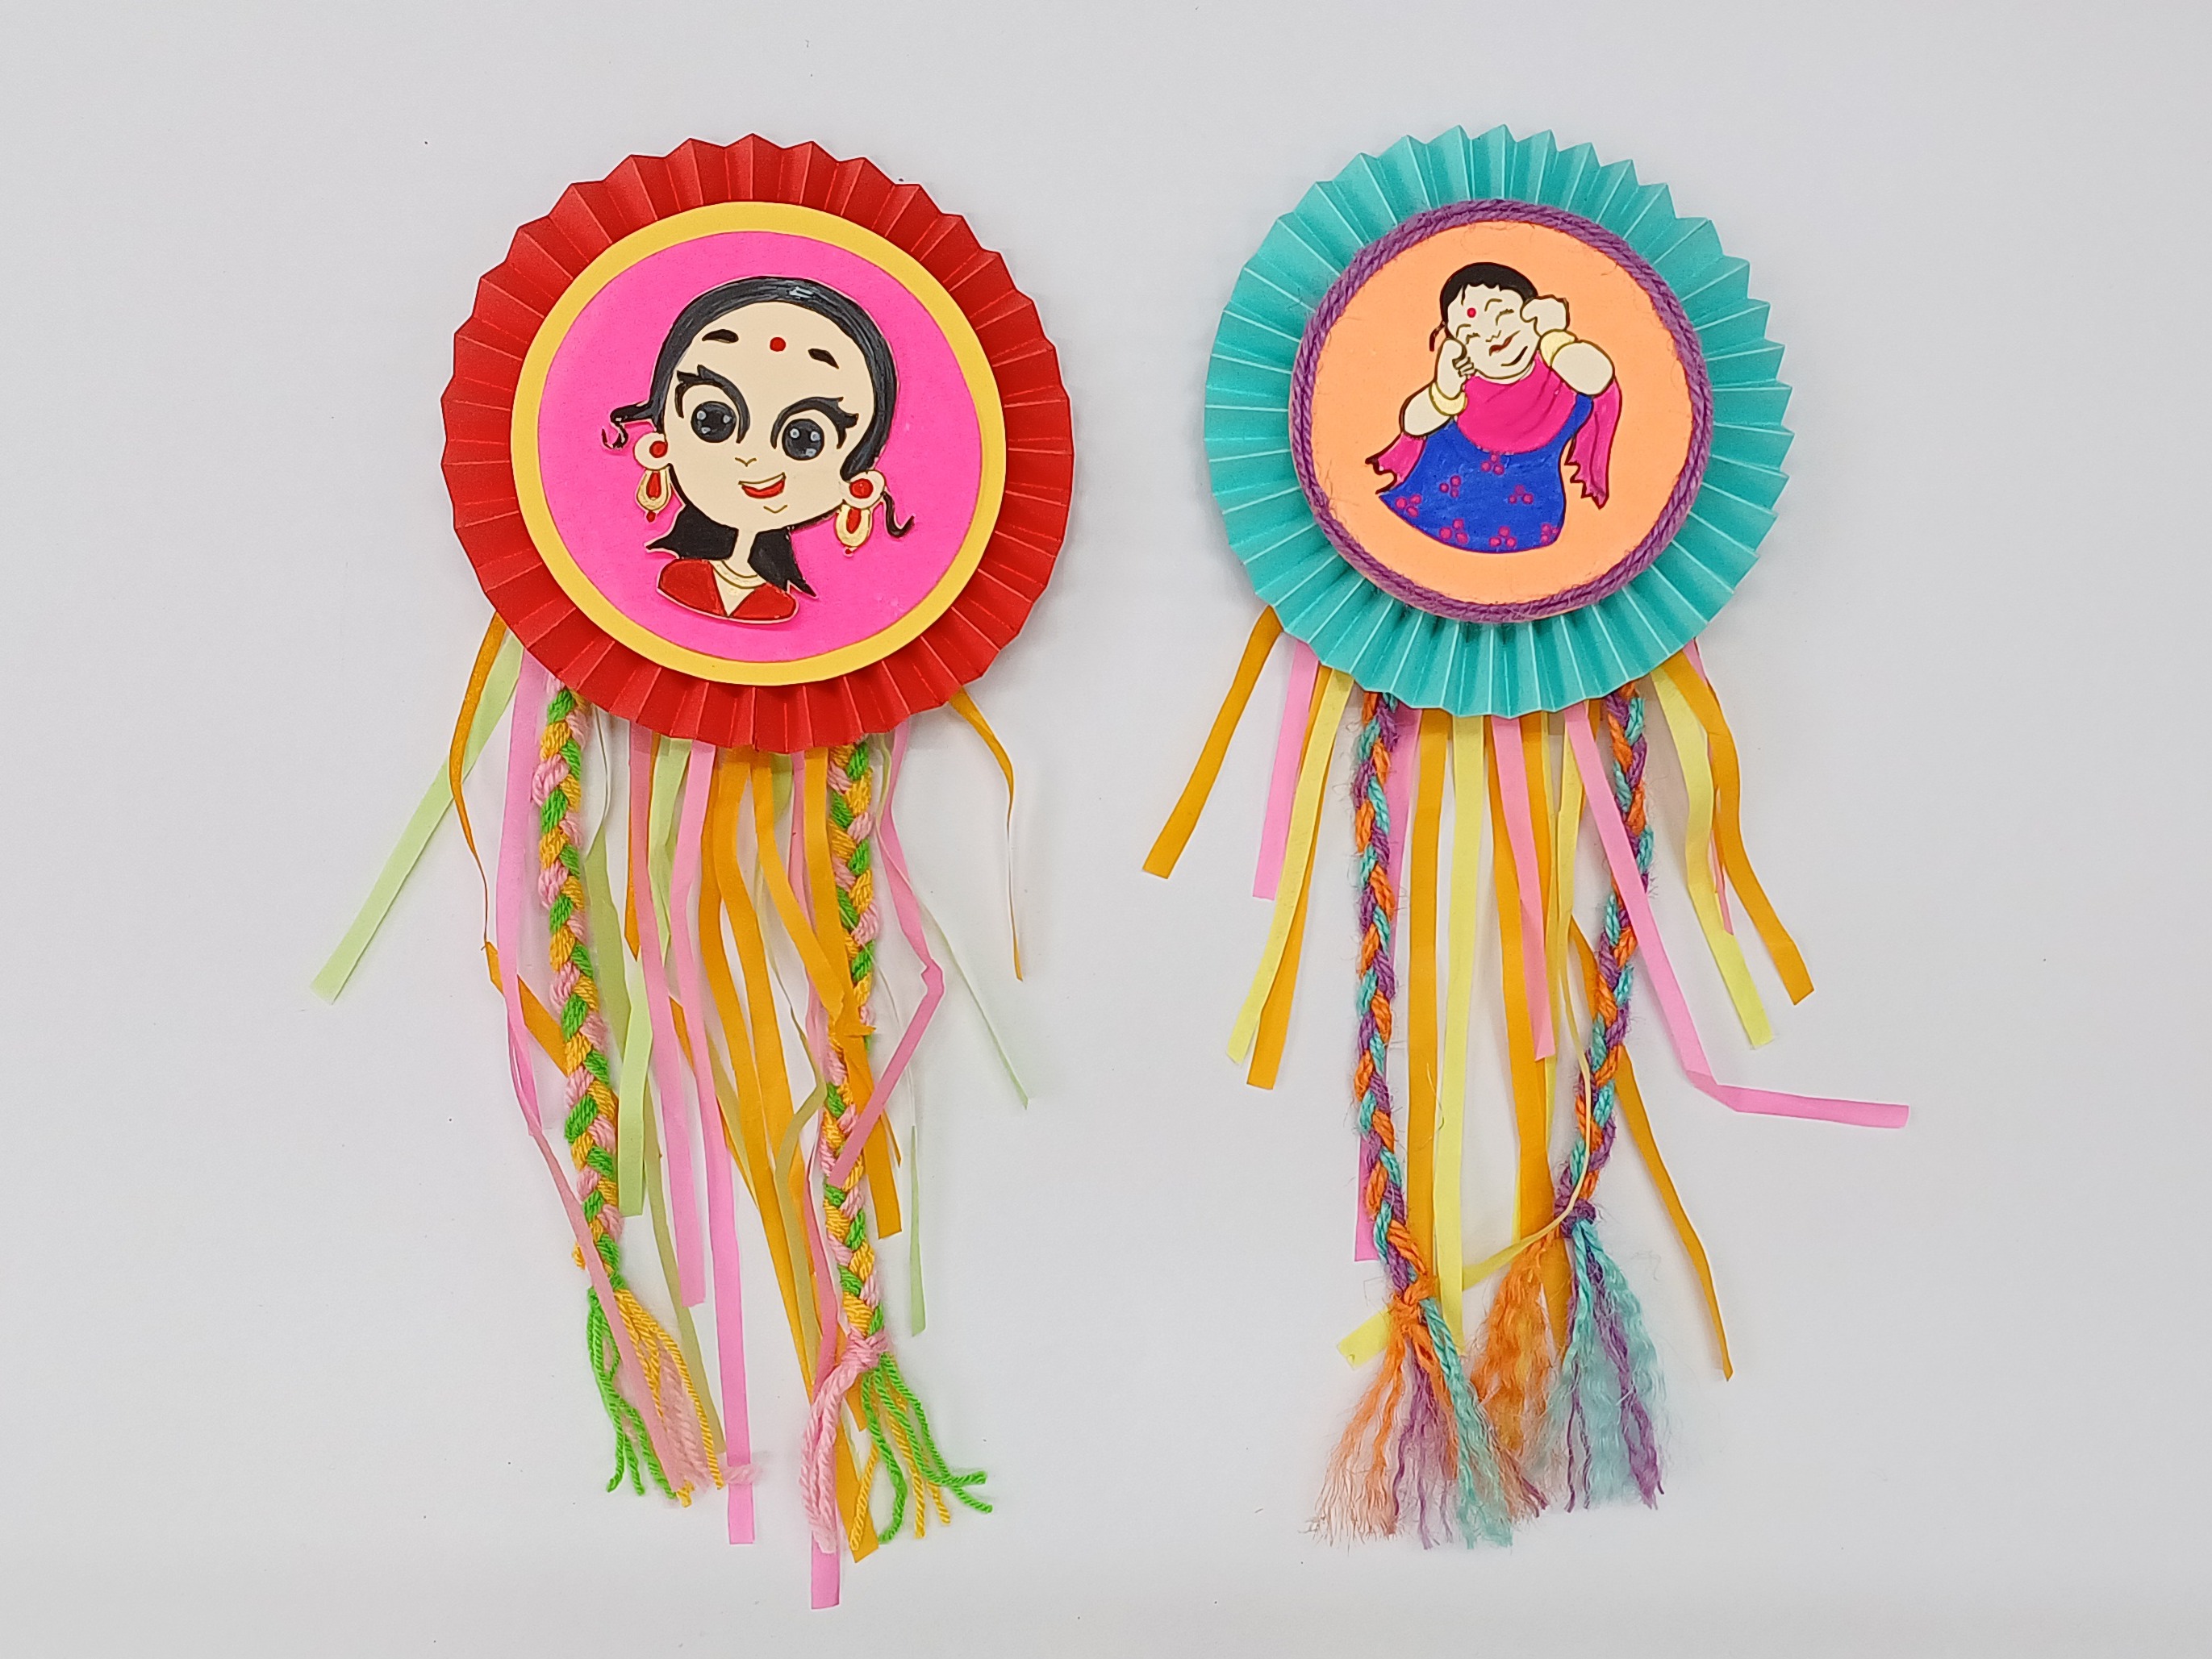
Step - 08
Your handmade badge is ready!

Step - 09
Design Template.
Steps to Create this Activity
Login to see steps
Step - 01
To create a Mother's Day badge, take three colored chart papers of your choice. Draw and cut out three circles measuring the diameter: 10cm, 8cm, and 4cm. Take contrasting colored chart paper and cut out a strip about 2 inches wide. Take any three colored wool and kite papers and cut out strands as shown in the image.
Step - 02
After fan folding the strip, use Fevistik Power to stick the fanfold strip in a circular manner as shown in the image.
Step - 03
Using Fevistik Power, stick the circular cutouts onto the other side as shown, and let it dry.
Step - 04
To draw the mom figurine, take colored chart paper of your choice. Draw the diagram of your choice or refer to the template given. Using Rangeela Tempera Color of your choice, paint the figurine with the help of paint brushes, and let it dry. Cut it with the help of scissors.
Step - 05
Using Fevistik Power, stick the figurine onto the badge structure, and let it dry.
Step - 06
To create danglers, cut out strips of kite papers with a width of approximately 1cm. With the help of wool strands, create a braid as shown in the image.
Step - 07
Using Fevistik Power, stick the dangler below the badge structure as shown, and let it dry.
Step - 08
Your handmade badge is ready!
Step - 09
Design Template.


