


DIY See-Saw Stationery Holder Craft for Kids - Activity Single - FeviCreate
Making See-Saw Stationery Holder by Using Sheets & Quilling Strips
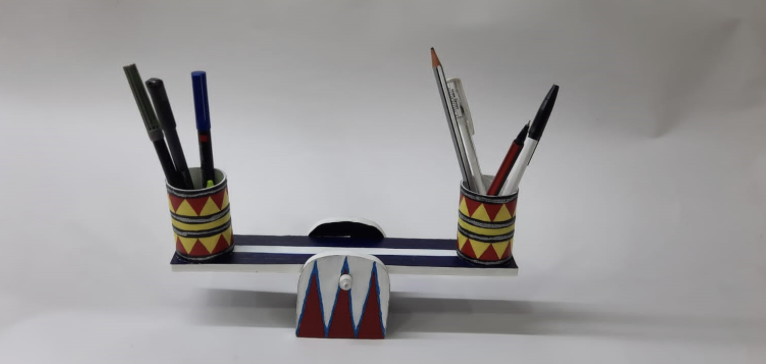
Tired of a cluttered desk? Let's make it quirky and organised with our DIY See-Saw Stationery Holder project! With easy instructions, you and your kids can craft a stylish desk accessory, keeping your office supplies balanced in a playful see-saw style.
Mixed Media Brand me 30 to 60 mins 6 to 8 years Art & Craft Class 4


Steps to Create this Activity
Login to see steps

Step - 01
To create seesaw stationery holder, take a sheet of corrugated, now draw and cut out the diagram referring to the template given.

Step - 02
To create holders, take 2 tissue rolls , with the help of pencil make a marking of 2 “ approx from the either side as shown.

Step - 03
Cut them with the help of paper cutter.

Step - 04
With the help of pencil draw the patterns of your choice, with the help of pencil poke holes onto the side structure as shown.

Step - 05
To create the mechanism, take a barbeque stick cut it short to an approx. size as shown, stick in the centre to keep it more firm stick piece of white chart paper above it using Fevicol A+ and let it dry.

Step - 06
Using FEvicol A+, assemble the structure as shown.

Step - 07
Similarly , attach side structure as shown .

Step - 08
To lock the side structure, take quilling strips and create tiny coils stick the edges using Fevicol A+, which will fit barbeque stick .

Step - 09
Using Fevicol A+, stick the coil onto both the sides as shown and let it dry.

Step - 10
Using Fevicryl Lilac kit colour of your choice paint the structure with the help of fine art brushes and let it dry. Using Rangeela Glitter of your choice design the holders and side structure and let it dry. For more finishing stick quilling strip onto the sides of the structure made . Handmade see saw stationery holder is ready !
Steps to Create this Activity
Login to see steps
Step - 01
To create seesaw stationery holder, take a sheet of corrugated, now draw and cut out the diagram referring to the template given.
Step - 02
To create holders, take 2 tissue rolls , with the help of pencil make a marking of 2 “ approx from the either side as shown.
Step - 03
Cut them with the help of paper cutter.
Step - 04
With the help of pencil draw the patterns of your choice, with the help of pencil poke holes onto the side structure as shown.
Step - 05
To create the mechanism, take a barbeque stick cut it short to an approx. size as shown, stick in the centre to keep it more firm stick piece of white chart paper above it using Fevicol A+ and let it dry.
Step - 06
Using FEvicol A+, assemble the structure as shown.
Step - 07
Similarly , attach side structure as shown .
Step - 08
To lock the side structure, take quilling strips and create tiny coils stick the edges using Fevicol A+, which will fit barbeque stick .
Step - 09
Using Fevicol A+, stick the coil onto both the sides as shown and let it dry.
Step - 10
Using Fevicryl Lilac kit colour of your choice paint the structure with the help of fine art brushes and let it dry. Using Rangeela Glitter of your choice design the holders and side structure and let it dry. For more finishing stick quilling strip onto the sides of the structure made . Handmade see saw stationery holder is ready !


