


How to Make Tissue Paper Table Lamps for Lohri Decorations - Activity Single - FeviCreate
Craft a Lohri Table Lamp with Tissue Paper Craft
Bring a festive glow to Lohri with a fun and easy DIY tissue paper table lamp craft. Children can use colorful tissue paper to decorate plain lamps, creating beautiful designs that add a warm, celebratory touch to the occasion. This creative activity encourages kids to develop their fine motor skills while learning about the significance of light and warmth in the festival.
Mixed Media Celebration 30 to 60 mins 9 to 14 years Art & Craft Class 5


Steps to Create this Activity
Login to see steps

Step - 01
To create a Lohri lamp, take an A3 size ohp sheet. Take some tissue paper and create a thick tissue paper layer using the mixture of Fevicol A+ and water with the help of fine art brushes.

Step - 02
Once dried, peel off the layer from OHP, and cut the three rectangles into descending sizes as shown in the image. Referring to the image, draw the diagram of the flames with the help of a pencil as shown.

Step - 03
Using the Rangeela Tempera colour of your choice, paint the flames with the help of fine art brushes and let it dry.

Step - 04
Using Fevicol A+, assemble cutouts as shown and let them dry.

Step - 05
Using Fevicol A+, seal the edges forming a cylindrical structure as shown in the image.

Step - 06
Take a corrugated piece, and draw a diagram of the circle proportionate to the cylindrical structure made.

Step - 07
Cut them with scissors.

Step - 08
Using Fevicol A+, stick twigs onto the corrugated base as shown and let it dry.

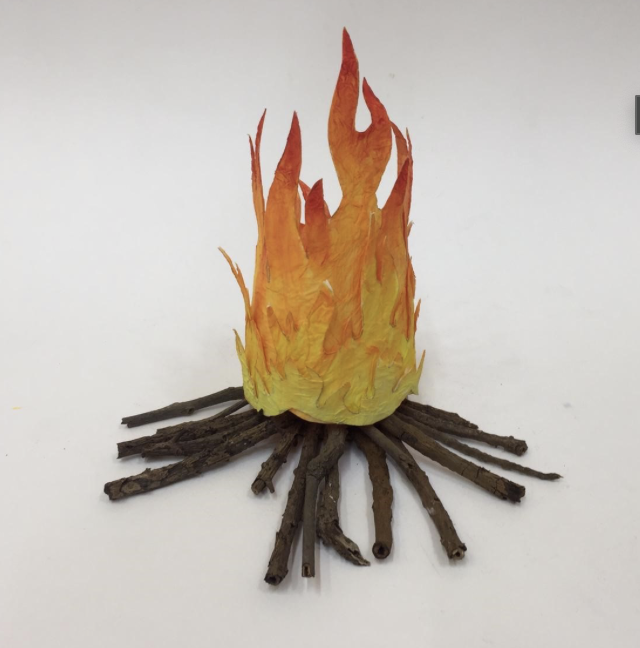
Step - 09
Using Fevicol A+, stick the cylindrical flames structure onto the twigs as shown and let it dry.

Step - 10
Insert fairy lights into the cylindrical flame structure. Your handmade tabletop lamp is ready!
Steps to Create this Activity
Login to see steps
Step - 01
To create a Lohri lamp, take an A3 size ohp sheet. Take some tissue paper and create a thick tissue paper layer using the mixture of Fevicol A+ and water with the help of fine art brushes.
Step - 02
Once dried, peel off the layer from OHP, and cut the three rectangles into descending sizes as shown in the image. Referring to the image, draw the diagram of the flames with the help of a pencil as shown.
Step - 03
Using the Rangeela Tempera colour of your choice, paint the flames with the help of fine art brushes and let it dry.
Step - 04
Using Fevicol A+, assemble cutouts as shown and let them dry.
Step - 05
Using Fevicol A+, seal the edges forming a cylindrical structure as shown in the image.
Step - 06
Take a corrugated piece, and draw a diagram of the circle proportionate to the cylindrical structure made.
Step - 07
Cut them with scissors.
Step - 08
Using Fevicol A+, stick twigs onto the corrugated base as shown and let it dry.
Step - 09
Using Fevicol A+, stick the cylindrical flames structure onto the twigs as shown and let it dry.
Step - 10
Insert fairy lights into the cylindrical flame structure. Your handmade tabletop lamp is ready!


