


Easy Warli Lamp Paper Craft Activity for Kids to Do at Home - Activity Single - FeviCreate
DIY Warli Lamp Paper Craft Activity with Paper Mache
Let your kids explore the captivating world of Warli art with Fevicreate's easy detailed guide. Using paper mache and cobbler cord, they can create a one-of-a-kind Warli-style lamp. With step-by-step pictures guiding them, they'll be able to let their imagination run wild and discover their artistic talents.
Mixed Media Gifting More than 60 mins 9 to 14 years Art & Craft Class 5


Steps to Create this Activity
Login to see steps

Step - 01
To create a Warli lamp, make some tissue paper mâché. Take a bowl, add pieces of some tissue papers in it, add some water and Fevicol MR. Mix it well until it becomes like dough. Make sure the tissue paper mâché is fine enough as shown in the image.

Step - 02
Take two A3-sized OHP sheets and create 4 structures of trapezium thick slabs, 2 on each OHP sheet. Referring to the template given, draw the Warli design over it once it is semi-dried with a pencil. Now fill the design using cobbler cord as shown; make sure to depress it in the design made and let it dry.

Step - 03
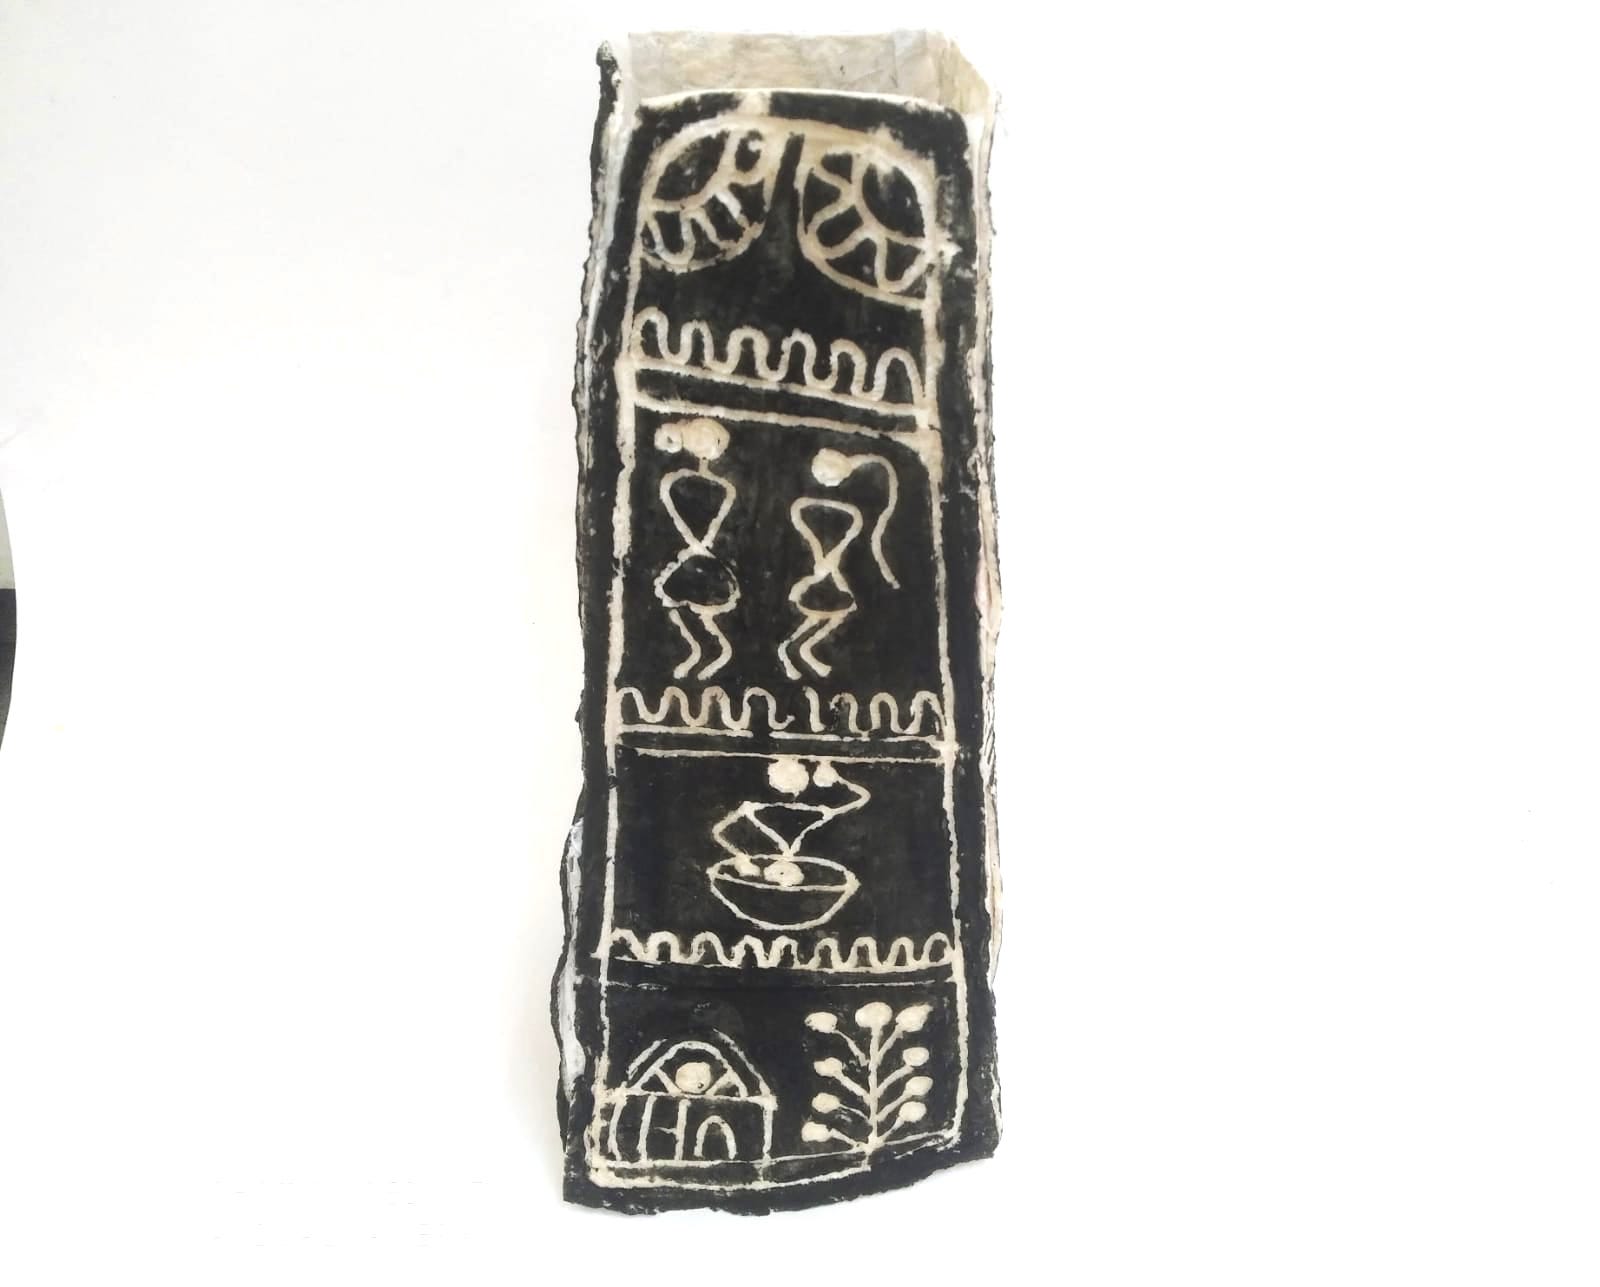
Once dried, peel it off from the OHP sheet. Now sponge-dab Rangeela Tempera Colour Black as shown in the image and let it dry.

Step - 04
Similarly, follow the same procedure on the other three structures. Once dried, peel off the cobbler cord as shown in the image.

Step - 05
To create a 3D structure of the lamp, assemble all four parts together by applying tissue paper at the partition using Fevicol MR; let it dry.

Step - 06
Using Fevicol MR, seal the edges of the lamp. Your handmade Warli lamp Is ready!

Step - 07
Design Template

Step - 08
Design Template
Steps to Create this Activity
Login to see steps
Step - 01
To create a Warli lamp, make some tissue paper mâché. Take a bowl, add pieces of some tissue papers in it, add some water and Fevicol MR. Mix it well until it becomes like dough. Make sure the tissue paper mâché is fine enough as shown in the image.
Step - 02
Take two A3-sized OHP sheets and create 4 structures of trapezium thick slabs, 2 on each OHP sheet. Referring to the template given, draw the Warli design over it once it is semi-dried with a pencil. Now fill the design using cobbler cord as shown; make sure to depress it in the design made and let it dry.
Step - 03
Once dried, peel it off from the OHP sheet. Now sponge-dab Rangeela Tempera Colour Black as shown in the image and let it dry.
Step - 04
Similarly, follow the same procedure on the other three structures. Once dried, peel off the cobbler cord as shown in the image.
Step - 05
To create a 3D structure of the lamp, assemble all four parts together by applying tissue paper at the partition using Fevicol MR; let it dry.
Step - 06
Using Fevicol MR, seal the edges of the lamp. Your handmade Warli lamp Is ready!
Step - 07
Design Template
Step - 08
Design Template


