


Easy DIY Photo Decor Paper Craft Activity for Preschool Kids - Activity Single - FeviCreate
DIY Photo Decor Craft Activity with Cardboard and Ohp Sheet
Let your kids embark on a delightful DIY adventure at home with Fevicreate's detailed step-by-step guide! Using a cardboard box and OHP sheet, they can create a cute little photo frame craft. Watch as their creativity flourishes, guided by the accompanying pictures.
Best Out of Waste Gifting 30 to 60 mins 6 to 8 years Art & Craft Class 2


Steps to Create this Activity
Login to see steps

Step - 01
To create base for photo décor, take any upcycled small box available, now according to your photo image size make marking the in the centre with the help of scale and pencil to insert the image. With the help of paper cutter make a slit onto the marking made.

Step - 02
Using Rangeela Tempera Colour of your choice, paint the box with the help of painting brush and let it dry.

Step - 03
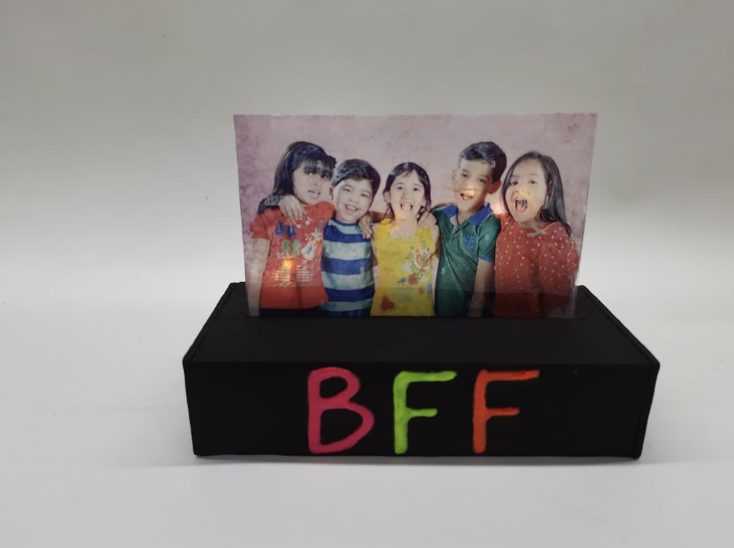
Now using Fevicryl 3D neon Liners write the Text of your choice or “BFF”.

Step - 04
To create a photo transfer technique, take an ohp sheet cut out the same size as your photo image . Now using Fevicol A+, spread a thin layer onto the ohp sheet, make sure it’s spread evenly.

Step - 05
Now invert the image and paste it onto the ohp sheet and let it dry thoroughly.

Step - 06
Once dried, ssprinkle some water on the back side of the print to make the surface is wet. Now softly scrub out the upper layer of paper with your hand or sponge over the print. Make sure light passes through the image.

Step - 07
To create a light holder, collect fairy light and 2 toothpicks.

Step - 08
To create a light holder, take both the toothpick and poke a hole on the either side of the slit made at the edges of it as shown in the image, now twirl the fairy lights around.

Step - 09
Now insert the image. Your handmade photo décor is ready!
Steps to Create this Activity
Login to see steps
Step - 01
To create base for photo décor, take any upcycled small box available, now according to your photo image size make marking the in the centre with the help of scale and pencil to insert the image. With the help of paper cutter make a slit onto the marking made.
Step - 02
Using Rangeela Tempera Colour of your choice, paint the box with the help of painting brush and let it dry.
Step - 03
Now using Fevicryl 3D neon Liners write the Text of your choice or “BFF”.
Step - 04
To create a photo transfer technique, take an ohp sheet cut out the same size as your photo image . Now using Fevicol A+, spread a thin layer onto the ohp sheet, make sure it’s spread evenly.
Step - 05
Now invert the image and paste it onto the ohp sheet and let it dry thoroughly.
Step - 06
Once dried, ssprinkle some water on the back side of the print to make the surface is wet. Now softly scrub out the upper layer of paper with your hand or sponge over the print. Make sure light passes through the image.
Step - 07
To create a light holder, collect fairy light and 2 toothpicks.
Step - 08
To create a light holder, take both the toothpick and poke a hole on the either side of the slit made at the edges of it as shown in the image, now twirl the fairy lights around.
Step - 09
Now insert the image. Your handmade photo décor is ready!


