


Colorful Mother’s Day Photo Frame Craft for Kids - Activity Single - FeviCreate
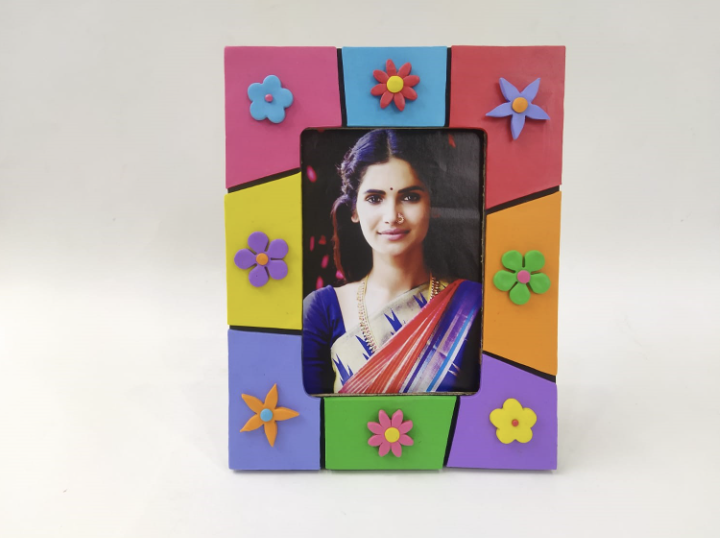
Photo Frame Craft for Students
Design a custom photo frame for Mother’s Day using easy-to-find materials. This project lets kids personalize a beautiful frame to hold a treasured family photo. It’s a great craft that brings creativity and emotion together into a heartfelt handmade gift for mom.
Clay Modelling Gifting More than 60 mins 6 to 8 years Art & Craft Class 7
Steps to Create this Activity
Login to see steps

Step - 01
To create photo frame, take a corrugated sheet & draw the diagram referring to the template given with the help of pencil and scale.

Step - 02
Cut it with paper cutter. Using Rangeela Tempera colours, paint the front frame with your choice of colour with the help of fine art brushes and let it dry.

Step - 03
To create the flower, take Raneegla Creative clay colour of your choice. Now create a coil as shown with the help of your hands.

Step - 04
To create flower petals, create tiny drop like shapes from coil, further with the help of your hands flatten it as shown.

Step - 05
Now merge all the petals together creating star like shape as shown. Now take any contrast-coloured clay of your choice and create a tiny pollen as shown.

Step - 06
Using Fevicol A+, stick pollen in the centre and let it dry.

Step - 07
Similarly, create different types of flowers using the same technique.

Step - 08
Further create slabs using Rangeela Creative Clay with the help of rolling pin, make sure slabs are evenly spread, now referring to the template given, cut out each slab with the help of paper cutter and scale.

Step - 09
Using Fevicol A+, stick the cut outs onto the frame as shown and let it dry.

Step - 10
Stick flower onto the clay slabs as shown and let it dry.

Step - 11
To create a frame holder, take corrugated sheet, draw and cut out a strip referring to the template given. Now with the help of scale fold the flaps from both the ends as shown.

Step - 12
Using Fevicol A+, stick the flaps to each other creating a triangle like structure and let it dry.

Step - 13
Using Fevicol A+, stick the holder behind as shown and let it dry.

Step - 14
Handmade photo frame for Mother’s Day is ready!
Steps to Create this Activity
Login to see steps
Step - 01
To create photo frame, take a corrugated sheet & draw the diagram referring to the template given with the help of pencil and scale.
Step - 02
Cut it with paper cutter. Using Rangeela Tempera colours, paint the front frame with your choice of colour with the help of fine art brushes and let it dry.
Step - 03
To create the flower, take Raneegla Creative clay colour of your choice. Now create a coil as shown with the help of your hands.
Step - 04
To create flower petals, create tiny drop like shapes from coil, further with the help of your hands flatten it as shown.
Step - 05
Now merge all the petals together creating star like shape as shown. Now take any contrast-coloured clay of your choice and create a tiny pollen as shown.
Step - 06
Using Fevicol A+, stick pollen in the centre and let it dry.
Step - 07
Similarly, create different types of flowers using the same technique.
Step - 08
Further create slabs using Rangeela Creative Clay with the help of rolling pin, make sure slabs are evenly spread, now referring to the template given, cut out each slab with the help of paper cutter and scale.
Step - 09
Using Fevicol A+, stick the cut outs onto the frame as shown and let it dry.
Step - 10
Stick flower onto the clay slabs as shown and let it dry.
Step - 11
To create a frame holder, take corrugated sheet, draw and cut out a strip referring to the template given. Now with the help of scale fold the flaps from both the ends as shown.
Step - 12
Using Fevicol A+, stick the flaps to each other creating a triangle like structure and let it dry.
Step - 13
Using Fevicol A+, stick the holder behind as shown and let it dry.
Step - 14
Handmade photo frame for Mother’s Day is ready!


