


Beautiful Kite Trinket Craft Projects for School Students - Activity Single - FeviCreate
Craft a kite trinket box with coloured chart papers
Create beautiful kite trinkets with kids using simple materials. This DIY activity is ideal for school projects, allowing children to learn about Makar Sankranti while expressing their artistic talents.
Best Out of Waste Brand me 30 to 60 mins 9 to 14 years Art & Craft Class 8


Steps to Create this Activity
Login to see steps

Step - 01
To create the Kite Trinket Box, take a corrugated sheet & draw the diagram referring to the template given. Similarly, take a few colored Chart papers & draw diagram of flower on it.

Step - 02
Cut them with scissors. To decorate the trinket, take colored foam sheet of your choice & cut out squares of different sizes & kite tail as shown in the image.

Step - 03
Using Fevistik Power, create the structure as shown in the image.

Step - 04
Using Fevistik Power of your choice, stick the foam cutouts as shown onto the lid. To create a mechanism for the lid, collect a toothpick & quilling strip. Using Fevistik Power, attach a coil to the toothpick as shown.

Step - 05
Using Fevistik Power, cover the edges of the base with the help of chart paper as shown. Take toothpick structure & insert through the base below as shown in the image.

Step - 06
Using Rangeela Tempera Colour of your choice, paint the inward sides of the base with the help of fine art brushes & let it dry. Now insert the lid through the toothpick structure as shown & lock it with the help of the coil using Fevistik Power & let them dry.

Step - 07
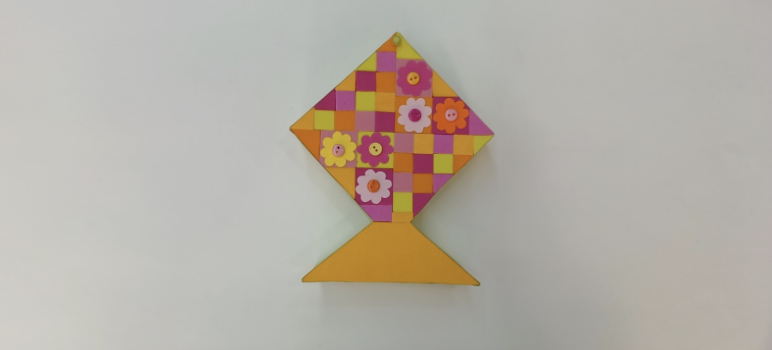
To enhance the structure, stick chart paper cutouts & buttons as shown in the image using Fevistik Power. Your handmade kite trinket is ready!

Step - 08
Design Template
Steps to Create this Activity
Login to see steps
Step - 01
To create the Kite Trinket Box, take a corrugated sheet & draw the diagram referring to the template given. Similarly, take a few colored Chart papers & draw diagram of flower on it.
Step - 02
Cut them with scissors. To decorate the trinket, take colored foam sheet of your choice & cut out squares of different sizes & kite tail as shown in the image.
Step - 03
Using Fevistik Power, create the structure as shown in the image.
Step - 04
Using Fevistik Power of your choice, stick the foam cutouts as shown onto the lid. To create a mechanism for the lid, collect a toothpick & quilling strip. Using Fevistik Power, attach a coil to the toothpick as shown.
Step - 05
Using Fevistik Power, cover the edges of the base with the help of chart paper as shown. Take toothpick structure & insert through the base below as shown in the image.
Step - 06
Using Rangeela Tempera Colour of your choice, paint the inward sides of the base with the help of fine art brushes & let it dry. Now insert the lid through the toothpick structure as shown & lock it with the help of the coil using Fevistik Power & let them dry.
Step - 07
To enhance the structure, stick chart paper cutouts & buttons as shown in the image using Fevistik Power. Your handmade kite trinket is ready!
Step - 08
Design Template


