


Raksha Bandhan Craft Ideas for Kids | DIY Lion Rakhi - Fevicreate - Activity Single - FeviCreate
DIY King of the Jungle Rakhi Craft with Cardboard & Foam Sheet
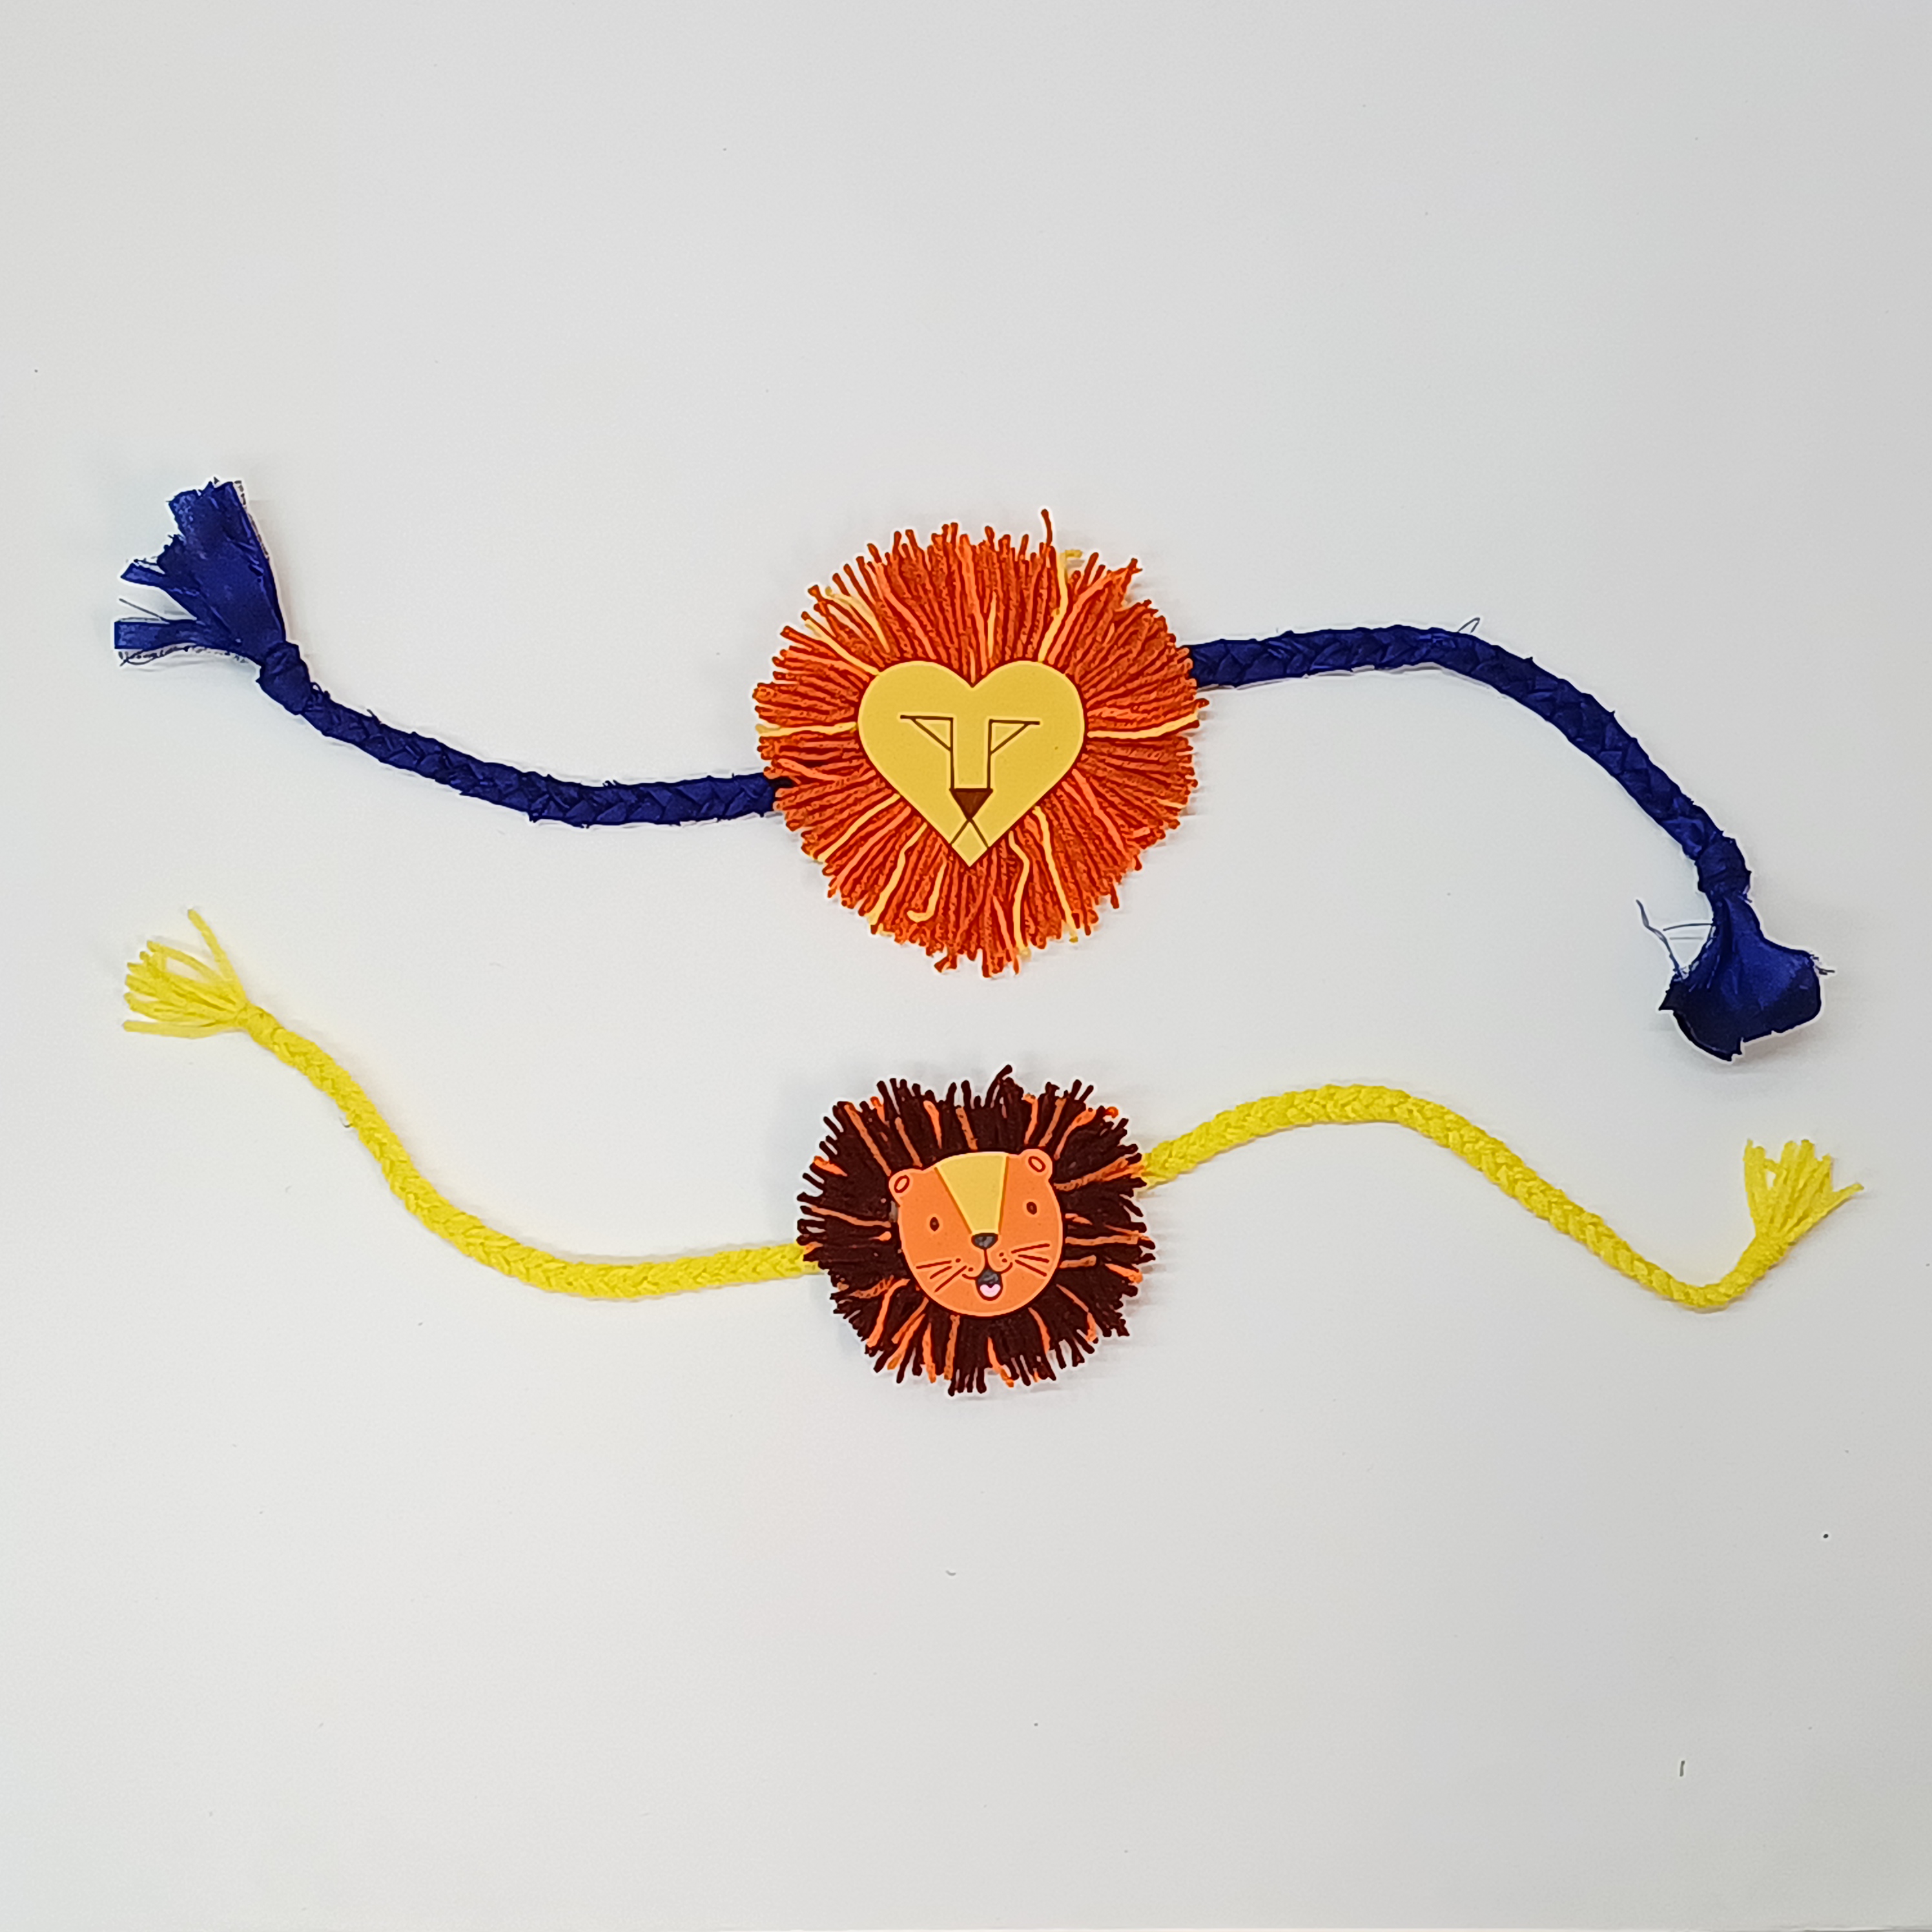
Let your kids explore their creativity and make a fun DIY lion rakhi for Raksha Bandhan. Using cardboard, foam sheets, and wool, follow Fevicreate's step-by-step guide to create a unique and playful rakhi.
Mixed Media Celebration 30 to 60 mins 6 to 8 years Art & Craft Class 3


Steps to Create this Activity
Login to see steps

Step - 01
To create the Rakhi base, take a piece of corrugated sheet and draw the contour of the Fevistik Power lion as shown in the image.

Step - 02
Cut them along the outer line with scissors.

Step - 03
To create the lion's mane, take two colored wool strands of your choice, cut out small strips, and stick them overlapping each other using Fevistik Power, as shown in the image.

Step - 04
Follow the same procedure to fill up the rest of the area using Fevistik Power.

Step - 05
To create a lion's face, take a foam piece and draw a diagram referring to the image, making sure it's proportionate to the mane.

Step - 06
Cut it with the help of scissors.

Step - 07
To create lion features i.e., eyes and mouth, use a felt pen. To create the lion’s nose, take a piece of foam, draw and cut out a tiny triangle as shown, and stick it using Fevistik Power.

Step - 08
Using Fevistik Power, stick the face onto the mane in the center as shown. Now, attach the structure to any cord. Your handmade Rakhi is ready! Similarly, you can create another Rakhi using materials like chart paper, felt, wool, and other available decorative materials.
Steps to Create this Activity
Login to see steps
Step - 01
To create the Rakhi base, take a piece of corrugated sheet and draw the contour of the Fevistik Power lion as shown in the image.
Step - 02
Cut them along the outer line with scissors.
Step - 03
To create the lion's mane, take two colored wool strands of your choice, cut out small strips, and stick them overlapping each other using Fevistik Power, as shown in the image.
Step - 04
Follow the same procedure to fill up the rest of the area using Fevistik Power.
Step - 05
To create a lion's face, take a foam piece and draw a diagram referring to the image, making sure it's proportionate to the mane.
Step - 06
Cut it with the help of scissors.
Step - 07
To create lion features i.e., eyes and mouth, use a felt pen. To create the lion’s nose, take a piece of foam, draw and cut out a tiny triangle as shown, and stick it using Fevistik Power.
Step - 08
Using Fevistik Power, stick the face onto the mane in the center as shown. Now, attach the structure to any cord. Your handmade Rakhi is ready! Similarly, you can create another Rakhi using materials like chart paper, felt, wool, and other available decorative materials.


