


Fun Father’s Day Trinket Craft for Kids - Activity Single - FeviCreate
Fun Father’s Day Trinket Craft for Kids
Make a small box for Dad’s tiny keepsakes keys, coins, or cufflinks. Use a matchbox or any little box and decorate it with love. Add a hidden note inside too!
Create a tiny surprise with a big smile — start now!
Painting Gifting More than 60 mins 9 to 14 years Art & Craft Class 6


Steps to Create this Activity
Login to see steps

Step - 01
To create plane trinket, you will need a tissue paper roll and a sheet of corrugated, draw the and cut out of the diagram of plane features I.e., wings, fan , tail, trinket holder referring to the template given. Make sure features are proportionate to the tissues paper holder .

Step - 02
To décor the plane, take a sheet of white paper, draw the diagram of plane trinket referring to the template given. Using Rangeela Tempera Colour of your choice paint the features I.e., body, wings, holder,tail,fan, corpet with the help of fine art brushes and let it dry.

Step - 03
Cut them with scissors.

Step - 04
Using Fevistik Power, stick the cut-outs on the corrugated cut outs as shown. Seal the edges of the corpet cut-out creating a conical structure.

Step - 05
To create wings and trinket holders, take paper straw cut out into three pieces measuring 1” approximately. Using Fevistik Power cover the straw with the help of black quilling strip and let it dry.

Step - 06
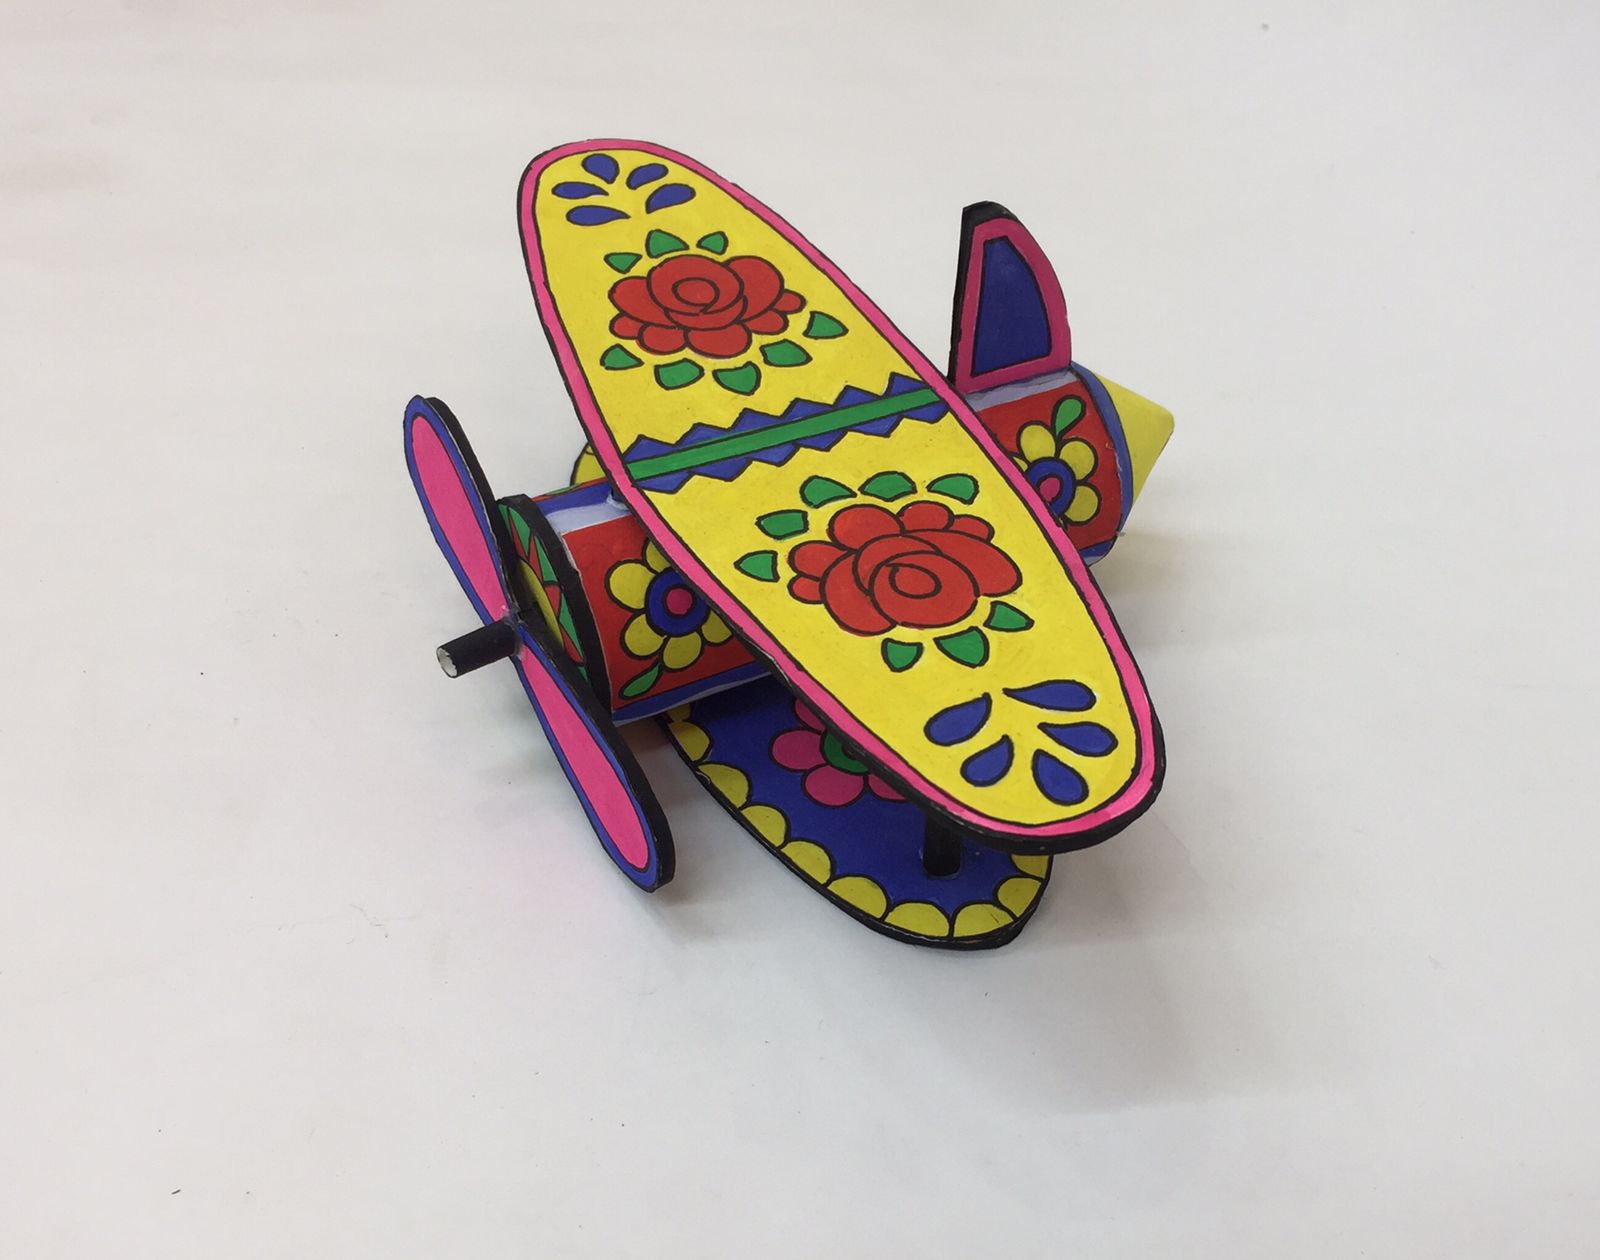
Using Fevistik Power, assemble the parts as shown in the image and let it dry. Your handmade plane trinket is ready!

Step - 07
Design Template
Steps to Create this Activity
Login to see steps
Step - 01
To create plane trinket, you will need a tissue paper roll and a sheet of corrugated, draw the and cut out of the diagram of plane features I.e., wings, fan , tail, trinket holder referring to the template given. Make sure features are proportionate to the tissues paper holder .
Step - 02
To décor the plane, take a sheet of white paper, draw the diagram of plane trinket referring to the template given. Using Rangeela Tempera Colour of your choice paint the features I.e., body, wings, holder,tail,fan, corpet with the help of fine art brushes and let it dry.
Step - 03
Cut them with scissors.
Step - 04
Using Fevistik Power, stick the cut-outs on the corrugated cut outs as shown. Seal the edges of the corpet cut-out creating a conical structure.
Step - 05
To create wings and trinket holders, take paper straw cut out into three pieces measuring 1” approximately. Using Fevistik Power cover the straw with the help of black quilling strip and let it dry.
Step - 06
Using Fevistik Power, assemble the parts as shown in the image and let it dry. Your handmade plane trinket is ready!
Step - 07
Design Template


