


DIY Happiness Jar to Store Your Daily Positive Vibes - Activity Single - FeviCreate
DIY Jar of Happiness Craft
A Jar of Happiness made by you! Craft a personalized jar to store your dreams, memories, or positive thoughts, and keep the joy alive every day. This simple DIY project is the perfect way to create a keepsake that reflects your personality and adds a touch of warmth to your space. It’s a heartfelt way to preserve the best moments and feelings. Get started on this easy craft and fill your jar with happiness!
Mixed Media Games and Puzzles More than 60 mins 9 to 14 years Art & Craft Class 7


Steps to Create this Activity
Login to see steps

Step - 01
Refer to the design sheet given and draw the parts on mount board sheet. Similarly cut the rectangular shape from OHP sheet. Label them properly.

Step - 02
Cut out all the shapes using paper cutter finely.

Step - 03
Take the square A which has 2 rectangles, square and 1 small rectangle and create a slope by using 2 big rectangles as vertical frames and the smaller rectangle stuck in an angular manner in between them with the smaller rectangle on the upper surface at the back using Fevicol A+, Refer to the image

Step - 04
Take square A and stick 3 complete recytangle walls on the edgeusing Fevicol A+. Arrange and stick the slope in the centre of the 3 sided space created using Fevicol A+.

Step - 05
Take part B and stick it as a flat surface at a distance from the slope as shown in the image using Fevicol A+.

Step - 06
Trace and cut 4 pieces of part B as mentioned in the design sheet.

Step - 07
Stick all 4 pieces together to create a thick form and poke a barbecue stick at one edges as shown and cut it keeping 1 cm extra from both sides

Step - 08
Cut 8 rectangular pieces from part B mentioned in the design sheet. Make 2 pairs of 4 each and stick them on each other and stick the vertically as shown on the flat window using Fevicol A+. Also poke a barbecue stick through and through the window and the rectangular pieces for the structure to stand sturdy for the mechanism to work properly.

Step - 09
Attach a rubber band to the barbecue stick of T shape window created and place it horizontally as shown. The other end of the rubber band will be fastened and attached to the vertical barbecue stick of the model.

Step - 10
Cut Square C and pace and stick it horizontally over the mechanism keeping a distance of 2-3 mm and stick the flaps as shown from the template labelled C and stick it using Fevicol A+. Leave it to dry.

Step - 11
Create a transparent window by making a rectangle of the size as per the base box. Also take template E and create the top of the candy jar with a slit open in the centre to put in clayballs.

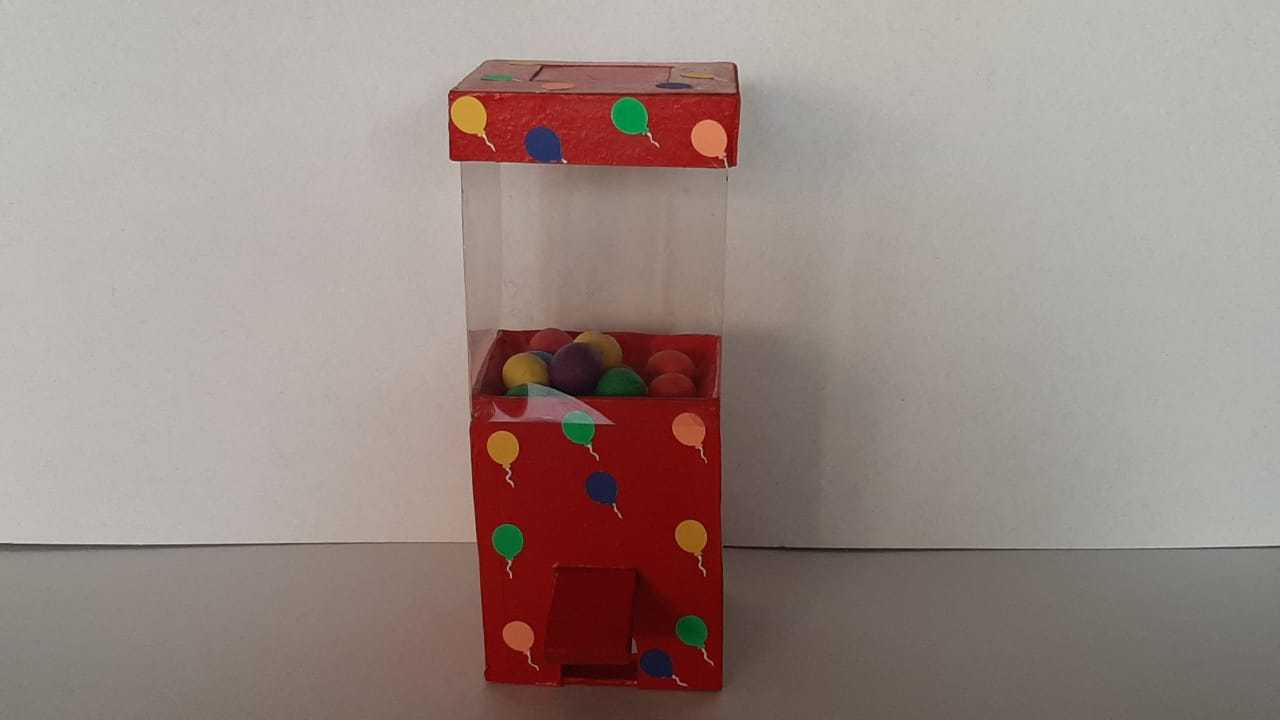
Step - 12
Your completed structure will look like this from the front.

Step - 13
Take small coloured paper and write messages for your loved ones on it. Make small roll of it and insert in clayballs which look like candy from Rangeela Creative Clay.

Step - 14
Further decorate the jar by coloring the parts using Fevicryl Acrylic Colors and sticking motifs using Fevicol A+. After drying, please check all the working of mechanical moving parts. Now put some clay message candies from the top. To get them, Push the horizontal lever in the front. One candy will fall from the slide at the bottom. Spread Happiness and give compliments to all your loved ones with your personalised message clay candies.
Steps to Create this Activity
Login to see steps
Step - 01
Refer to the design sheet given and draw the parts on mount board sheet. Similarly cut the rectangular shape from OHP sheet. Label them properly.
Step - 02
Cut out all the shapes using paper cutter finely.
Step - 03
Take the square A which has 2 rectangles, square and 1 small rectangle and create a slope by using 2 big rectangles as vertical frames and the smaller rectangle stuck in an angular manner in between them with the smaller rectangle on the upper surface at the back using Fevicol A+, Refer to the image
Step - 04
Take square A and stick 3 complete recytangle walls on the edgeusing Fevicol A+. Arrange and stick the slope in the centre of the 3 sided space created using Fevicol A+.
Step - 05
Take part B and stick it as a flat surface at a distance from the slope as shown in the image using Fevicol A+.
Step - 06
Trace and cut 4 pieces of part B as mentioned in the design sheet.
Step - 07
Stick all 4 pieces together to create a thick form and poke a barbecue stick at one edges as shown and cut it keeping 1 cm extra from both sides
Step - 08
Cut 8 rectangular pieces from part B mentioned in the design sheet. Make 2 pairs of 4 each and stick them on each other and stick the vertically as shown on the flat window using Fevicol A+. Also poke a barbecue stick through and through the window and the rectangular pieces for the structure to stand sturdy for the mechanism to work properly.
Step - 09
Attach a rubber band to the barbecue stick of T shape window created and place it horizontally as shown. The other end of the rubber band will be fastened and attached to the vertical barbecue stick of the model.
Step - 10
Cut Square C and pace and stick it horizontally over the mechanism keeping a distance of 2-3 mm and stick the flaps as shown from the template labelled C and stick it using Fevicol A+. Leave it to dry.
Step - 11
Create a transparent window by making a rectangle of the size as per the base box. Also take template E and create the top of the candy jar with a slit open in the centre to put in clayballs.
Step - 12
Your completed structure will look like this from the front.
Step - 13
Take small coloured paper and write messages for your loved ones on it. Make small roll of it and insert in clayballs which look like candy from Rangeela Creative Clay.
Step - 14
Further decorate the jar by coloring the parts using Fevicryl Acrylic Colors and sticking motifs using Fevicol A+. After drying, please check all the working of mechanical moving parts. Now put some clay message candies from the top. To get them, Push the horizontal lever in the front. One candy will fall from the slide at the bottom. Spread Happiness and give compliments to all your loved ones with your personalised message clay candies.


