


Paper Craft- Easy Steps to Make a Paper Dream Catcher - Activity Single - FeviCreate
Making Paper Dream Catcher for Kids
Fevicreate Art & Craft Activities are structured activities that involve a step by step method to create an end product. This crafting journey gives you something to show, you enjoy your journey and get a sense of achievement too. What more can one ask for!
Paper Crafting Brand me 10 to 30 mins 9 to 14 years Art & Craft Class 7


Steps to Create this Activity
Login to see steps

Step - 01
On an OHP sheet draw a circle with approx. 6 inch diameter using a felt pen and compass.

Step - 02
Cut them with scissors.

Step - 03
To create design for dreamcatcher take any coloured chart paper and draw a disc 2 cm wide using a pencil.

Step - 04
Cut it with scissors.

Step - 05
Similarly, on any coloured chart paper, draw a centre element for dreamcatcher using a felt pen.

Step - 06
Cut it with scissors.

Step - 07
On another coloured chart paper, draw triangles as shown. Make sure its proportionate to the disc drawn

Step - 08
Cut them with scissors.

Step - 09
Similarly, take any coloured chart paper proportionate to triangles and draw a grid of squares as shown with scale and felt pen.

Step - 10
Using Fevicol A+, assemble the cut-outs as shown; let it dry. Make sure to stick squares diagonally and overlapping; let it dry.

Step - 11
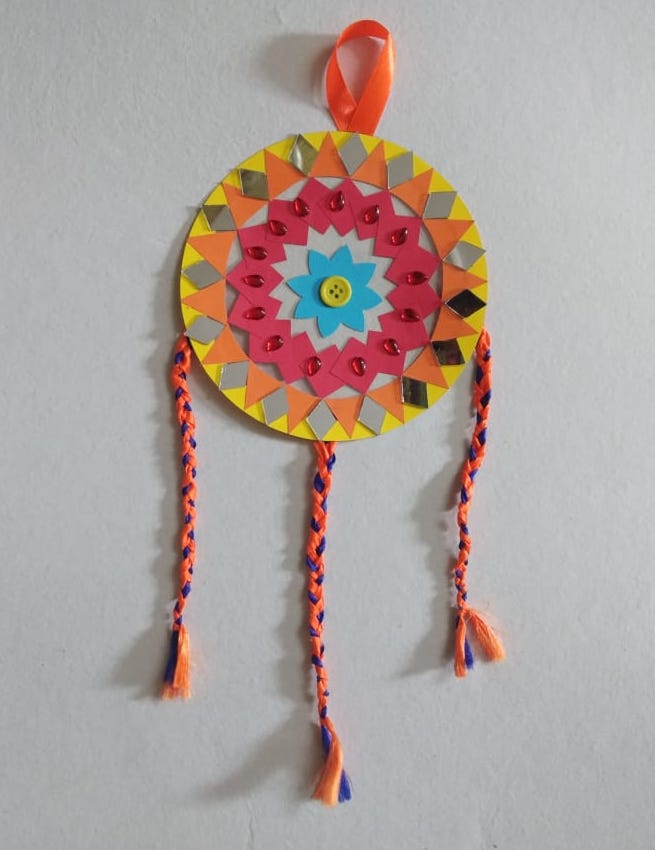
To enhance, stick mirrors, ornamental stones and buttons using Fevicol A+; let it dry.

Step - 12
To create tassels, take two-coloured ribbons of your choice & create three sets with three partitions in each set.

Step - 13
Create braids and tie the edges as shown.

Step - 14
Using Fevicol A+, assemble tassels and let them dry. Your personalised dreamcatcher is ready!
Steps to Create this Activity
Login to see steps
Step - 01
On an OHP sheet draw a circle with approx. 6 inch diameter using a felt pen and compass.
Step - 02
Cut them with scissors.
Step - 03
To create design for dreamcatcher take any coloured chart paper and draw a disc 2 cm wide using a pencil.
Step - 04
Cut it with scissors.
Step - 05
Similarly, on any coloured chart paper, draw a centre element for dreamcatcher using a felt pen.
Step - 06
Cut it with scissors.
Step - 07
On another coloured chart paper, draw triangles as shown. Make sure its proportionate to the disc drawn
Step - 08
Cut them with scissors.
Step - 09
Similarly, take any coloured chart paper proportionate to triangles and draw a grid of squares as shown with scale and felt pen.
Step - 10
Using Fevicol A+, assemble the cut-outs as shown; let it dry. Make sure to stick squares diagonally and overlapping; let it dry.
Step - 11
To enhance, stick mirrors, ornamental stones and buttons using Fevicol A+; let it dry.
Step - 12
To create tassels, take two-coloured ribbons of your choice & create three sets with three partitions in each set.
Step - 13
Create braids and tie the edges as shown.
Step - 14
Using Fevicol A+, assemble tassels and let them dry. Your personalised dreamcatcher is ready!


