


Learn To Make Paper Hand Fan - Activity Single - FeviCreate
Learn to Make a Paper Hand Fan in 5 Simple Steps.
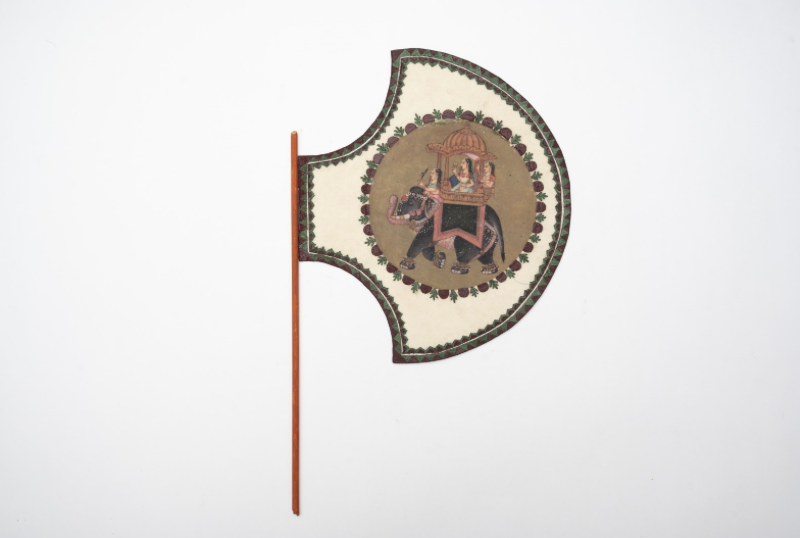
Turn up the cool vibes with a DIY hand fan using paper and miniature art prints. Let your kids unleash their crafting whirlwind, creating breezy masterpieces. It's a fun way to beat the heat while honing their artistic skills.
Mixed Media Brand me 30 to 60 mins 9 to 14 years Art & Craft Class 7


Steps to Create this Activity
Login to see steps

Step - 01
To create a miniature art hand fan, take an A4 size foam sheet, and referring to the template given, draw the contour of fan using a pencil.

Step - 02
Cut them with scissors. To create phototransfer technique, take a miniature printout of good quality. Using scissors, cut the printout in any shape of your choice or cut out a circle referring to the image. Using a Fine Art Brush, apply a uniform layer of Fevicol A+ on the printed side. Now stick it on the foam sheet as shown. Let it dry for approximately 2 hours.

Step - 03
Sprinkle some water on the back side of the print to make the surface wet. Now softly scrub out the upper layer of paper with your hand or sponge over the print. The print will be transferred giving a translucent effect with the print on the foam sheet as shown.

Step - 04
To maintain the print as shown, apply a thin layer of moisturizer. Draw the miniature art pattern around it (as per your choice or refer to the template given). Using Rangeela Tempera Colours of your choice, paint the pattern with Fine Art brushes and let it dry.

Step - 05
To create a fan holder, take a wooden stick and paint it using Rangeela Tempera Colours of your choice using Fine Art brushes and let it dry. Using Fevicol A+, attach the stick to the fan and let it dry. Your personalised hand fan is ready!

Step - 06
Design Template.
Steps to Create this Activity
Login to see steps
Step - 01
To create a miniature art hand fan, take an A4 size foam sheet, and referring to the template given, draw the contour of fan using a pencil.
Step - 02
Cut them with scissors. To create phototransfer technique, take a miniature printout of good quality. Using scissors, cut the printout in any shape of your choice or cut out a circle referring to the image. Using a Fine Art Brush, apply a uniform layer of Fevicol A+ on the printed side. Now stick it on the foam sheet as shown. Let it dry for approximately 2 hours.
Step - 03
Sprinkle some water on the back side of the print to make the surface wet. Now softly scrub out the upper layer of paper with your hand or sponge over the print. The print will be transferred giving a translucent effect with the print on the foam sheet as shown.
Step - 04
To maintain the print as shown, apply a thin layer of moisturizer. Draw the miniature art pattern around it (as per your choice or refer to the template given). Using Rangeela Tempera Colours of your choice, paint the pattern with Fine Art brushes and let it dry.
Step - 05
To create a fan holder, take a wooden stick and paint it using Rangeela Tempera Colours of your choice using Fine Art brushes and let it dry. Using Fevicol A+, attach the stick to the fan and let it dry. Your personalised hand fan is ready!
Step - 06
Design Template.


