


Easy to Make Halloween Craft Ideas for Preschool - Activity Single - FeviCreate
DIY Halloween Decor Craft Ideas for Preschool
Fevicreate Art & Craft Activities are structured activities that involve a step-by-step method to create an end product. This crafting journey gives you something to show, you enjoy your journey and get a sense of achievement too. What more can one ask for!
Clay Modelling Celebration 30 to 60 mins 9 to 14 years Art & Craft Class 6


Steps to Create this Activity
Login to see steps

Step - 01
To create tabletop décor, take an A3 size corrugated sheet. Refer to the image and draw the contour of a house and its sides with a width of approximately 2 inches.

Step - 02
Cut them with the help of scissors.

Step - 03
Using Fevistik Power, assemble the structure as shown and let it dry. Use Rangeela Tempera Color of your choice to paint the background with the help of paint brushes as shown and let it dry.

Step - 04
Using colored corrugated of your choice, cover the outer surface using Fevistik Power and let it dry.

Step - 05
To create a Halloween element, i.e., a witch figurine, take Rangeela Creative Clay in black. Create an even circular slab, cut it in half, and shape it into a conical form using your hands as shown in the image. Your witch hat is ready

Step - 06
Similarly, to create a witch figurine - for the torso, take Rangeela Creative Clay and with the help of your hands create a conical structure as shown. Similarly, create the face, hands, and hair, referring to the image. Now assemble all the features as shown in the image.

Step - 07
Following the same procedure, create other Halloween elements using Rangeela Creative Clay.

Step - 08
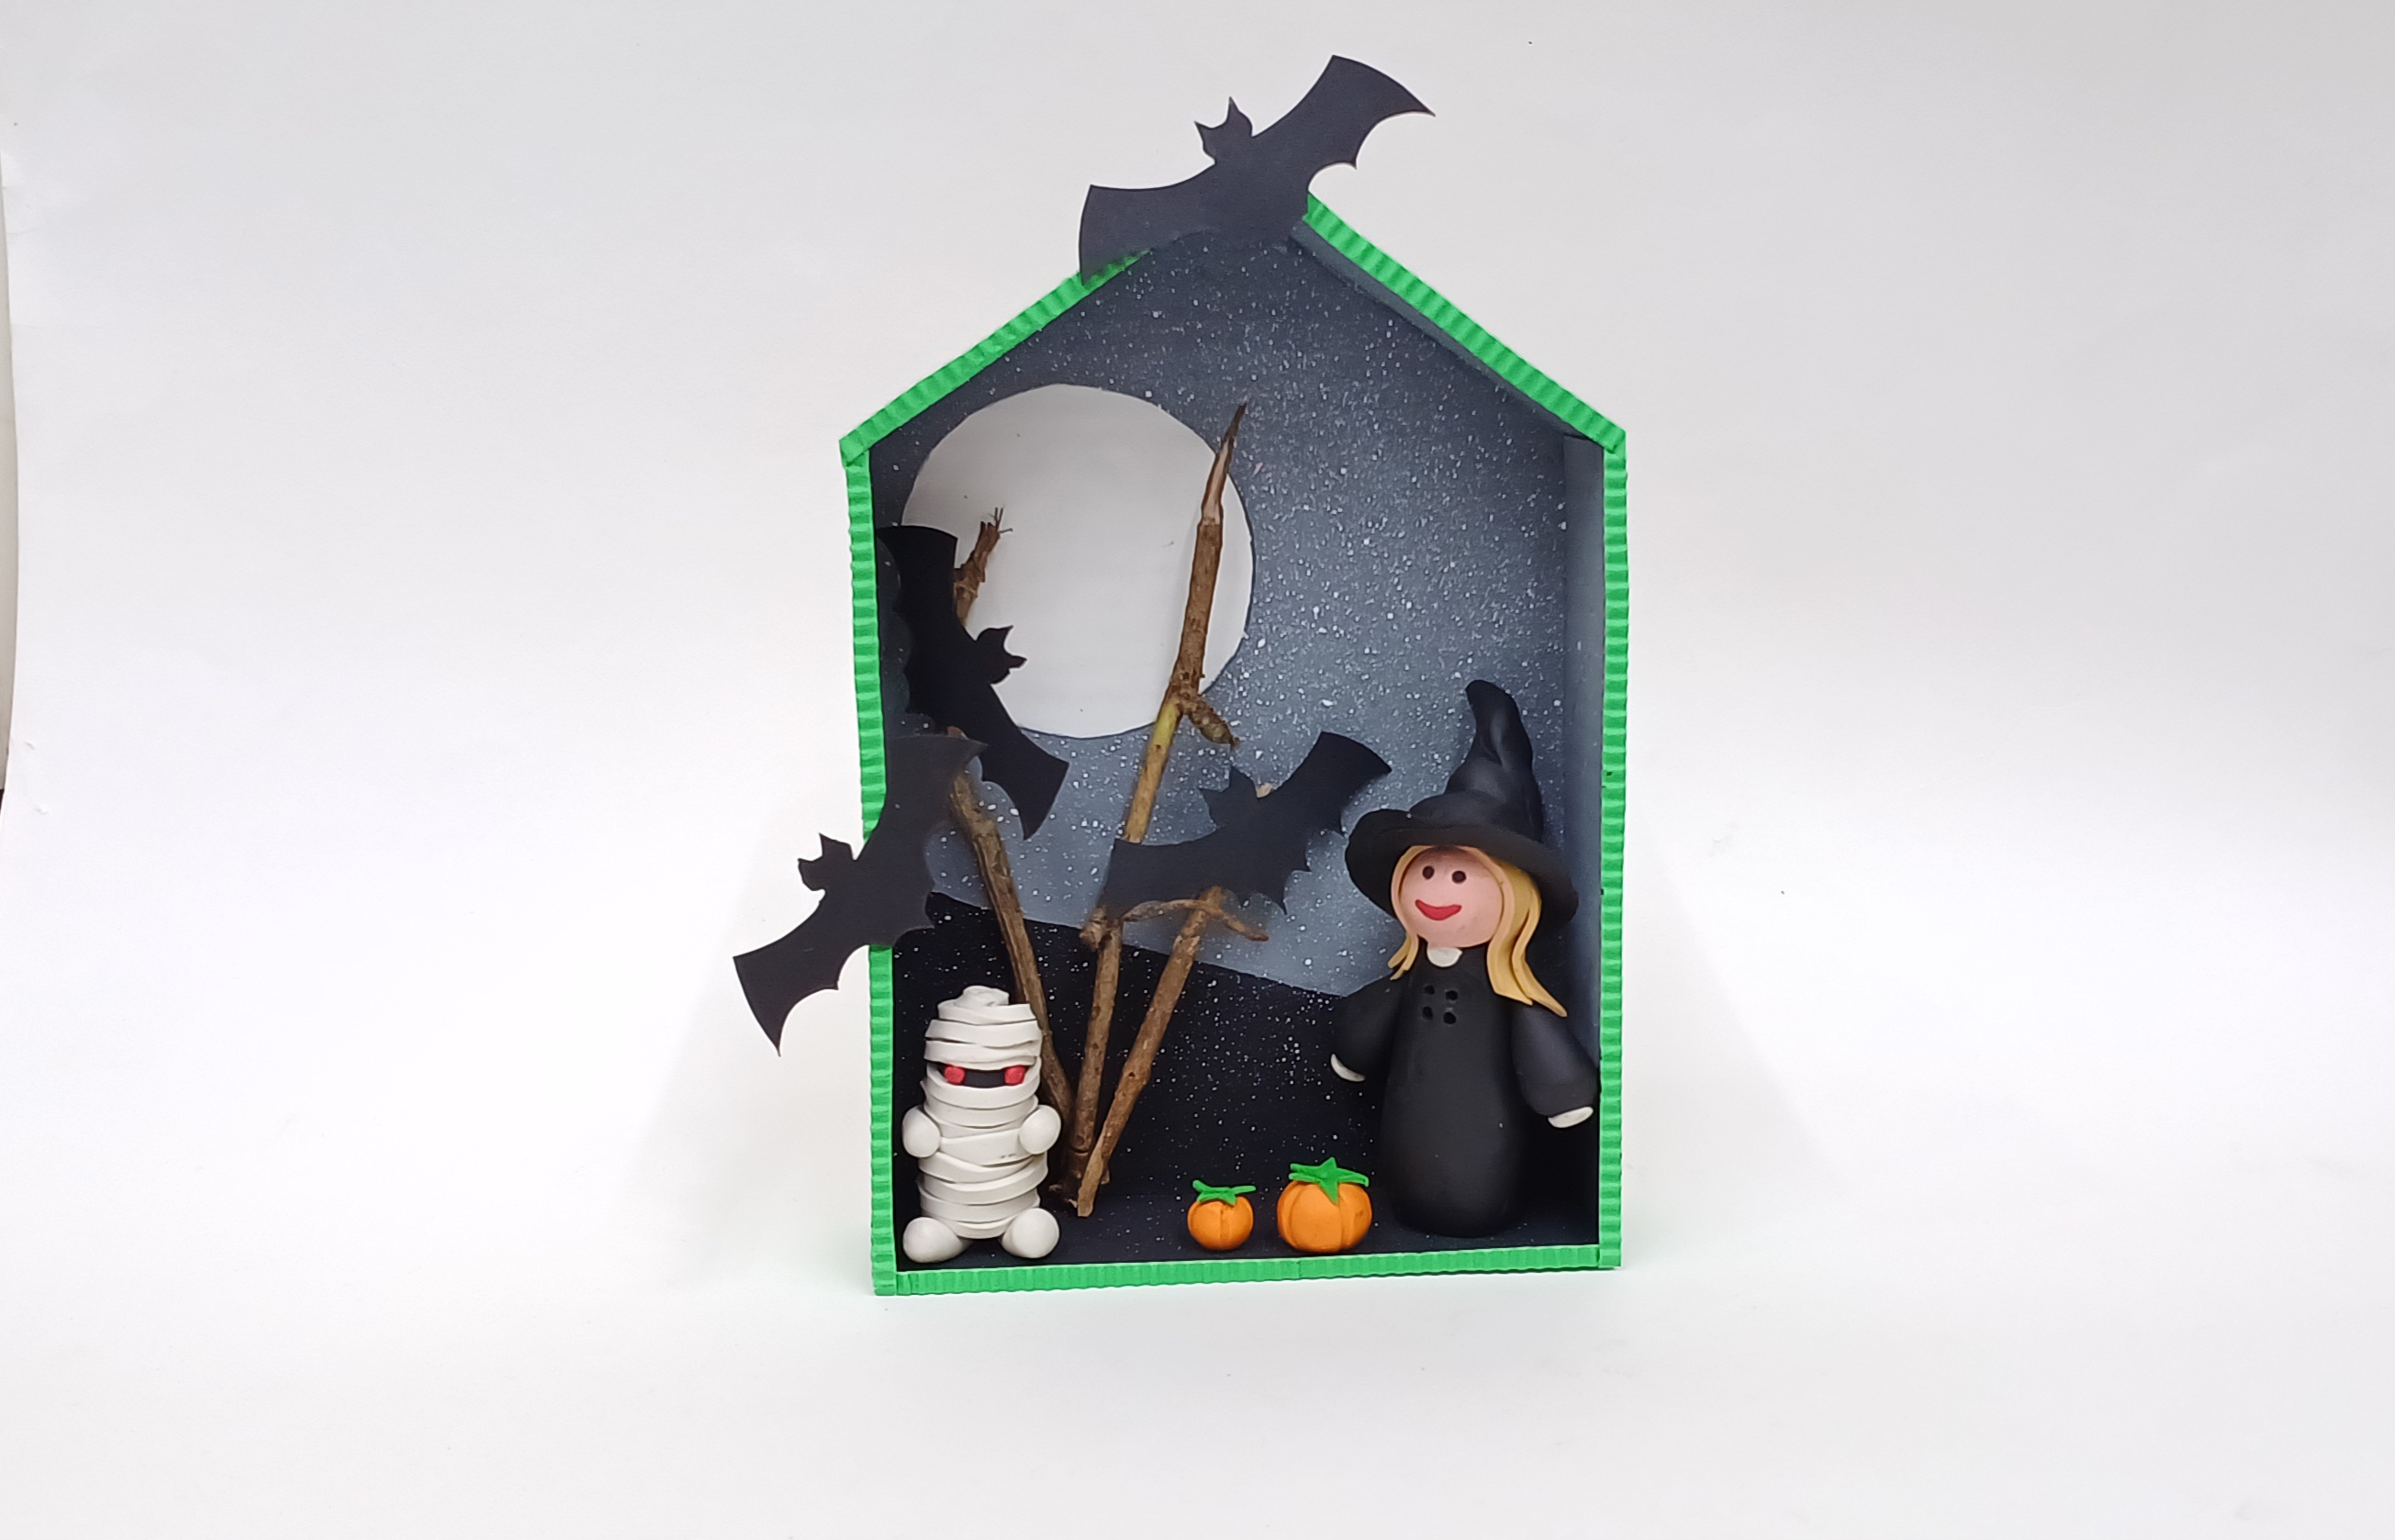
To enhance it further, take black and white chart paper, draw and cut out elements such as bats and a moon. Using Fevistik Power stick the elements as shown. Collect some twigs, stick them and place the Halloween elements as shown. Your handmade tabletop décor for Halloween is ready
Steps to Create this Activity
Login to see steps
Step - 01
To create tabletop décor, take an A3 size corrugated sheet. Refer to the image and draw the contour of a house and its sides with a width of approximately 2 inches.
Step - 02
Cut them with the help of scissors.
Step - 03
Using Fevistik Power, assemble the structure as shown and let it dry. Use Rangeela Tempera Color of your choice to paint the background with the help of paint brushes as shown and let it dry.
Step - 04
Using colored corrugated of your choice, cover the outer surface using Fevistik Power and let it dry.
Step - 05
To create a Halloween element, i.e., a witch figurine, take Rangeela Creative Clay in black. Create an even circular slab, cut it in half, and shape it into a conical form using your hands as shown in the image. Your witch hat is ready
Step - 06
Similarly, to create a witch figurine - for the torso, take Rangeela Creative Clay and with the help of your hands create a conical structure as shown. Similarly, create the face, hands, and hair, referring to the image. Now assemble all the features as shown in the image.
Step - 07
Following the same procedure, create other Halloween elements using Rangeela Creative Clay.
Step - 08
To enhance it further, take black and white chart paper, draw and cut out elements such as bats and a moon. Using Fevistik Power stick the elements as shown. Collect some twigs, stick them and place the Halloween elements as shown. Your handmade tabletop décor for Halloween is ready


