


Creative Giraffe Stationery Box Craft Activity for Kids - Activity Single - FeviCreate
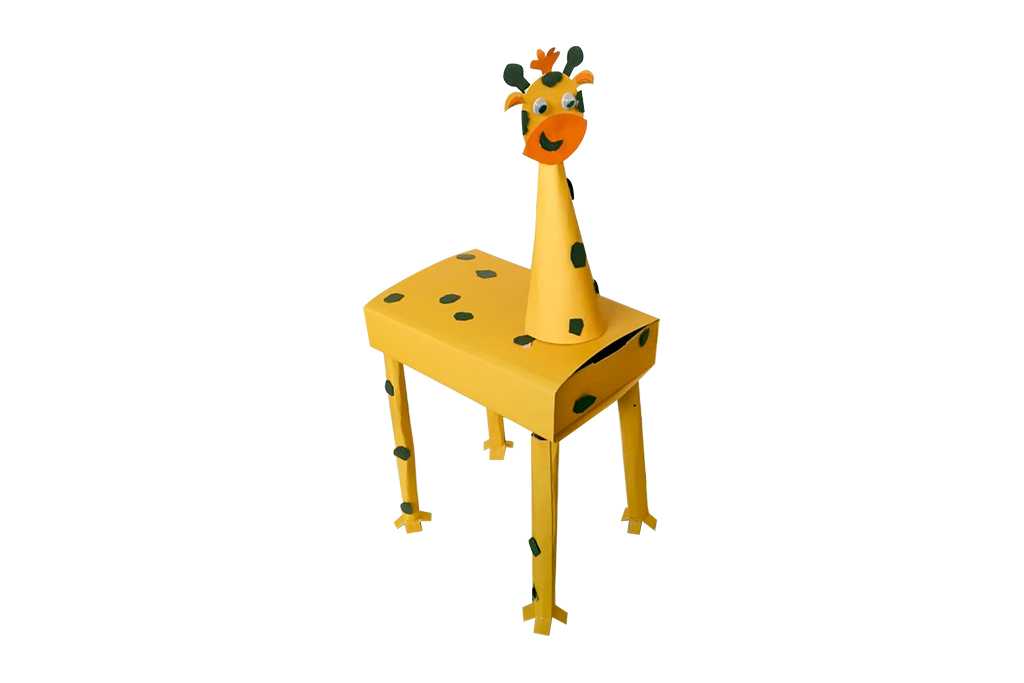
Giraffe Stationery Box Craft Activity
A quick and easy DIY stationery holder for your desk
Paper Crafting Gifting 30 to 60 mins 6 to 8 years Art & Craft Class 1


Steps to Create this Activity
Login to see steps

Step - 01
Take a sheet of thick card paper/ corrugated sheet and trace the diagram given in the template. You may also use a ready soap box available with you.

Step - 02
Referring to the template, cut with the help of scissors and later fold the flaps as shown with the help of scale

Step - 03
Referring to the template, cut and fold the flaps as shown

Step - 04
To create container, stick the edges and flaps using Fevistik, as shown and let it dry

Step - 05
Now insert the box into the box cover made as shown

Step - 06
Take coloured chart paper of your choice, draw and cut features of Giraffe as shown with the help of pencil and scissors. Refer to the given template

Step - 07
Using Fevistik, assemble cut-outs and stick googly eyes as shown to create Giraffe face

Step - 08
To create Giraffe neck, take a piece of thick card paper as per the required size. Now roll it into a cone shape as shown and cut the extra part with the help of scissors as shown

Step - 09
Take a 4 piece of thick card paper measuring it into 12cm x 5cm. Now roll it into a coil and seal the edges using Fevistik, and let it dry. You may also use ready straws available at home, cut it required sizes

Step - 10
Take coloured paper of your choice 5mm approx cut them into pieces and stick it on the parts created using Fevistik and let it dry. You may also paint the pattern.

Step - 11
Using Fevistik,, assemble all the parts to create stationery holder.
Steps to Create this Activity
Login to see steps
Step - 01
Take a sheet of thick card paper/ corrugated sheet and trace the diagram given in the template. You may also use a ready soap box available with you.
Step - 02
Referring to the template, cut with the help of scissors and later fold the flaps as shown with the help of scale
Step - 03
Referring to the template, cut and fold the flaps as shown
Step - 04
To create container, stick the edges and flaps using Fevistik, as shown and let it dry
Step - 05
Now insert the box into the box cover made as shown
Step - 06
Take coloured chart paper of your choice, draw and cut features of Giraffe as shown with the help of pencil and scissors. Refer to the given template
Step - 07
Using Fevistik, assemble cut-outs and stick googly eyes as shown to create Giraffe face
Step - 08
To create Giraffe neck, take a piece of thick card paper as per the required size. Now roll it into a cone shape as shown and cut the extra part with the help of scissors as shown
Step - 09
Take a 4 piece of thick card paper measuring it into 12cm x 5cm. Now roll it into a coil and seal the edges using Fevistik, and let it dry. You may also use ready straws available at home, cut it required sizes
Step - 10
Take coloured paper of your choice 5mm approx cut them into pieces and stick it on the parts created using Fevistik and let it dry. You may also paint the pattern.
Step - 11
Using Fevistik,, assemble all the parts to create stationery holder.


