


Make a Cool Earth Day Clock with Easy Steps for Kids - Activity Single - FeviCreate
DIY Earth Day Clock for Kids
Celebrate Earth Day in style with a unique clock craft for kids! This easy DIY project lets children get hands-on while learning how to make something functional. Personalize your clock with bright colors and creative designs – a perfect way to mark Earth Day. Get started and craft yours today!
Paper Crafting Environment More than 60 mins 9 to 14 years Art & Craft Class 8


Steps to Create this Activity
Login to see steps

Step - 01
To create an Earth Day clock, take a corrugated sheet and draw and cut out a circle referring to the given template. Similarly, cut out a circle from upcycled blue fabric. With the help of a pencil, draw the map over it as shown. Now, take some green-colored fabrics and cut them into random-sized pieces as shown in the image.

Step - 02
With the help of a pencil and a ruler, draw lines dividing the circle into 12 parts as shown in the image. To create trees, gather toothpicks.

Step - 03
Using Fevistik Power, stick toothpicks on the markings made, and assemble the fabric cutouts onto them as shown, making it look like an Earth.

Step - 04
To create trees, take a corrugated sheet, and referring to the template given, draw and cut out twelve trees of different shapes as shown in the image.

Step - 05
Using Fevistik Power, cover each tree using different materials such as chart paper, foam, graded wool, and colored corrugated sheet.

Step - 06
Using Fevistik Power, attach all the trees onto the toothpicks as shown in the image and let it dry.

Step - 07
To write clock numbers, take colored chart paper of your choice. Here, we have taken brown chart paper. With the help of a white felt pen, write the numbers 1-12.

Step - 08
Using Fevistik Power, stick the numbers onto the trees as shown and let it dry.

Step - 09
Collect a clock device. With the help of a pencil, poke a hole in the center of the clock structure proportionate to the device to insert it.

Step - 10
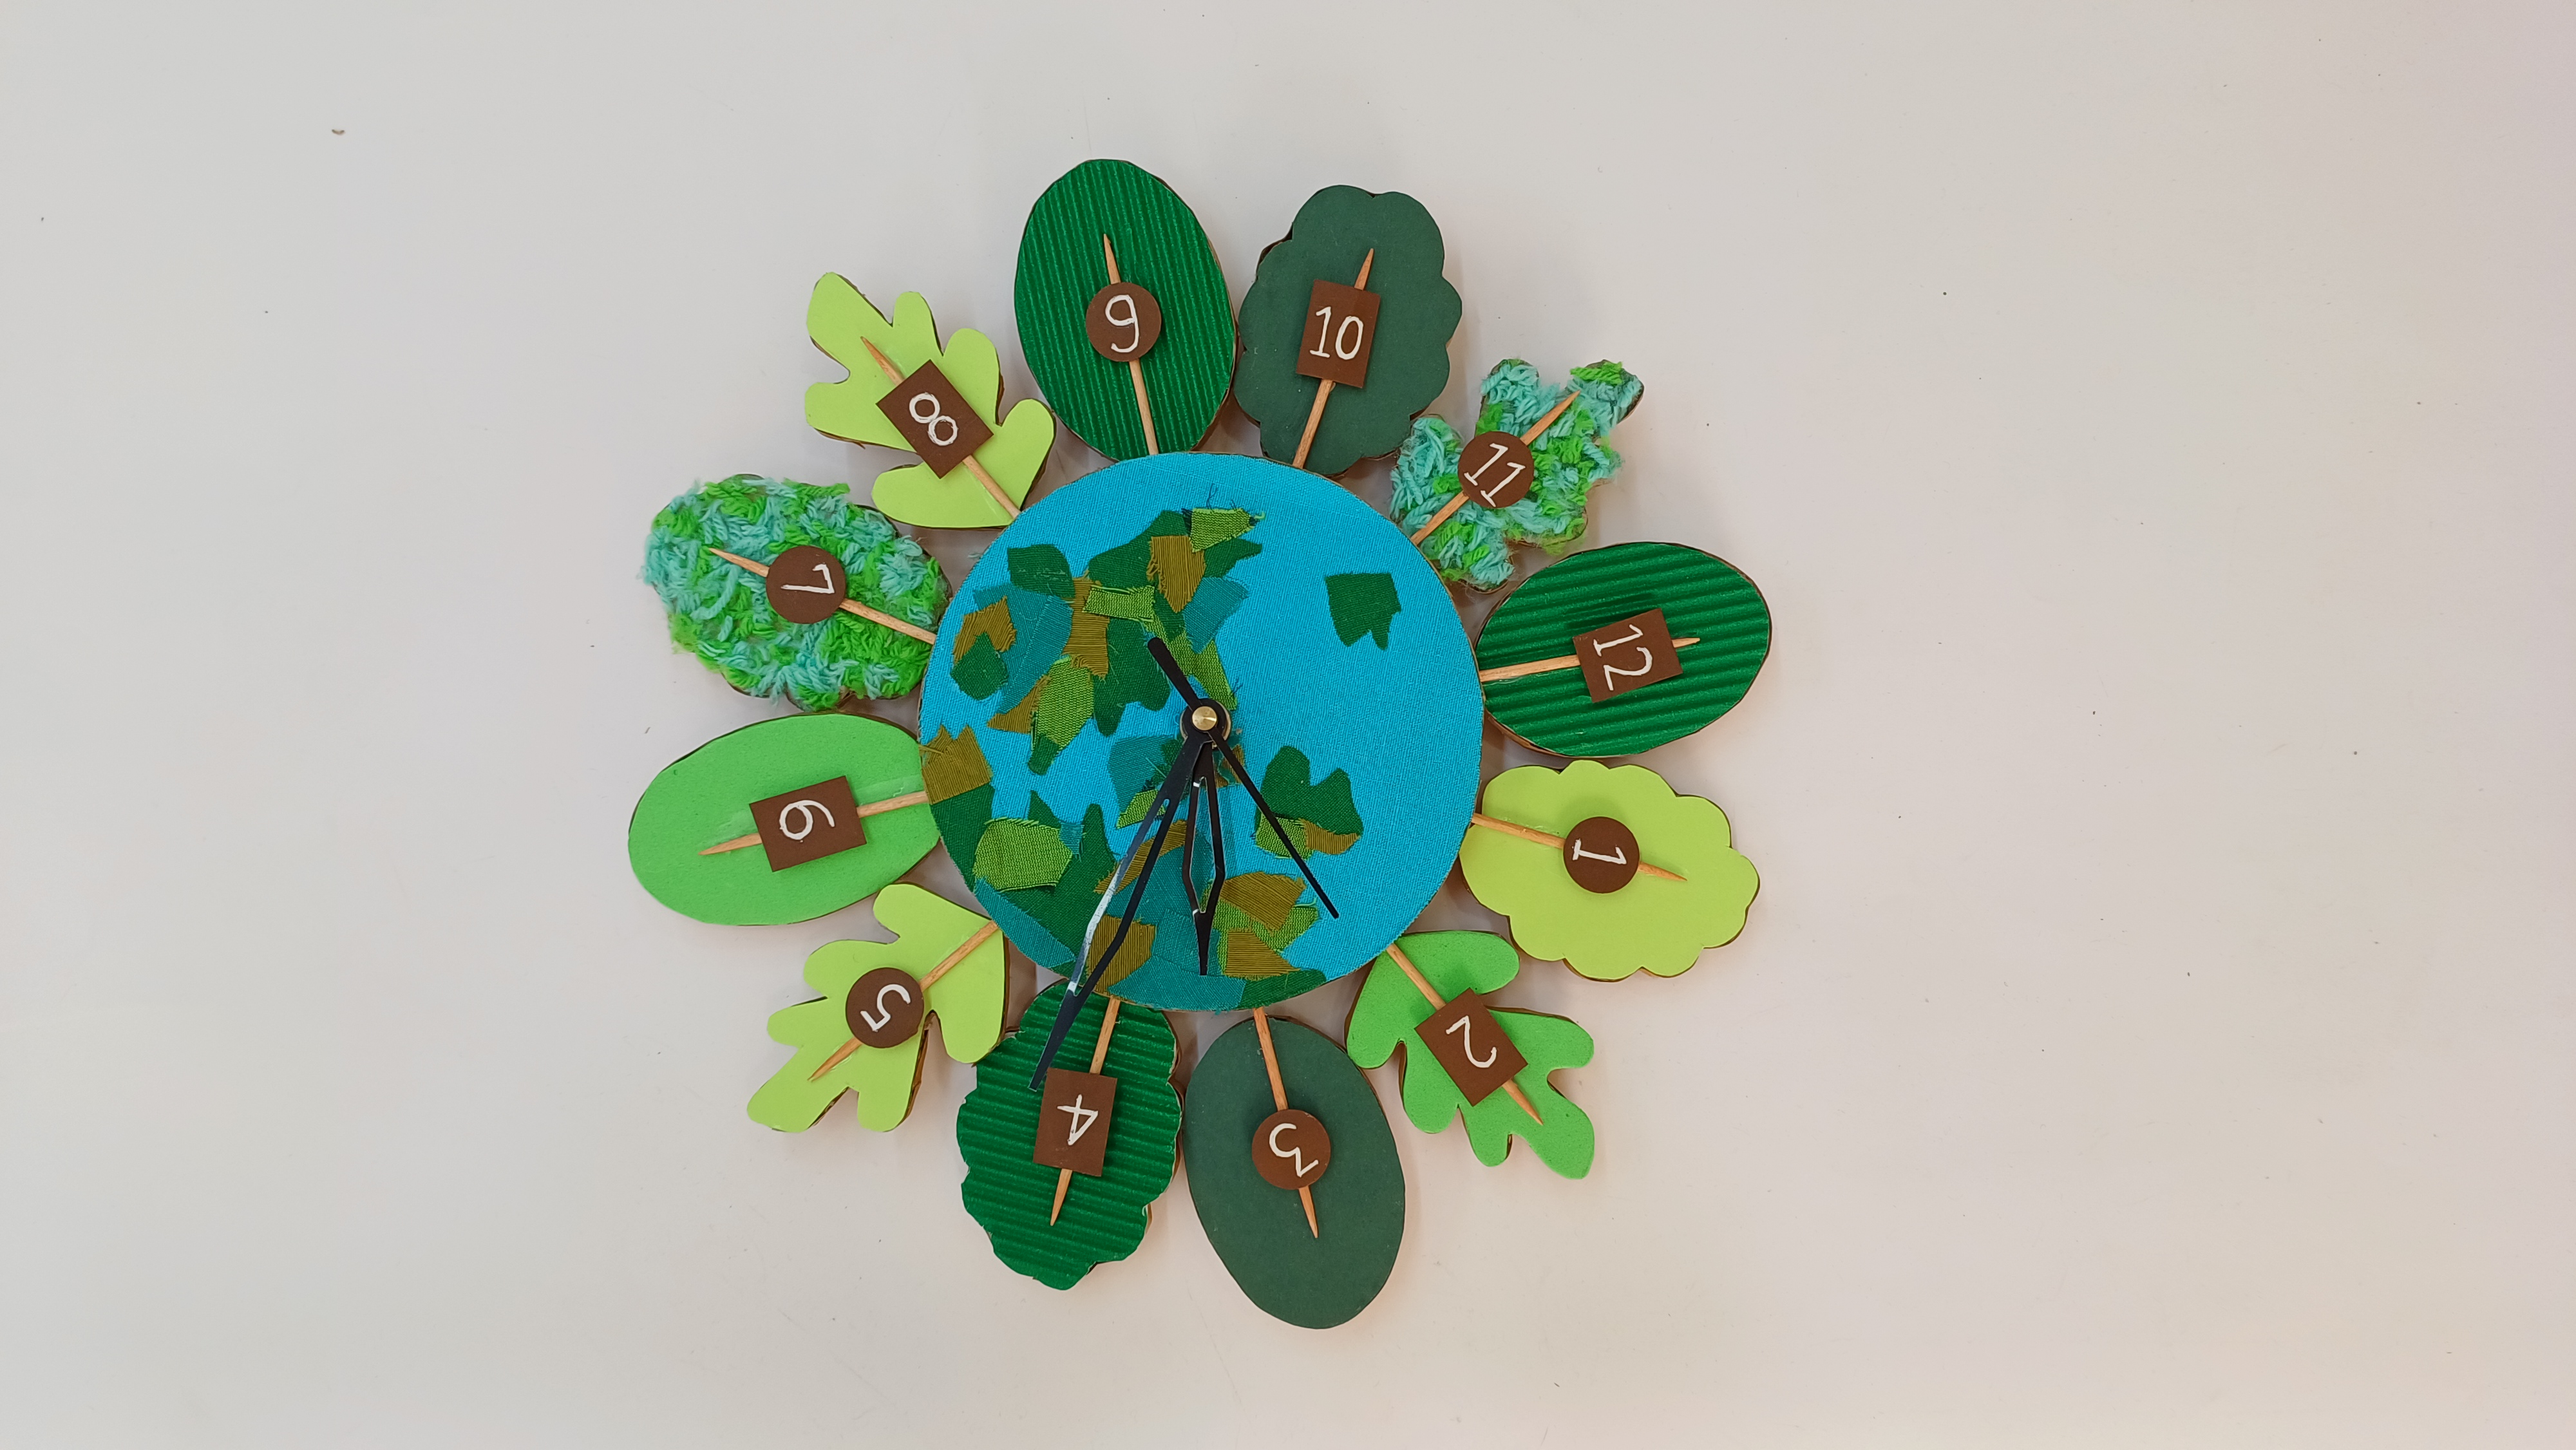
Now, attach the clock device as shown in the image. Your handmade clock is ready!

Step - 11
Design Template.
Steps to Create this Activity
Login to see steps
Step - 01
To create an Earth Day clock, take a corrugated sheet and draw and cut out a circle referring to the given template. Similarly, cut out a circle from upcycled blue fabric. With the help of a pencil, draw the map over it as shown. Now, take some green-colored fabrics and cut them into random-sized pieces as shown in the image.
Step - 02
With the help of a pencil and a ruler, draw lines dividing the circle into 12 parts as shown in the image. To create trees, gather toothpicks.
Step - 03
Using Fevistik Power, stick toothpicks on the markings made, and assemble the fabric cutouts onto them as shown, making it look like an Earth.
Step - 04
To create trees, take a corrugated sheet, and referring to the template given, draw and cut out twelve trees of different shapes as shown in the image.
Step - 05
Using Fevistik Power, cover each tree using different materials such as chart paper, foam, graded wool, and colored corrugated sheet.
Step - 06
Using Fevistik Power, attach all the trees onto the toothpicks as shown in the image and let it dry.
Step - 07
To write clock numbers, take colored chart paper of your choice. Here, we have taken brown chart paper. With the help of a white felt pen, write the numbers 1-12.
Step - 08
Using Fevistik Power, stick the numbers onto the trees as shown and let it dry.
Step - 09
Collect a clock device. With the help of a pencil, poke a hole in the center of the clock structure proportionate to the device to insert it.
Step - 10
Now, attach the clock device as shown in the image. Your handmade clock is ready!
Step - 11
Design Template.


