


Make a Cute DIY Dog Tissue Holder for Everyday Use - Activity Single - FeviCreate
A Cute Tissue Holder for Kids
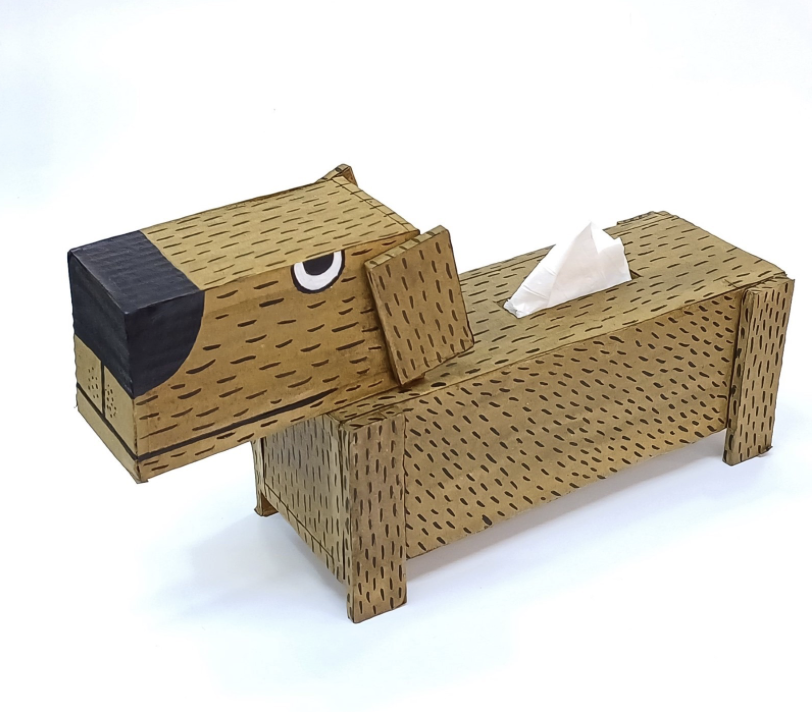
Make everyday items fun with this adorable tissue holder! This simple DIY adds creativity to daily essentials while keeping kids entertained. Perfect for a themed craft or a cute gift, this project is both fun and practical. Want to start crafting? Follow our easy guide today!
Painting Brand me 30 to 60 mins 9 to 14 years Art & Craft Class 6


Steps to Create this Activity
Login to see steps

Step - 01
To create dog tissue holder, take a corrugated sheet, draw and cutout the panels referring to the template given I.e., torso, face, legs & ears. Using Fevistik Power assemble the cutouts & form torso & face as shown in the image.

Step - 02
Using Fevistik Power, assemble the features as shown & let it dry.

Step - 03
To create tissue holder, using paper cutter create a slit above the torso as shown & one below. Make sure the slit below is big enough to insert tissue papers through. Using Fevicryl Acrylic Colour of your choice give a was effect to structure with the help of fine art bushes & let it dry.

Step - 04
Using Fevicryl Acrylic Colour, create features I.e., eyes, nose, mouth & hair with the help of fine art brushes & let it dry. Your handmade tissue holder is ready!
Steps to Create this Activity
Login to see steps
Step - 01
To create dog tissue holder, take a corrugated sheet, draw and cutout the panels referring to the template given I.e., torso, face, legs & ears. Using Fevistik Power assemble the cutouts & form torso & face as shown in the image.
Step - 02
Using Fevistik Power, assemble the features as shown & let it dry.
Step - 03
To create tissue holder, using paper cutter create a slit above the torso as shown & one below. Make sure the slit below is big enough to insert tissue papers through. Using Fevicryl Acrylic Colour of your choice give a was effect to structure with the help of fine art bushes & let it dry.
Step - 04
Using Fevicryl Acrylic Colour, create features I.e., eyes, nose, mouth & hair with the help of fine art brushes & let it dry. Your handmade tissue holder is ready!


