


Design a DIY Treasure Box to Store Special Memories - Activity Single - FeviCreate
DIY Tissue Roll Treasure Box Craft
Upgrade a plain box into a stylish tissue holder with this easy DIY! A fun and practical craft for students, this project adds personality to your space while keeping things tidy. With step-by-step instructions, you’ll have a customized holder in no time. Ready to craft yours? Start now!
Paper Crafting Best Out of Waste More than 60 mins 9 to 14 years Art & Craft Class 7


Steps to Create this Activity
Login to see steps

Step - 01
To create the treasure box, take tissue roll holder cut it into half, proportionate to the cut out, draw the diagram of treasure box i.e base, sides and strips as shown in the image with the help of pencil and scale.

Step - 02
Cut them with scissors.

Step - 03
Using Fevicol A+, assemble the parts as shown and let it dry. Make sure to check lid opens and shuts properly.

Step - 04
Using Fevicol A+, stick corrugated strips creating a lock for treasure box as shown and let it dry

Step - 05
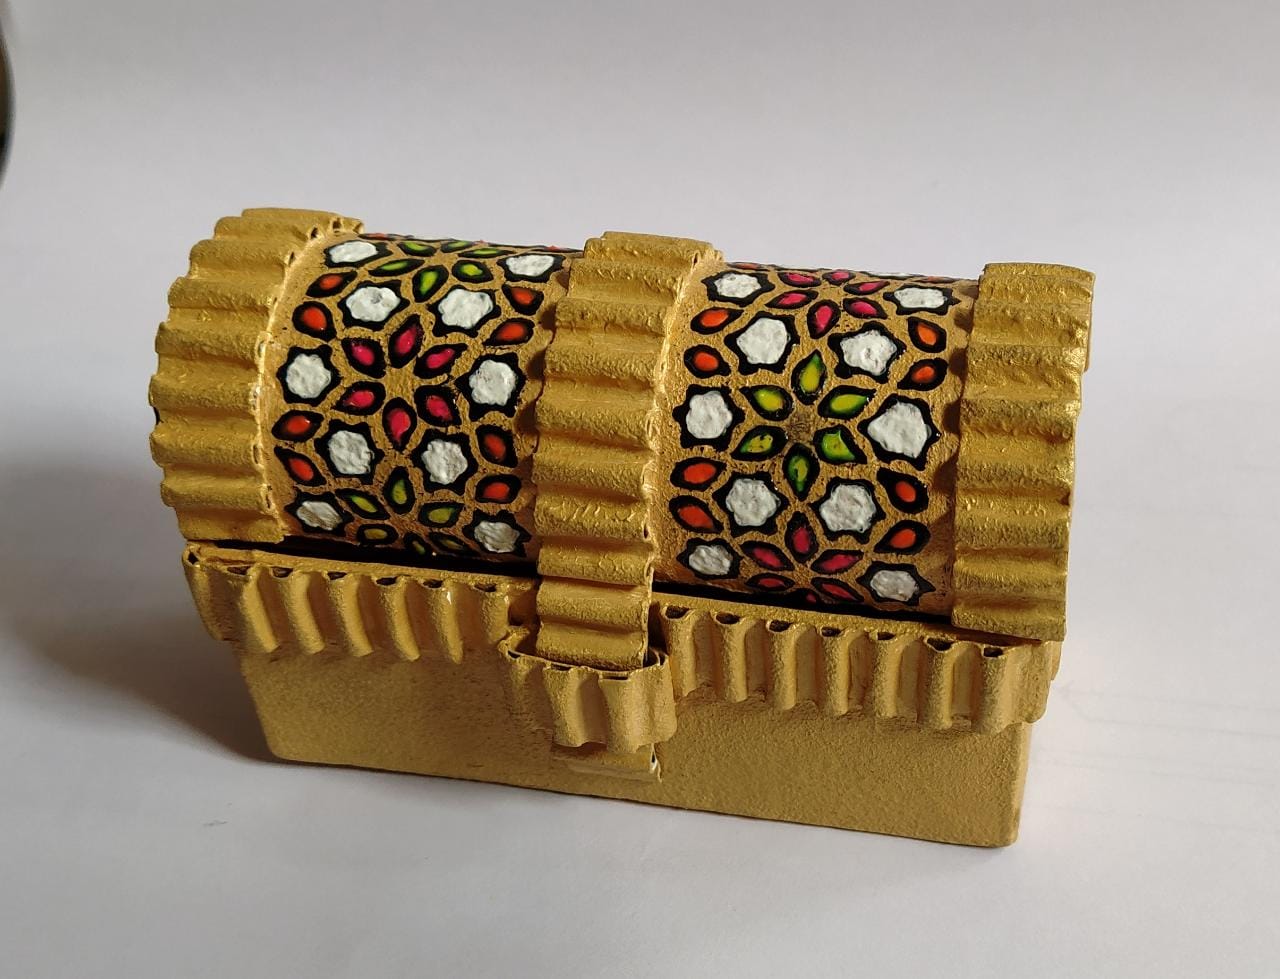
Using Fevicryl Acrylic Colour gold paint the box with the help of Fine art brushes and let it dry

Step - 06
With the help of pencil draw any geometric pattern of your choice onto the lid.

Step - 07
Using Fevicryl 3D Outliner of your choice fill up the design forms as shown and let it dry.

Step - 08
Take any coloured chart paper of your choice, and draw a rectangle to create a fanfold keeping a flap as shown in the image. Make sure the width of the chart paper is proportionate to treasure box created.

Step - 09
Fanfold the paper as shown.

Step - 10
With the help of felt pen write text “COUNTLESS MEMORIES TO CHERISH”, using Fevicol A+ stick pictures of your siblings and let it dry. Using Fevicol A+, attach the fanfold to the treasure box as shown and let it dry.
Steps to Create this Activity
Login to see steps
Step - 01
To create the treasure box, take tissue roll holder cut it into half, proportionate to the cut out, draw the diagram of treasure box i.e base, sides and strips as shown in the image with the help of pencil and scale.
Step - 02
Cut them with scissors.
Step - 03
Using Fevicol A+, assemble the parts as shown and let it dry. Make sure to check lid opens and shuts properly.
Step - 04
Using Fevicol A+, stick corrugated strips creating a lock for treasure box as shown and let it dry
Step - 05
Using Fevicryl Acrylic Colour gold paint the box with the help of Fine art brushes and let it dry
Step - 06
With the help of pencil draw any geometric pattern of your choice onto the lid.
Step - 07
Using Fevicryl 3D Outliner of your choice fill up the design forms as shown and let it dry.
Step - 08
Take any coloured chart paper of your choice, and draw a rectangle to create a fanfold keeping a flap as shown in the image. Make sure the width of the chart paper is proportionate to treasure box created.
Step - 09
Fanfold the paper as shown.
Step - 10
With the help of felt pen write text “COUNTLESS MEMORIES TO CHERISH”, using Fevicol A+ stick pictures of your siblings and let it dry. Using Fevicol A+, attach the fanfold to the treasure box as shown and let it dry.


