


Easy DIY Sorahi Art Coaster Craft for Kindergarteners - Activity Single - FeviCreate
Sorahi Coaster Craft Activity with Cardboard
Unleash the artist in your child with a DIY coaster craft activity! Using cardboard, chart paper, and quilling strips, your kids will have a blast creating this colourful sorahi art masterpiece. It's a fantastic way to nurture their creativity while learning the art of quilling.
Paper Crafting Brand me 30 to 60 mins 9 to 14 years Art & Craft Class 6


Steps to Create this Activity
Login to see steps

Step - 01
To create a coaster, take a sheet of mount board, draw and cut out a square measuring 15 cm approximately.

Step - 02
Referring to the template given, draw the sorahi motifs onto coloured chart paper orange, yellow and green with a felt pen. (Image Alt Tag: Sorahi Motifs Drawn on 3 Coloured Chart Papers )

Step - 03
Cut them with scissors. (Image Alt Tag: Cut Outs Made of the Chart Paper . )

Step - 04
Using Rangeela Tempera Colours, paint the patterns onto the motifs as shown in the image. Once dried, give an outline to the motifs with a felt pen. (Image Alt Tag: Motif Painted With Colours . )

Step - 05
To create coaster background, take coloured chart paper of your choice and cut out a square measuring it into 15cm. (Image Alt Tag: Coloured Chart Paper Used for Background Coaster )

Step - 06
Using Fevicol MR, assemble the motifs as shown in the image and let it dry (Image Alt Tag: Motifs Assembled With Glue )

Step - 07
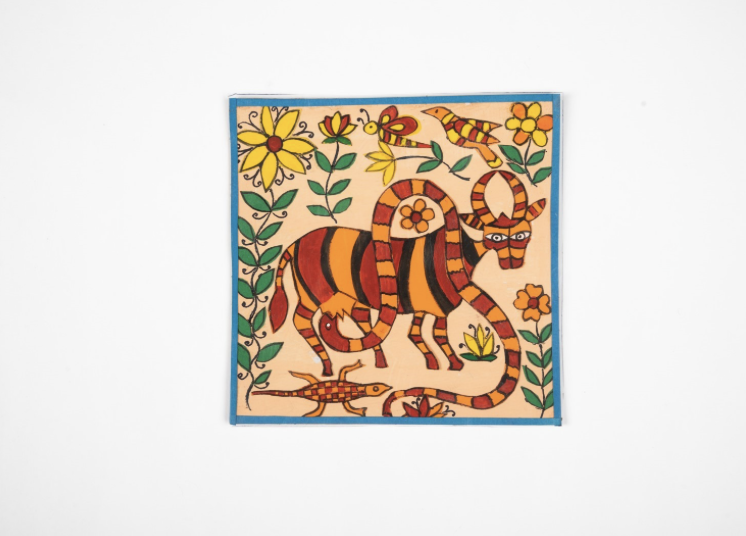
Take an OHP sheet, draw and cut out a square measuring 15 cm approximately. Using Fevicol MR, stick it over the coaster, make sure to stick from the edges. Take a coloured quilling strip of your choice and stick as a border to the coaster as shown and let it dry. Your handmade Sorahi coaster is ready! (Image Alt Tag: All Elements Assembled Using Glue, DIY Sorahi Coaster Is Ready)
Steps to Create this Activity
Login to see steps
Step - 01
To create a coaster, take a sheet of mount board, draw and cut out a square measuring 15 cm approximately.
Step - 02
Referring to the template given, draw the sorahi motifs onto coloured chart paper orange, yellow and green with a felt pen. (Image Alt Tag: Sorahi Motifs Drawn on 3 Coloured Chart Papers )
Step - 03
Cut them with scissors. (Image Alt Tag: Cut Outs Made of the Chart Paper . )
Step - 04
Using Rangeela Tempera Colours, paint the patterns onto the motifs as shown in the image. Once dried, give an outline to the motifs with a felt pen. (Image Alt Tag: Motif Painted With Colours . )
Step - 05
To create coaster background, take coloured chart paper of your choice and cut out a square measuring it into 15cm. (Image Alt Tag: Coloured Chart Paper Used for Background Coaster )
Step - 06
Using Fevicol MR, assemble the motifs as shown in the image and let it dry (Image Alt Tag: Motifs Assembled With Glue )
Step - 07
Take an OHP sheet, draw and cut out a square measuring 15 cm approximately. Using Fevicol MR, stick it over the coaster, make sure to stick from the edges. Take a coloured quilling strip of your choice and stick as a border to the coaster as shown and let it dry. Your handmade Sorahi coaster is ready! (Image Alt Tag: All Elements Assembled Using Glue, DIY Sorahi Coaster Is Ready)


