


DIY Regal Lion Rakhi Craft for Preschool Kids During Raksha Bandhan - Activity Single - FeviCreate
DIY Regal Lion Rakhi Craft With Cardboard & Chart Papers
Fevicreate Art & Craft Activities are structured activities that involve a step-by-step method to create an end product. This crafting journey gives you something to show, you enjoy your journey and get a sense of achievement too. What more can one ask for!
Mixed Media Celebration 30 to 60 mins 6 to 8 years Art & Craft Class 2


Steps to Create this Activity
Login to see steps

Step - 01
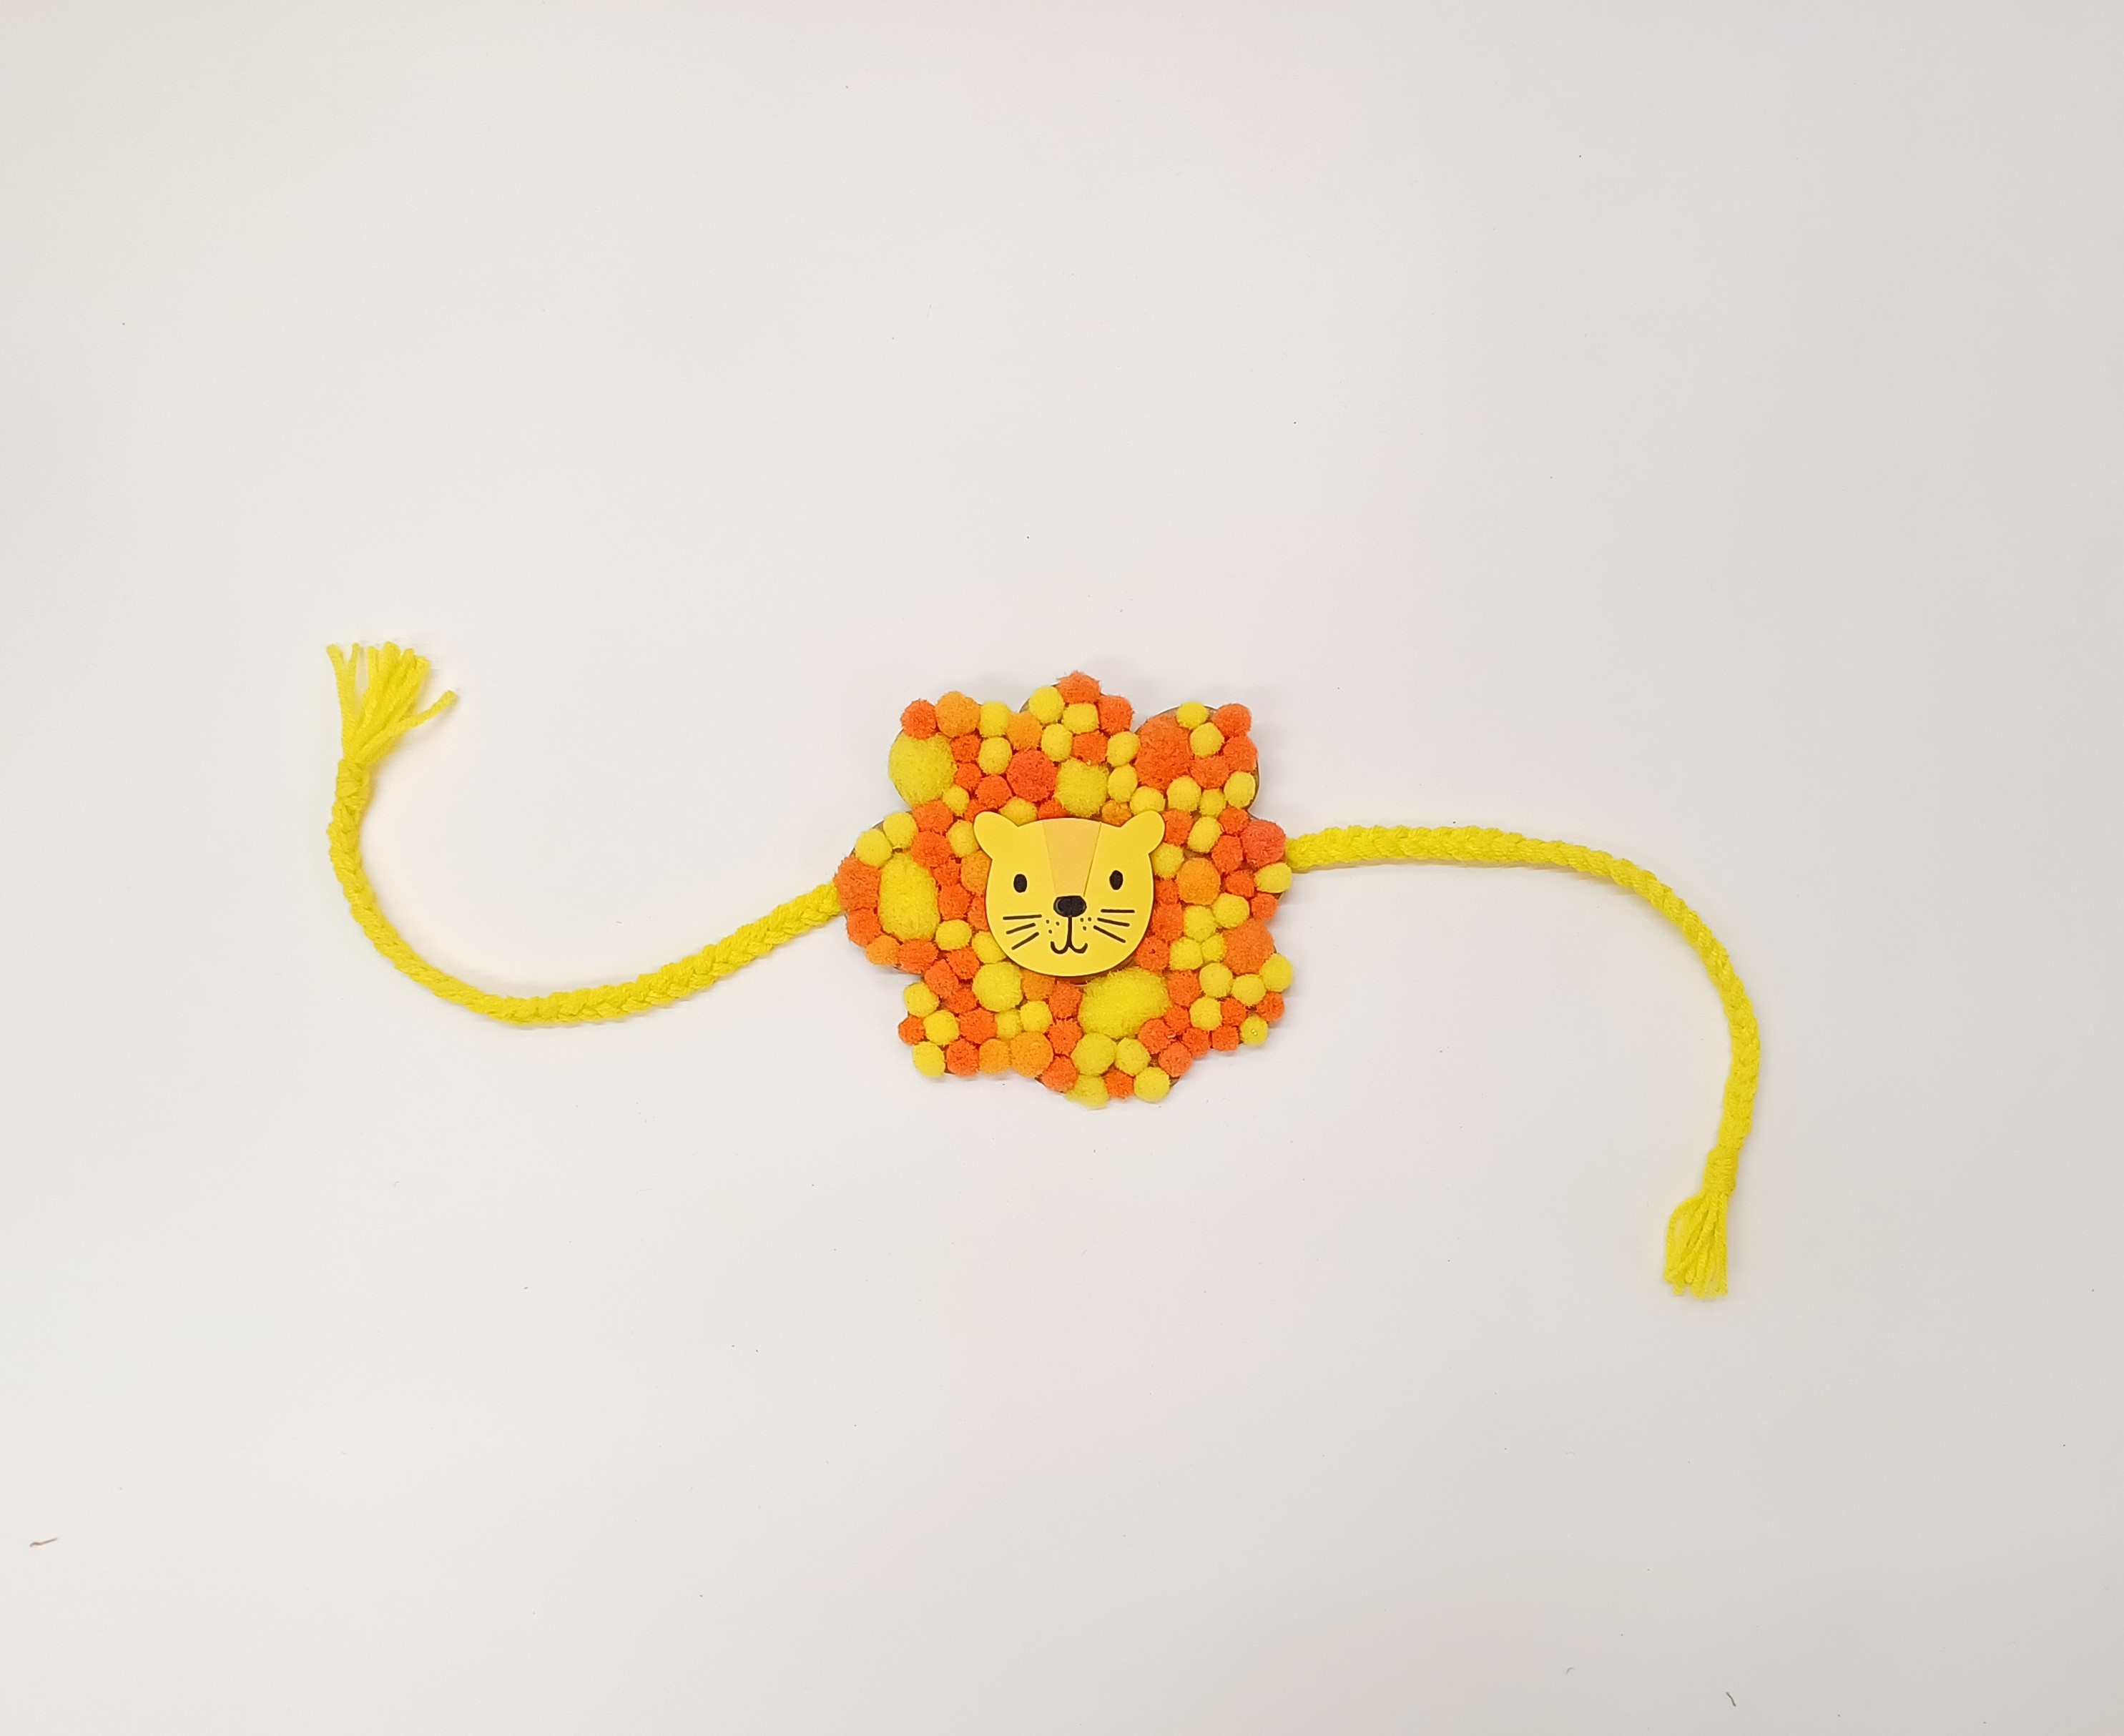
To create a lion rakhi, take a piece of cardboard and draw the mane referring to the shown image, or you can create one of your choice. To create the lion’s face, take colored chart paper of your choice and draw the lion’s face referring to the shown image. Use a felt pen to draw the features of the lion, i.e., eyes, nose, mouth, or you can create an illustrative lion of your choice.

Step - 02
Cut them with scissors. Using Fevistik Power, assemble the cut-outs as shown and let them dry.

Step - 03
Collect any three colored pompoms of your choice.

Step - 04
Using Fevistik Power, fill up the area of the mane with pompoms as shown and let it dry.

Step - 05
Assemble the face onto the mane as shown and then stick the structure onto any cord of your choice. Your handmade Rakhi is ready!
Steps to Create this Activity
Login to see steps
Step - 01
To create a lion rakhi, take a piece of cardboard and draw the mane referring to the shown image, or you can create one of your choice. To create the lion’s face, take colored chart paper of your choice and draw the lion’s face referring to the shown image. Use a felt pen to draw the features of the lion, i.e., eyes, nose, mouth, or you can create an illustrative lion of your choice.
Step - 02
Cut them with scissors. Using Fevistik Power, assemble the cut-outs as shown and let them dry.
Step - 03
Collect any three colored pompoms of your choice.
Step - 04
Using Fevistik Power, fill up the area of the mane with pompoms as shown and let it dry.
Step - 05
Assemble the face onto the mane as shown and then stick the structure onto any cord of your choice. Your handmade Rakhi is ready!


