


Students' Simple Clay Red Fort Model Craft by Fevicreate - Activity Single - FeviCreate
DIY Red Fort Model Craft Activity for Kids
Fevicreate Art & Craft Activities are fun and easy-to-follow projects that guide you step by step to make something special. You get to enjoy the process and feel proud of what you've created. What could be better than that?
Clay Modelling Brand me More than 60 mins 9 to 14 years Art & Craft Class 8


Steps to Create this Activity
Login to see steps

Step - 01
To create Red Fort, take a sheet of mount board, draw the diagram referring to the template given.

Step - 02
Cut them with scissors or paper cutter

Step - 03
Now take Rangeela creative Clay, to get the brown colour take the strip of red, yellow and blue clay and mix it thoroughly. Now take pink coloured clay and mix with brown coloured clay.After mixing clay thoroughly shade would look as shown in the image.

Step - 04
Referring to the image, create slabs of each coloured clay with the help of rolling pin cut out the elements of the fort with the help of paper cutter and stick it onto the mount board cut out using Fevicol A+ and let it dry. Now apply a thin layer of Fevicol A+ over with the help of fine art brushes and let I dry.

Step - 05
To create pendulum motion movement, take sheet of mount board draw and cut out the diagram referring to the template given creating a stand, as shown poke holes to the mount board. Now take paper straw make sure its height bigger than the fort made, using tri coloured chart paper create an Indian flag and stick it onto the straw using Fevicol A+ and let it dry, with the help of barbeque stick poke hole to paper straw below as shown in the image. Now collect a barbeque stick.

Step - 06
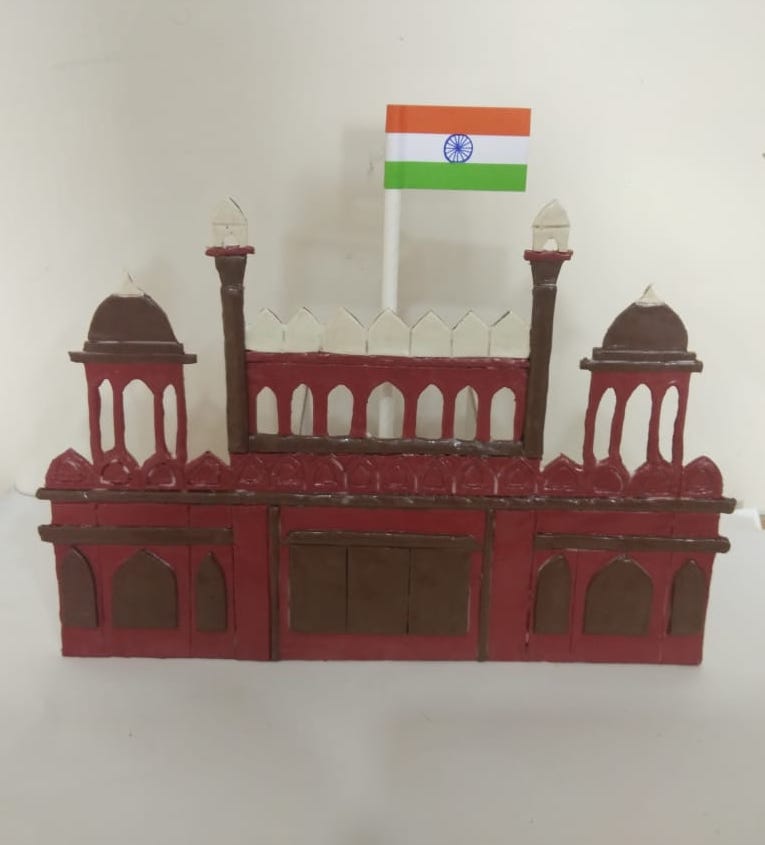
Once dried create Ashoka chakra onto the flag with the help of blue coloured felt pen. Now assemble the parts together as shown in the image

Step - 07
Using Fevicol A+, stick stand created behind and let it dry. Handmade Red Fort is ready
Steps to Create this Activity
Login to see steps
Step - 01
To create Red Fort, take a sheet of mount board, draw the diagram referring to the template given.
Step - 02
Cut them with scissors or paper cutter
Step - 03
Now take Rangeela creative Clay, to get the brown colour take the strip of red, yellow and blue clay and mix it thoroughly. Now take pink coloured clay and mix with brown coloured clay.After mixing clay thoroughly shade would look as shown in the image.
Step - 04
Referring to the image, create slabs of each coloured clay with the help of rolling pin cut out the elements of the fort with the help of paper cutter and stick it onto the mount board cut out using Fevicol A+ and let it dry. Now apply a thin layer of Fevicol A+ over with the help of fine art brushes and let I dry.
Step - 05
To create pendulum motion movement, take sheet of mount board draw and cut out the diagram referring to the template given creating a stand, as shown poke holes to the mount board. Now take paper straw make sure its height bigger than the fort made, using tri coloured chart paper create an Indian flag and stick it onto the straw using Fevicol A+ and let it dry, with the help of barbeque stick poke hole to paper straw below as shown in the image. Now collect a barbeque stick.
Step - 06
Once dried create Ashoka chakra onto the flag with the help of blue coloured felt pen. Now assemble the parts together as shown in the image
Step - 07
Using Fevicol A+, stick stand created behind and let it dry. Handmade Red Fort is ready


