


Vibrant Peacock Wall Decor with Fevicreate - Activity Single - FeviCreate
Peacock Wall Decor Craft
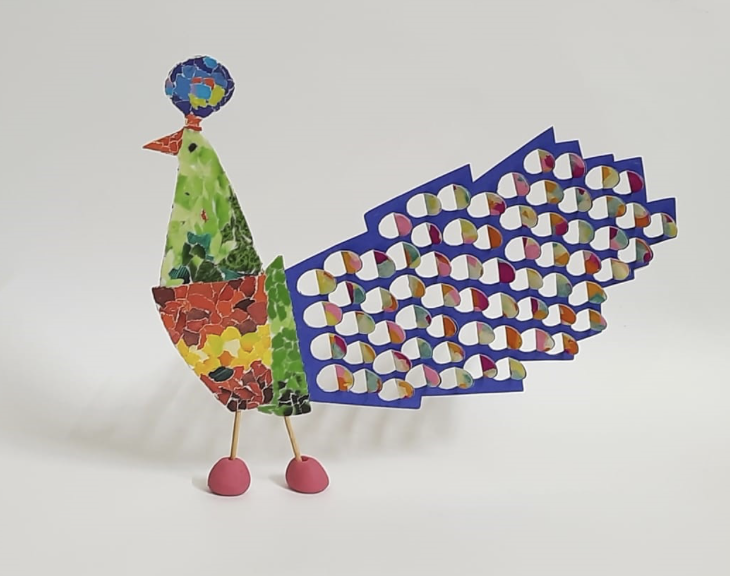
Unleash creativity with your kids and let them explore the joy of making a stunning DIY peacock decor craft. Use chart papers, magazine cutouts, and kite paper followed by our step-by-step guide for a vibrant and engaging artistic experience.
Paper Crafting Celebration 30 to 60 mins 9 to 14 years Art & Craft Class 8


Steps to Create this Activity
Login to see steps

Step - 01
To create peacock wall décor, take a sheet of A4 size white chart paper, now draw the contour of peacock referring to the template given with the help of pencil.

Step - 02
Cut them with scissors.

Step - 03
To create feathers of the peacock, take an A4 size sheet of dark blue chart paper, and draw the diagram referring to the template given as shown in the image.

Step - 04
Using Fevicol MR, stick cut out onto the white chart paper as shown and let it dry. Now take coloured kite papers of your choice and cut them into pieces as shown.

Step - 05
Using Fevicol MR, stick kite paper cut outs on the other side of peacock as shown and let it dry.

Step - 06
With the help of a paper cutter, cut out the semi-circle shape drawn as the feather form as shown. Make sure to cut out only “C” type structure. Now with the help of your fold it outwards as shown.

Step - 07
Now collect a magazine available, cut it into tiny pieces as shown.

Step - 08
Using Fevicol MR, stick cut outs onto rest of the structure remaining I.e., torso, neck and other face features made and let it dry.

Step - 09
Similarly, follow the same process onto the other side too.

Step - `10
To create a holder, take a barbeque stick divide it into 2, and now proportionately create legs according to the structure made and stick to the base below using Fevicol MR. To create feet, take Rangeela Creative Clay of your choice and create 2 small spheres, now insert a barbeque stick through the clay spheres as shown. Handmade peacock décor is ready!
Steps to Create this Activity
Login to see steps
Step - 01
To create peacock wall décor, take a sheet of A4 size white chart paper, now draw the contour of peacock referring to the template given with the help of pencil.
Step - 02
Cut them with scissors.
Step - 03
To create feathers of the peacock, take an A4 size sheet of dark blue chart paper, and draw the diagram referring to the template given as shown in the image.
Step - 04
Using Fevicol MR, stick cut out onto the white chart paper as shown and let it dry. Now take coloured kite papers of your choice and cut them into pieces as shown.
Step - 05
Using Fevicol MR, stick kite paper cut outs on the other side of peacock as shown and let it dry.
Step - 06
With the help of a paper cutter, cut out the semi-circle shape drawn as the feather form as shown. Make sure to cut out only “C” type structure. Now with the help of your fold it outwards as shown.
Step - 07
Now collect a magazine available, cut it into tiny pieces as shown.
Step - 08
Using Fevicol MR, stick cut outs onto rest of the structure remaining I.e., torso, neck and other face features made and let it dry.
Step - 09
Similarly, follow the same process onto the other side too.
Step - `10
To create a holder, take a barbeque stick divide it into 2, and now proportionately create legs according to the structure made and stick to the base below using Fevicol MR. To create feet, take Rangeela Creative Clay of your choice and create 2 small spheres, now insert a barbeque stick through the clay spheres as shown. Handmade peacock décor is ready!


