


Creative DIY Mirror Frame Activity for Kids - Activity Single - FeviCreate
DIY Mirror Frame Craft for Kids
Fevicreate Art & Craft Activities are structured activities that involve a step by step method to create an end product. This crafting journey gives you something to show, you enjoy your journey and get a sense of achievement too. What more can one ask for!
Mixed Media Best Out of Waste 30 to 60 mins 9 to 14 years Art & Craft Class 6


Steps to Create this Activity
Login to see steps

Step - 01
To create base of the frame, take A4 sheet of mount board , black foam sheet and sheet. Now draw and cut out a rectangle measuring it into 9”x7” approx.

Step - 02
To create frame, take any A4 coloured felt sheet of your choice, draw and cut-out a frame measuring it into 9”x7” keeping width of 1” approx. Using Fevicol A+ assemble the cut-outs overlapping one another as shown and let it dry.

Step - 03
To create flowers, take a sheet of white chart paper and draw the diagram of petals as shown in the image with the help of pencil.

Step - 04
Cut them with scissors.

Step - 05
To create buds of the flower, take a small piece of flower wire, and wrap yellow coloured kite paper around it seal the edges using Fevicol A+ and let it dry.

Step - 06
To create the stem, take piece of flower wire, and attach flower buds. Now using fevicol A+, stick petals around it and let it dry now. Take green coloured kite paper, wrap it around the flower wire as shown and seal the edges using Fevicol A+

Step - 07
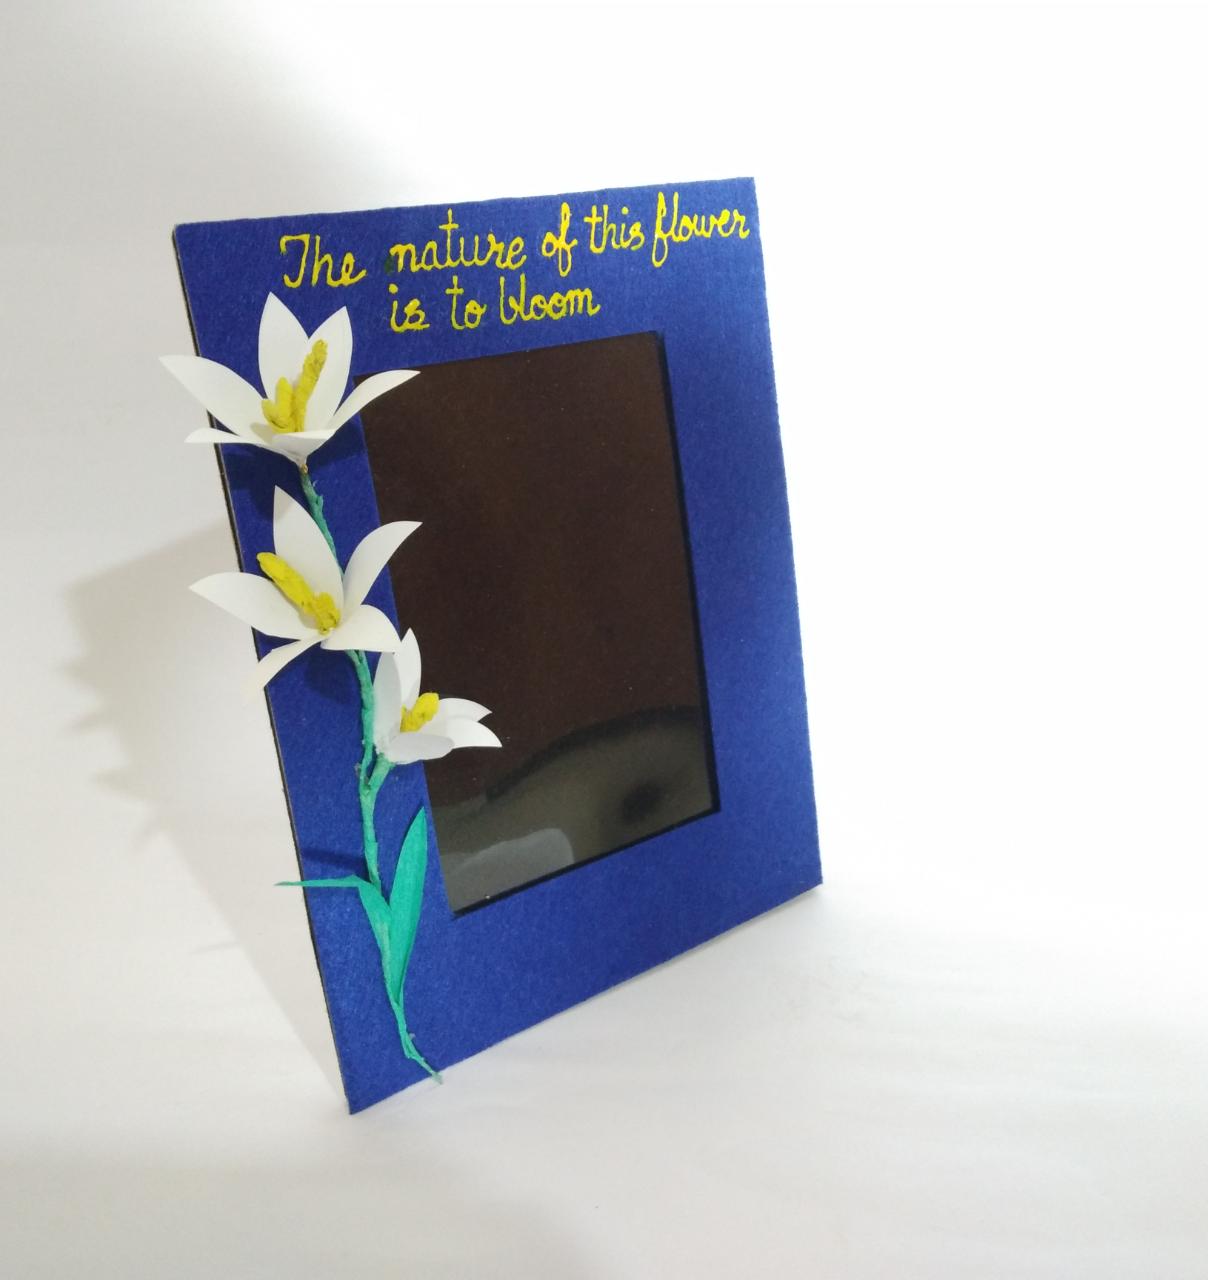
Using Fevicol A+, stick bouquet of flowers on any of the side and let it dry, now using Fevicryl 3D Outliner write “THE NATURE OF THIS FLOWER IS TO BLOOM”. Now take a piece of mount board and create frame holder as shown

Step - 08
Using Fevicol A+, stick the holder behind and let it dry.
Steps to Create this Activity
Login to see steps
Step - 01
To create base of the frame, take A4 sheet of mount board , black foam sheet and sheet. Now draw and cut out a rectangle measuring it into 9”x7” approx.
Step - 02
To create frame, take any A4 coloured felt sheet of your choice, draw and cut-out a frame measuring it into 9”x7” keeping width of 1” approx. Using Fevicol A+ assemble the cut-outs overlapping one another as shown and let it dry.
Step - 03
To create flowers, take a sheet of white chart paper and draw the diagram of petals as shown in the image with the help of pencil.
Step - 04
Cut them with scissors.
Step - 05
To create buds of the flower, take a small piece of flower wire, and wrap yellow coloured kite paper around it seal the edges using Fevicol A+ and let it dry.
Step - 06
To create the stem, take piece of flower wire, and attach flower buds. Now using fevicol A+, stick petals around it and let it dry now. Take green coloured kite paper, wrap it around the flower wire as shown and seal the edges using Fevicol A+
Step - 07
Using Fevicol A+, stick bouquet of flowers on any of the side and let it dry, now using Fevicryl 3D Outliner write “THE NATURE OF THIS FLOWER IS TO BLOOM”. Now take a piece of mount board and create frame holder as shown
Step - 08
Using Fevicol A+, stick the holder behind and let it dry.


