


Creative DIY Mini TV Craft Ideas for Students - Activity Single - FeviCreate
DIY Mini TV Craft Ideas
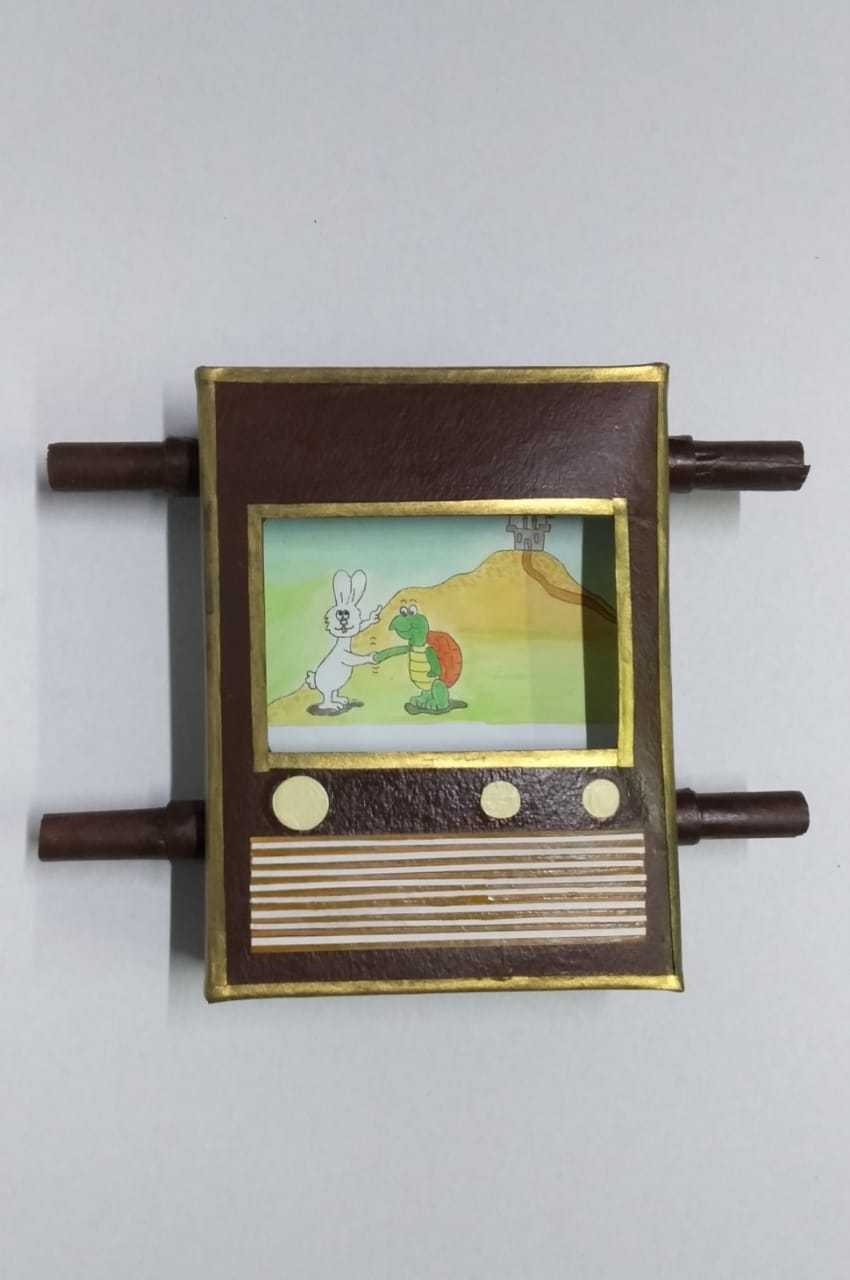
Create your cartoon episode with this mechanical craft diy TV
Paper Crafting Brand me More than 60 mins 9 to 14 years Art & Craft Class 7


Steps to Create this Activity
Login to see steps

Step - 01
Take a sheet of mount board, draw the diagram from the given template with the help of pencil

Step - 02
Cut it with the help of paper cutter. Now using scale and paper cutter fold the flaps. Referring to template given. Take parental guidance if necessary.

Step - 03
Take a sheet of newspaper and roll it into a thick coil, make sure coil is thick enough to be inserted through the circles cut in mount board sheet. Refer to the template given.

Step - 04
Now take A4 size white chart papers, draw the diagram referring the template given with the help of pencil and scale, make sure each rectangle drawn are precise in size.

Step - 05
Cut them with help of scissors

Step - 06
Now with the help of pencil draw the characters of your favourite story. Here we have story characters of “Hare and the Tortoise”. Depict your favourite story or create your own imaginative characters and make a story board as shown.

Step - 07
Using Fevicrly Acrylic Colours of your choice paint it with the help of fine art brushes and let it dry. Now out line it with felt pen or CD marker

Step - 08
Now take a piece of white chart paper, draw and cut two rectangles as per the template given to keep margins on the story roll.

Step - 09
Using Fevicol A+, assemble all the story cut-outs by overlapping one another and stick two cut white rectangles one above and one below as shown to keep margin, make sure you stick cut outs according to story sequence

Step - 10
To create story strip, take newspaper paper thick coil, using Fevicol A+ stick story strip edges to the coil as shown.

Step - 11
Now roll story strip inwards as shown .Insert the coil through circles as shown, make sure coil are thick enough to stay intact

Step - 12
To create mini TV, seal the flaps of the box using Fevciol A+ and let it dry.

Step - 13
Using Fevicryl Acrylic Colour of your choice paint it using fine art brushes and let it dry.

Step - 14
To further decorate mini TV you can stick elements as shown. Your personalised Mini TV is ready.
Steps to Create this Activity
Login to see steps
Step - 01
Take a sheet of mount board, draw the diagram from the given template with the help of pencil
Step - 02
Cut it with the help of paper cutter. Now using scale and paper cutter fold the flaps. Referring to template given. Take parental guidance if necessary.
Step - 03
Take a sheet of newspaper and roll it into a thick coil, make sure coil is thick enough to be inserted through the circles cut in mount board sheet. Refer to the template given.
Step - 04
Now take A4 size white chart papers, draw the diagram referring the template given with the help of pencil and scale, make sure each rectangle drawn are precise in size.
Step - 05
Cut them with help of scissors
Step - 06
Now with the help of pencil draw the characters of your favourite story. Here we have story characters of “Hare and the Tortoise”. Depict your favourite story or create your own imaginative characters and make a story board as shown.
Step - 07
Using Fevicrly Acrylic Colours of your choice paint it with the help of fine art brushes and let it dry. Now out line it with felt pen or CD marker
Step - 08
Now take a piece of white chart paper, draw and cut two rectangles as per the template given to keep margins on the story roll.
Step - 09
Using Fevicol A+, assemble all the story cut-outs by overlapping one another and stick two cut white rectangles one above and one below as shown to keep margin, make sure you stick cut outs according to story sequence
Step - 10
To create story strip, take newspaper paper thick coil, using Fevicol A+ stick story strip edges to the coil as shown.
Step - 11
Now roll story strip inwards as shown .Insert the coil through circles as shown, make sure coil are thick enough to stay intact
Step - 12
To create mini TV, seal the flaps of the box using Fevciol A+ and let it dry.
Step - 13
Using Fevicryl Acrylic Colour of your choice paint it using fine art brushes and let it dry.
Step - 14
To further decorate mini TV you can stick elements as shown. Your personalised Mini TV is ready.


