


Handmade DIY Name Plate Ideas – Kite Name Plate Craft & Personalised Decor | Fevicreate - Activity Single - FeviCreate
Candy Stick Kite
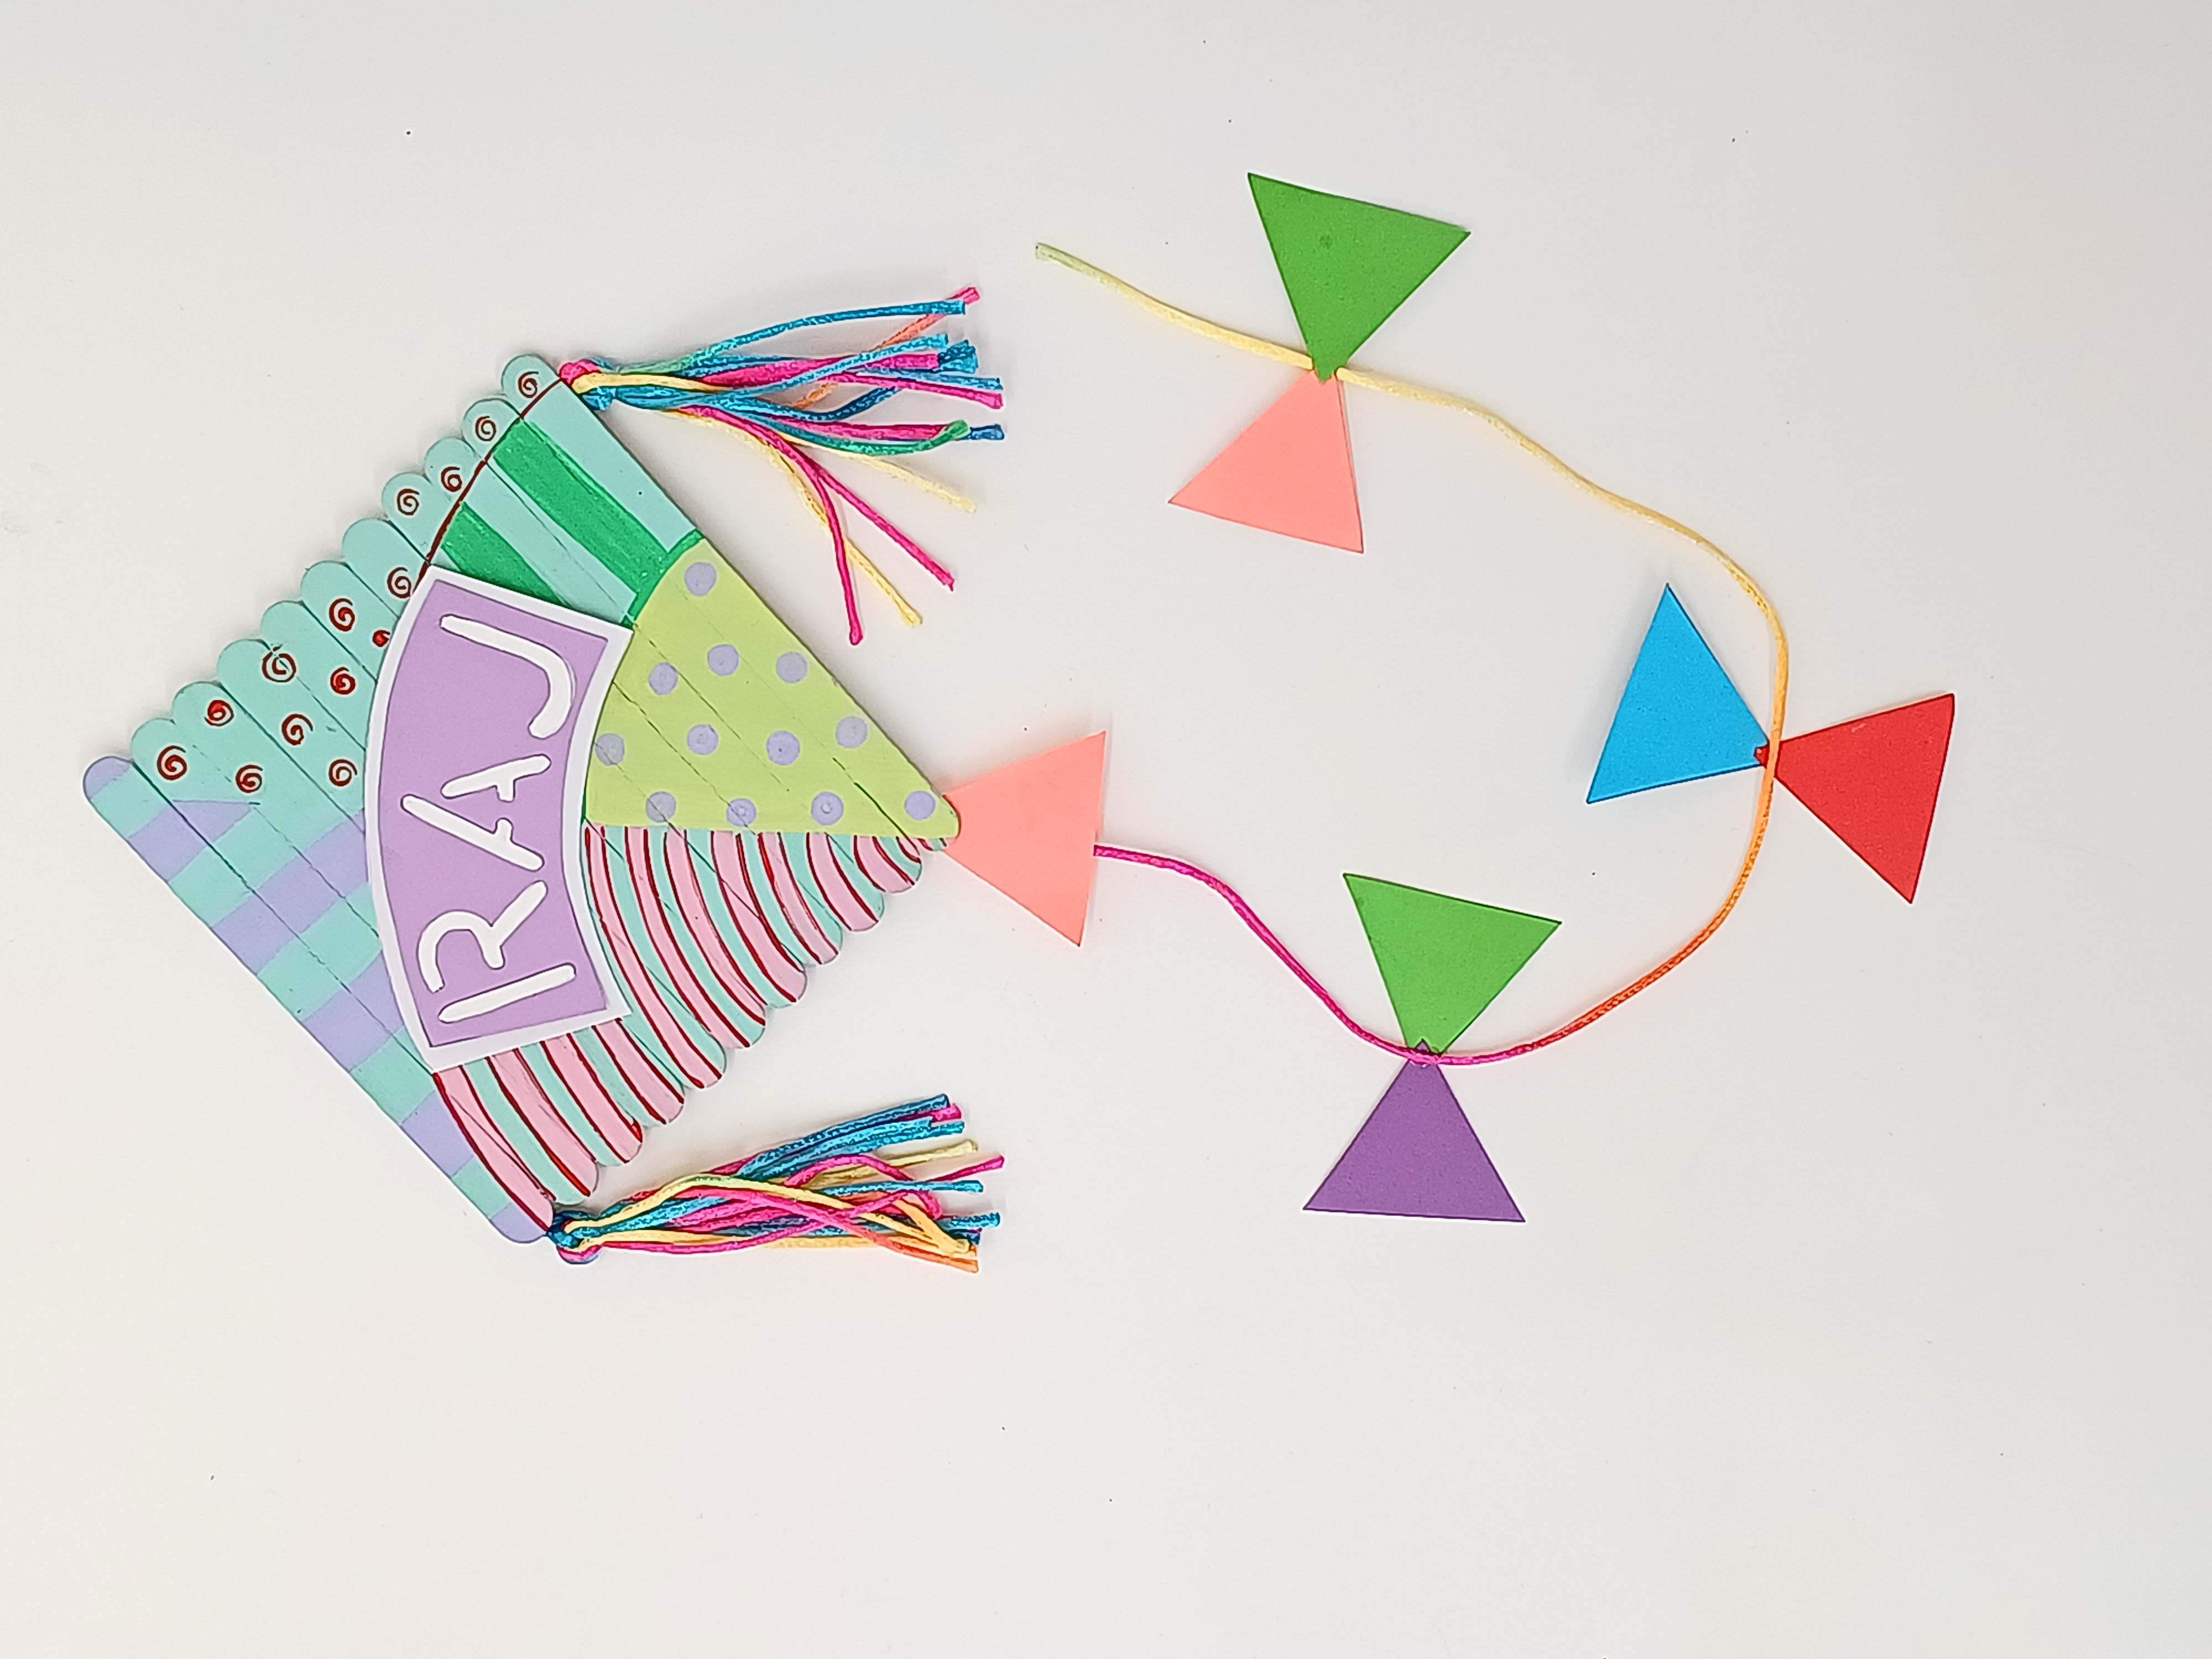
This playful kite decor is ingeniously crafted from candy sticks, transformed into a vibrant miniature kite. Each stick is brightly painted with colors from the Rangeela Tempera Pastel Colours, creating an eye-catching pattern. Colourful threads and paper cutouts are attached to mimic the kite's tail, adding a festive touch. This charming piece is a perfect example of creative recycling, bringing joy and colour to any space.
Allow kids to design personalized kite nameplates with this creative DIY project. It’s an engaging way for children to combine artistic expression with the joy of celebrating Makar Sankranti.
Painting Celebration 30 to 60 mins 6 to 8 years Art & Craft Class 5


Steps to Create this Activity
Login to see steps

Step - 01
Grab a thick white sheet and cut it into a square that’s 12 cm on each side. Collect some ice cream sticks.

Step - 02
Use Fevistik Power glue to stick the ice cream sticks onto your square, following the design you have in mind.

Step - 03
With Rangeela Tempera Unicorn Colours and some paint brushes, paint your creation. Let it dry completely

Step - 04
Once its dry, take your favourite Rangeela Tempera Unicorn Colours and divide your nameplate into four sections. Use Fine Art Brushes to make fun patterns in each section.

Step - 05
To make bunting and a tail for the kite, take some coloured chart papers and cut them into triangles that will fit well with your kite shape. Use a piece of cord to attach them.

Step - 06
Use Fevistik Power glue to put everything together, just like in your design, and let it dry again.

Step - 07
Using coloured chart paper of your choice, draw and cut out an arc shape that matches your structure. Write your name on it with a felt pen. Your handmade nameplate is now ready.
Steps to Create this Activity
Login to see steps
Step - 01
Grab a thick white sheet and cut it into a square that’s 12 cm on each side. Collect some ice cream sticks.
Step - 02
Use Fevistik Power glue to stick the ice cream sticks onto your square, following the design you have in mind.
Step - 03
With Rangeela Tempera Unicorn Colours and some paint brushes, paint your creation. Let it dry completely
Step - 04
Once its dry, take your favourite Rangeela Tempera Unicorn Colours and divide your nameplate into four sections. Use Fine Art Brushes to make fun patterns in each section.
Step - 05
To make bunting and a tail for the kite, take some coloured chart papers and cut them into triangles that will fit well with your kite shape. Use a piece of cord to attach them.
Step - 06
Use Fevistik Power glue to put everything together, just like in your design, and let it dry again.
Step - 07
Using coloured chart paper of your choice, draw and cut out an arc shape that matches your structure. Write your name on it with a felt pen. Your handmade nameplate is now ready.


