


Craft a Heritage Photo Frame to Display Your Memories! - Activity Single - FeviCreate
DIY HERITAGE PHOTOFRAME
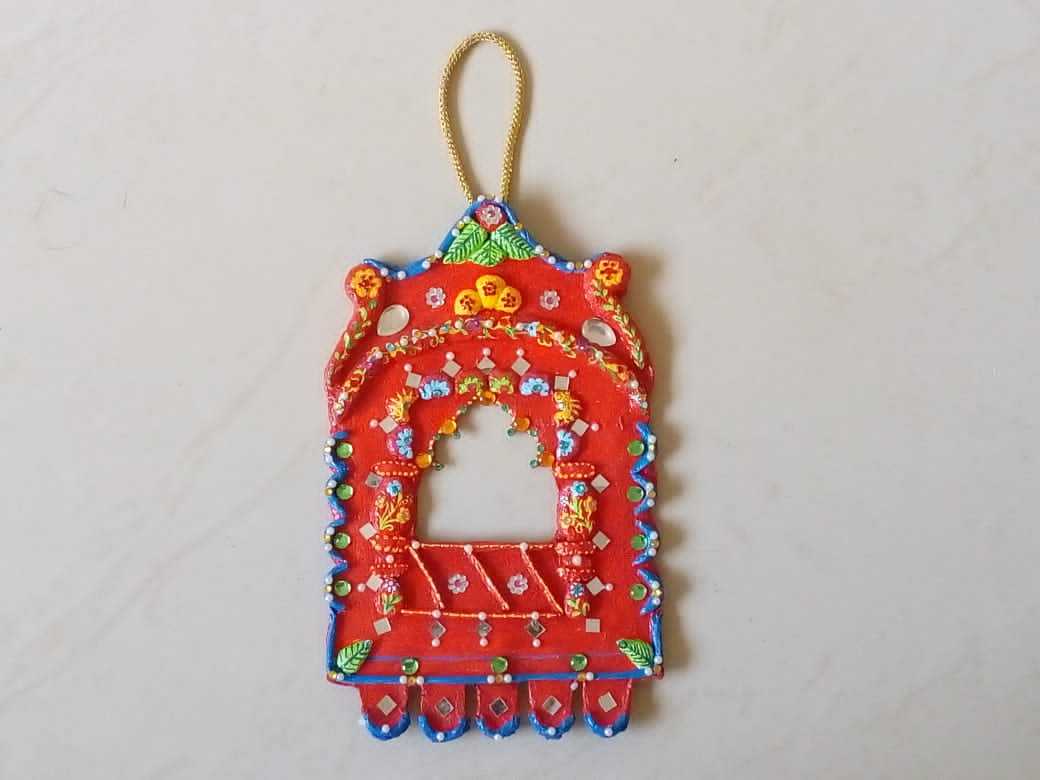
Craft a heritage-themed photo frame using paper, motifs, and colors inspired by traditional art. This project gives kids a chance to explore cultural aesthetics while creating a personalized frame that highlights cherished family photos or memories.
Paper Crafting Paper Crafting More than 60 mins 9 to 14 years Art & Craft Class 8


Steps to Create this Activity
Login to see steps

Step - 01
To make papier mache pulp, take a bowl and make a mixture of newspaper pieces and Fevicol A+, make sure to mix it well until you get thick glue-like consistency. Add bit of water if it's too thick. To get proper result keep the mixture for 24 hrs approx.

Step - 02
To create photo frame, take white coloured chart paper draw any heritage design as shown with the help of pencil.

Step - 03
Now trace out contour design onto ohp sheet and cut it with the help of paper cutter, now place a plastic sheet and create a slab with help of rolling pin as shown. Make sure surface is even from all the sides

Step - 04
Now place the ohp cut out onto the slab as shown

Step - 05
Once semi dried, cut it with the help of paper cutter.

Step - 06
Using paper Mache create elements following the design drawn make sure elements done are symmetrical. Using Fevicol A+, stick each element as shown

Step - 07
Using Fevicrly Acrylic Color white, paint it as base coat with the help of fine art brushes and let it dry

Step - 08
Using Fevicryl Acrylic colour of your choice paint it with the help of fine art brushes. To enhance decorate it with mirrors and other embellishments using Fevicol A+. Now take any cord create a loop and hook it from behind.
Steps to Create this Activity
Login to see steps
Step - 01
To make papier mache pulp, take a bowl and make a mixture of newspaper pieces and Fevicol A+, make sure to mix it well until you get thick glue-like consistency. Add bit of water if it's too thick. To get proper result keep the mixture for 24 hrs approx.
Step - 02
To create photo frame, take white coloured chart paper draw any heritage design as shown with the help of pencil.
Step - 03
Now trace out contour design onto ohp sheet and cut it with the help of paper cutter, now place a plastic sheet and create a slab with help of rolling pin as shown. Make sure surface is even from all the sides
Step - 04
Now place the ohp cut out onto the slab as shown
Step - 05
Once semi dried, cut it with the help of paper cutter.
Step - 06
Using paper Mache create elements following the design drawn make sure elements done are symmetrical. Using Fevicol A+, stick each element as shown
Step - 07
Using Fevicrly Acrylic Color white, paint it as base coat with the help of fine art brushes and let it dry
Step - 08
Using Fevicryl Acrylic colour of your choice paint it with the help of fine art brushes. To enhance decorate it with mirrors and other embellishments using Fevicol A+. Now take any cord create a loop and hook it from behind.


