


How to Make DIY Helmet for Kids by Fevicreate - Activity Single - FeviCreate
How to Make DIY Helmet for Kids
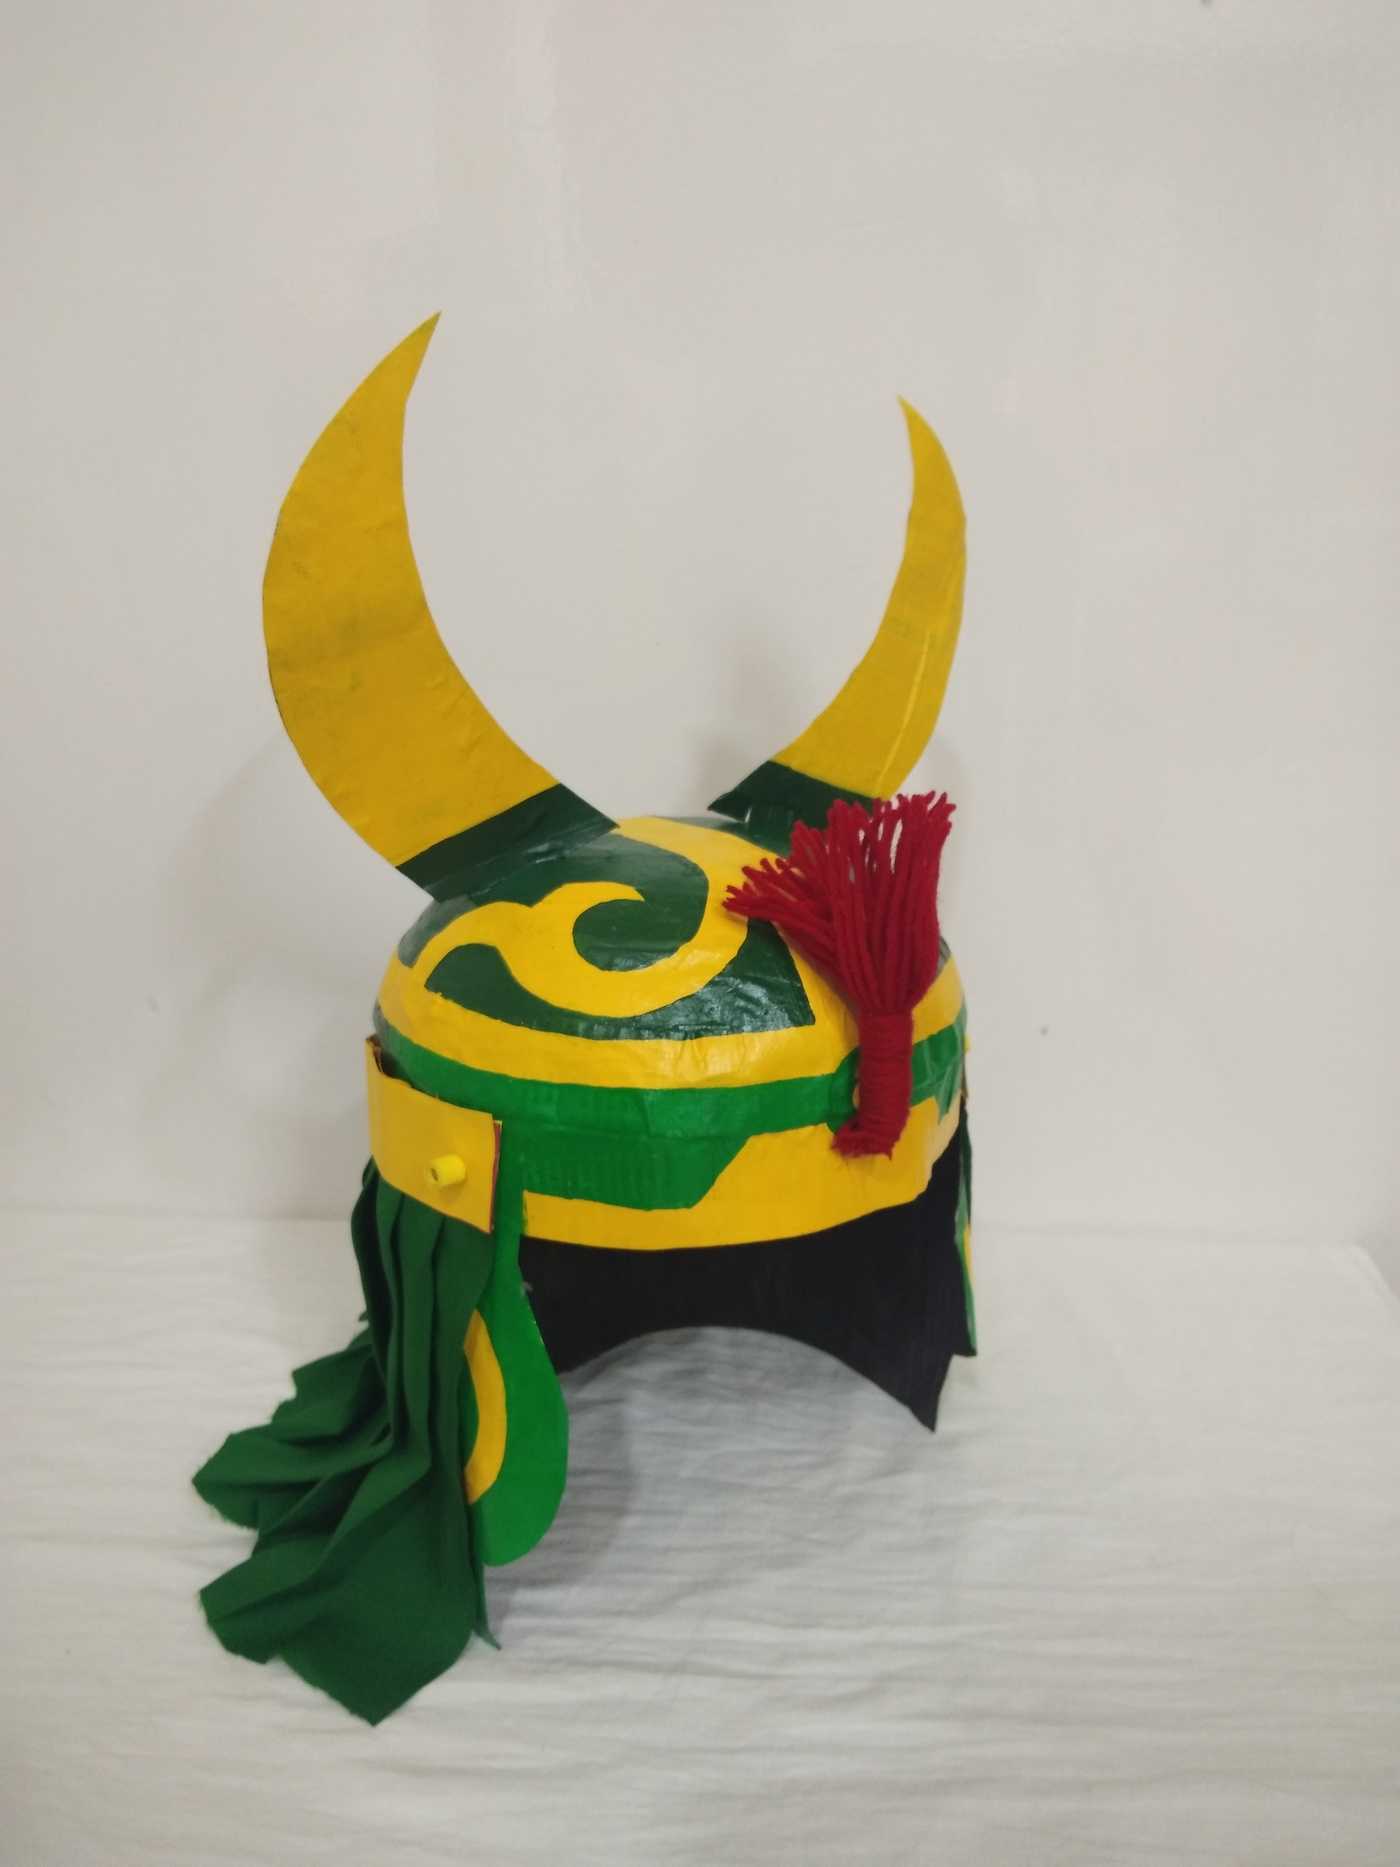
Be a super hero with the wearable warrior helmet using paper and fevicol
Paper Crafting Paper Crafting More than 60 mins 9 to 14 years Art & Craft Class 7


Steps to Create this Activity
Login to see steps

Step - 01
Take a bowl or balloon make sure it is specifically measured according to your head size. Now make a mixture of Fevicol A+ and water. Now apply a thin layer of body lotion or oil onto bowl and then start sticking newspaper strips to create helmet mould as shown. Now to create thick newspaper layered sheet, take few newspaper and stick layer overlapping one another using the mixture and let it dry.

Step - 02
To create helmet, peel out the mould from bowl once its dried. Now with the help of template given, draw the design onto helmet and on helmet’s side attachments with the help of feltpen/CD Marker. Make sure design you make on both the elements are aligned

Step - 03
With the help of scissors cut the parts of helmet’s side attachments. Now for horns slit the base into half

Step - 04
To create a helmet, assemble all the parts and stick it using Fevicol A+. Make sure that the design done on helmet and on the helmet’s side attachment are aligned while sticking as shown

Step - 05
Using Fevicryl Acrylic Colour of Your choice paint the helmet with the help of fine art brushes and let it dry

Step - 06
Similarly, to enhance your helmet, you can accessorise it with any fabric of your choice and head brooch which can be made from wool or any decorative material available at home

Step - 07
You can attach OHP sheet around the helmet as shown to make a shield kind of a structure.
Steps to Create this Activity
Login to see steps
Step - 01
Take a bowl or balloon make sure it is specifically measured according to your head size. Now make a mixture of Fevicol A+ and water. Now apply a thin layer of body lotion or oil onto bowl and then start sticking newspaper strips to create helmet mould as shown. Now to create thick newspaper layered sheet, take few newspaper and stick layer overlapping one another using the mixture and let it dry.
Step - 02
To create helmet, peel out the mould from bowl once its dried. Now with the help of template given, draw the design onto helmet and on helmet’s side attachments with the help of feltpen/CD Marker. Make sure design you make on both the elements are aligned
Step - 03
With the help of scissors cut the parts of helmet’s side attachments. Now for horns slit the base into half
Step - 04
To create a helmet, assemble all the parts and stick it using Fevicol A+. Make sure that the design done on helmet and on the helmet’s side attachment are aligned while sticking as shown
Step - 05
Using Fevicryl Acrylic Colour of Your choice paint the helmet with the help of fine art brushes and let it dry
Step - 06
Similarly, to enhance your helmet, you can accessorise it with any fabric of your choice and head brooch which can be made from wool or any decorative material available at home
Step - 07
You can attach OHP sheet around the helmet as shown to make a shield kind of a structure.


