


Create a Beautiful Ganesh Lamp for Festivals - Easy Craft - Activity Single - FeviCreate
Ganpati Lamp Craft Ideas for the Ganesh Festival.
Decorating Ganpati lamps is a wonderful way to show your devotion and creativity during this special festival. Using Fevicreate and adding your personal touches will make your Ganesh Ji lamp both beautiful and eye-catching.
Mixed Media Celebration More than 60 mins 9 to 14 years Art & Craft Class 7


Steps to Create this Activity
Login to see steps

Step - 01
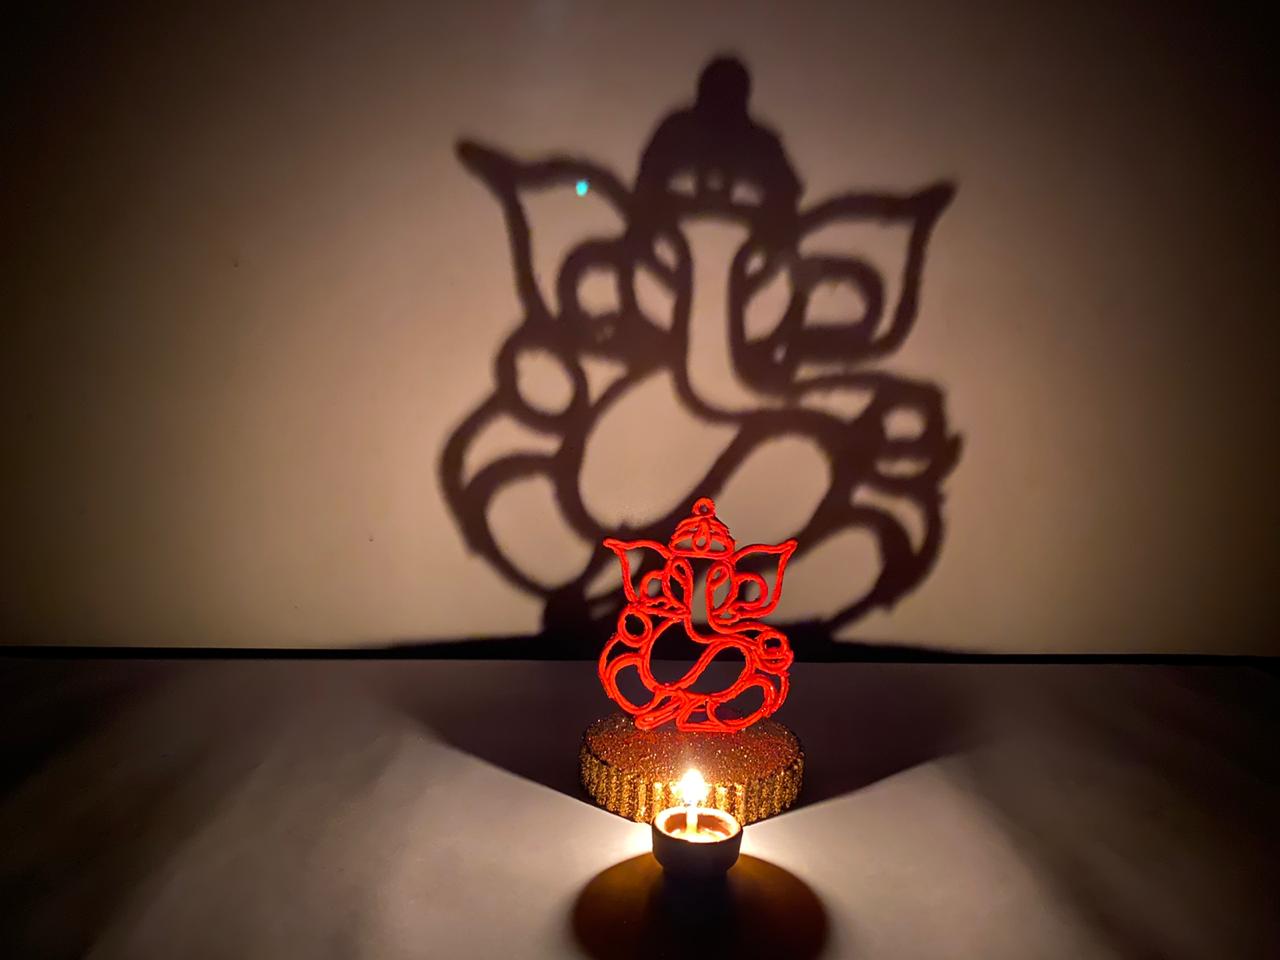
To create a Ganesha lamp/ shadow backdrop, draw a Ganesha design of your choice or can draw the design referring to the image with the help of felt pen. Now place an OHP Sheet over it as shown

Step - 02
Apply Fevicol A+ following the drawing as shown

Step - 03
Now stick a cobbler cord over it and let it dry.

Step - 04
Using Fevicol A+, layer the structure at least 3-4 times with the help of cobbler cord. Once the structure is completely dried, peel it off from the OHP sheet. Make sure the structure made is stiff.

Step - 05
Using Rangeela Tempera colour of your choice paint structure with the help of fine art brushes and let it dry.

Step - 06
To create base, take corrugated sheet, draw and cut the diagram proportion to the structure made

Step - 07
Using Fevicol A+ assemble the cut outs and let it dry.

Step - 08
Using Fevicol A+, Apply glitter powder to the base as shown and let it dry. Now with the help of a paper cutter give a slit to the base to insert the structure made.

Step - 09
Insert the structure through the slit as shown. For it to stay intact apply Fevicol A+ to edges of the structure and let it dry.

Step - 10
Your handmade lamp is ready!
Steps to Create this Activity
Login to see steps
Step - 01
To create a Ganesha lamp/ shadow backdrop, draw a Ganesha design of your choice or can draw the design referring to the image with the help of felt pen. Now place an OHP Sheet over it as shown
Step - 02
Apply Fevicol A+ following the drawing as shown
Step - 03
Now stick a cobbler cord over it and let it dry.
Step - 04
Using Fevicol A+, layer the structure at least 3-4 times with the help of cobbler cord. Once the structure is completely dried, peel it off from the OHP sheet. Make sure the structure made is stiff.
Step - 05
Using Rangeela Tempera colour of your choice paint structure with the help of fine art brushes and let it dry.
Step - 06
To create base, take corrugated sheet, draw and cut the diagram proportion to the structure made
Step - 07
Using Fevicol A+ assemble the cut outs and let it dry.
Step - 08
Using Fevicol A+, Apply glitter powder to the base as shown and let it dry. Now with the help of a paper cutter give a slit to the base to insert the structure made.
Step - 09
Insert the structure through the slit as shown. For it to stay intact apply Fevicol A+ to edges of the structure and let it dry.
Step - 10
Your handmade lamp is ready!


