


Create an Easter Photo Frame to Celebrate the Holiday! - Activity Single - FeviCreate
How to Make Easter Photo Frame
Celebrate Easter by making a cheerful photo frame using pastels, stickers, and paper. Kids can craft something joyful to hold special spring memories or drawings. It’s a fun way to combine seasonal festivity with simple crafting techniques.
Clay Modelling Clay Modelling 30 to 60 mins 6 to 8 years Art & Craft Class 3


Steps to Create this Activity
Login to see steps

Step - 01
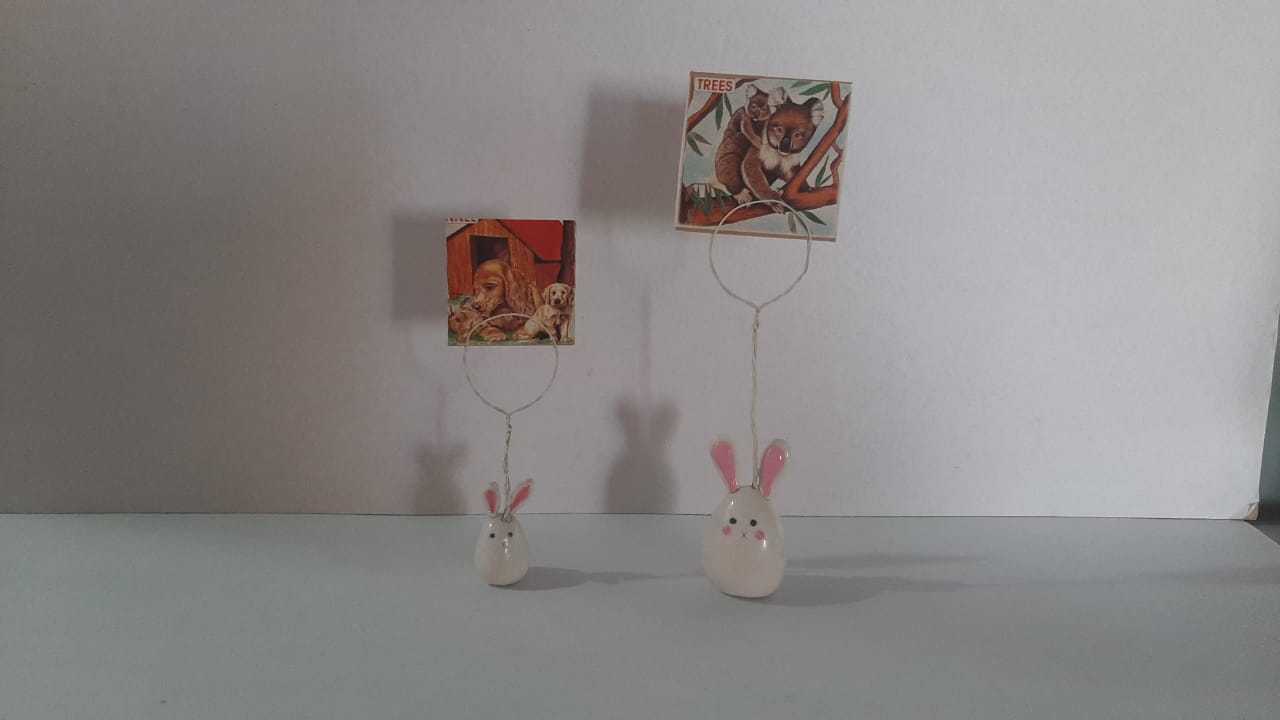
To create easter photo frame, take Rangeela creative Clay of your choice and create bunny and its features measuring it into 2” approx. Make sure features are proportionate

Step - 02
Using Fevicol A+, assemble it as shown and let it dry.

Step - 03
To create a photo holder, take flower wire and create a loop structure as shown

Step - 04
Now insert the holder onto bunny made as shown. Now apply a layer of Fevicol A+ with the help of Fine Art Brushes and let it dry

Step - 05
Personalised photo frame is ready!
Steps to Create this Activity
Login to see steps
Step - 01
To create easter photo frame, take Rangeela creative Clay of your choice and create bunny and its features measuring it into 2” approx. Make sure features are proportionate
Step - 02
Using Fevicol A+, assemble it as shown and let it dry.
Step - 03
To create a photo holder, take flower wire and create a loop structure as shown
Step - 04
Now insert the holder onto bunny made as shown. Now apply a layer of Fevicol A+ with the help of Fine Art Brushes and let it dry
Step - 05
Personalised photo frame is ready!


