


DIY Easter Bunny Basket Craft Ideas Activity - Activity Single - FeviCreate
How to Make a DIY Bunny Basket Using Corrugated Sheets & Clay
Fevicreate Art & Craft Activities are structured activities that involve a step-by-step method to create an end product. This crafting journey gives you something to show, you enjoy your journey and get a sense of achievement too. What more can one ask for!
Clay Modelling Celebration 30 to 60 mins 9 to 14 years Art & Craft Class 8


Steps to Create this Activity
Login to see steps

Step - 01
To create bunny basket, take a sheet of corrugated sheet, draw and cut the diagram referring to the template given with the help of pencil and scale.

Step - 02
To create sides of the basket, take corrugated sheet, draw and cut the diagram referring to the template given with the help of pencil and scale

Step - 03
To create holder for the basket, take corrugated sheet draw and cut out a diagram referring to the template given with the help of pencil and scale. Now roll it into a coil and seal the edges using Fevicol A+ and let it dry.

Step - 04
Using Fevicol A+, assemble the cut outs I.e., 2 bunny contours, base, sides of the basket and a holder as shown. Let it dry.

Step - 05
Using Fevicryl Acrylic Colour of your choice paint the basket with the help of fine art brushes and let it dry.

Step - 06
To create eyebrows and mouth take some black coloured clay and roll it into a thin coil. Make sure elements created are proportionate to the structure made. Similarly, to make eyes, create 2 tiny spheres & create oval shape. To create nose, take some white coloured clay & roll it into a sphere & further into in an oval shape. To create ears and legs take some pink coloured clay, create a slab with the help of rolling pin now cut out oval shape with the help of clay tool or paper cutter as shown in the image. Now take black coloured clay & create a thin coil from it & give an outline to it to the features made. Similarly, create hands in a cloud like structure as shown in the image. To create carrots, take some orange-coloured clay roll into a conical shape as shown in the image and now attach some green coloured coils above it as shown.

Step - 07
Using Fevicol A+, assemble all the elements as shown and let it dry. Now stick googly eyes as shown and let it dry.

Step - 08
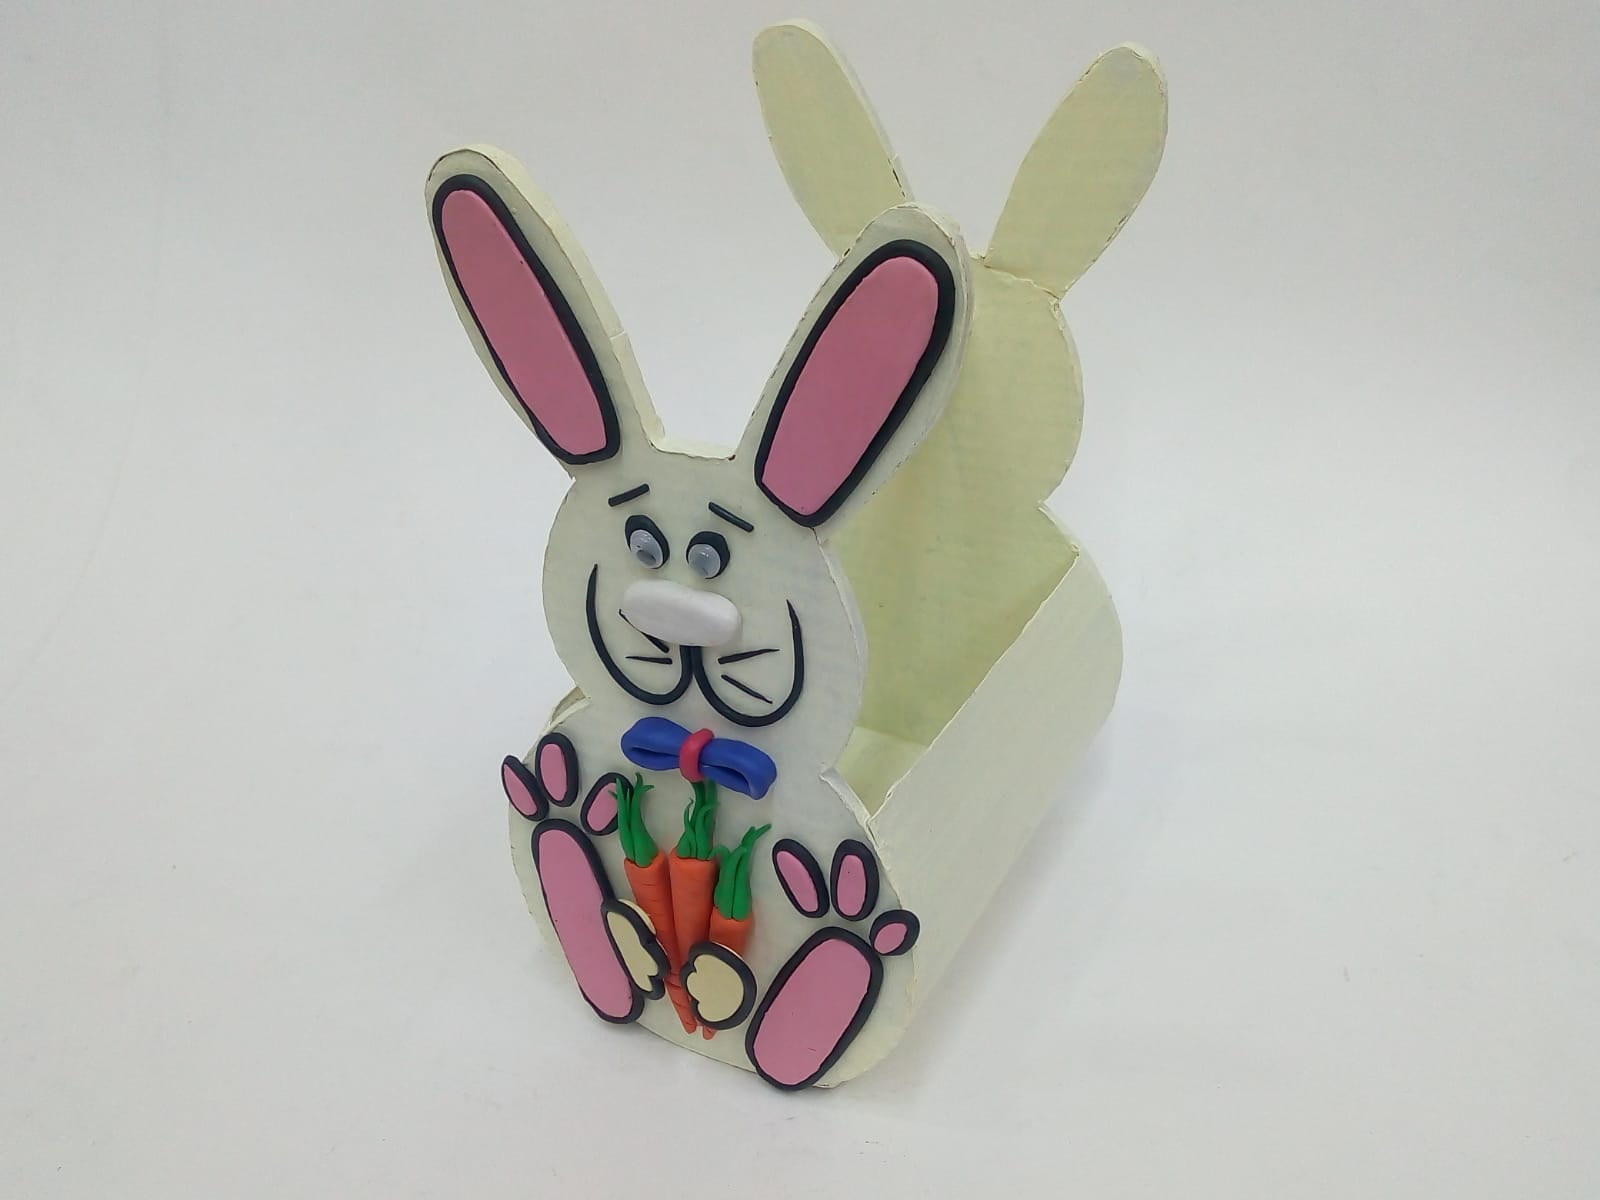
Handmade bunny basket is ready !
Steps to Create this Activity
Login to see steps
Step - 01
To create bunny basket, take a sheet of corrugated sheet, draw and cut the diagram referring to the template given with the help of pencil and scale.
Step - 02
To create sides of the basket, take corrugated sheet, draw and cut the diagram referring to the template given with the help of pencil and scale
Step - 03
To create holder for the basket, take corrugated sheet draw and cut out a diagram referring to the template given with the help of pencil and scale. Now roll it into a coil and seal the edges using Fevicol A+ and let it dry.
Step - 04
Using Fevicol A+, assemble the cut outs I.e., 2 bunny contours, base, sides of the basket and a holder as shown. Let it dry.
Step - 05
Using Fevicryl Acrylic Colour of your choice paint the basket with the help of fine art brushes and let it dry.
Step - 06
To create eyebrows and mouth take some black coloured clay and roll it into a thin coil. Make sure elements created are proportionate to the structure made. Similarly, to make eyes, create 2 tiny spheres & create oval shape. To create nose, take some white coloured clay & roll it into a sphere & further into in an oval shape. To create ears and legs take some pink coloured clay, create a slab with the help of rolling pin now cut out oval shape with the help of clay tool or paper cutter as shown in the image. Now take black coloured clay & create a thin coil from it & give an outline to it to the features made. Similarly, create hands in a cloud like structure as shown in the image. To create carrots, take some orange-coloured clay roll into a conical shape as shown in the image and now attach some green coloured coils above it as shown.
Step - 07
Using Fevicol A+, assemble all the elements as shown and let it dry. Now stick googly eyes as shown and let it dry.
Step - 08
Handmade bunny basket is ready !


