


Create a Beautiful Buddha Figurine with Simple Clay - Activity Single - FeviCreate
Learn DIY Buddha Craft with Crafting Paper and Clay Molding
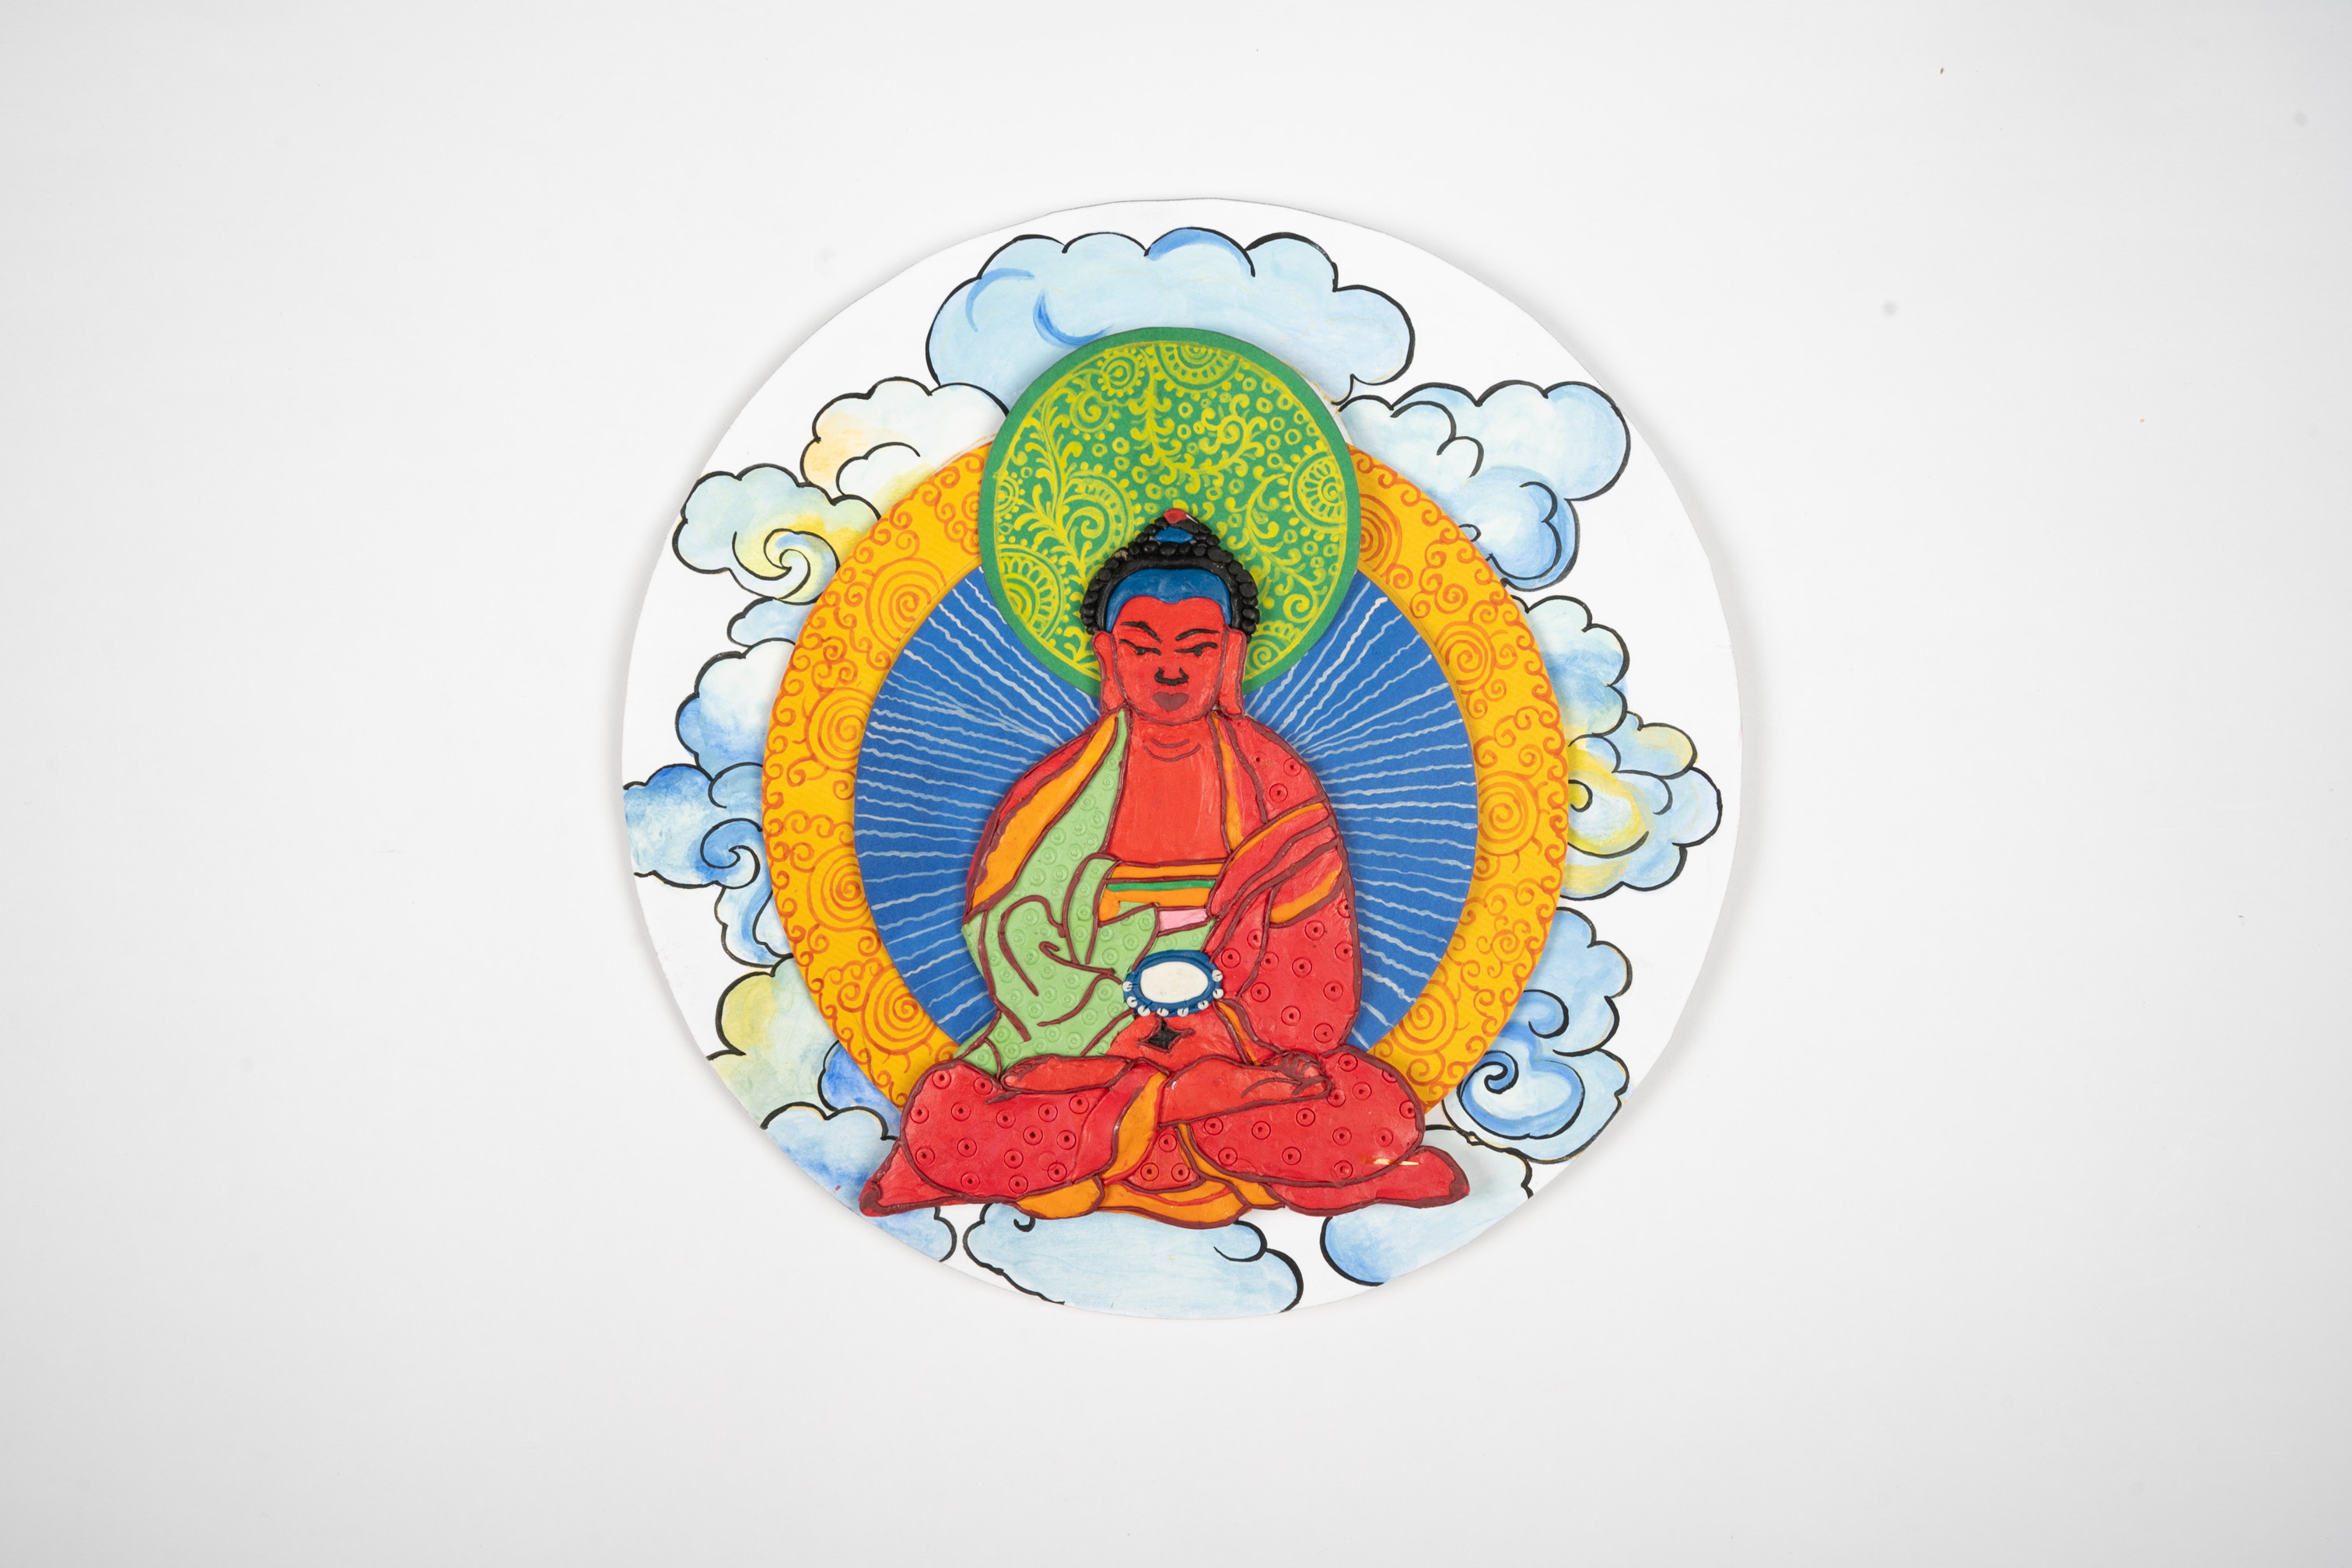
Make a peaceful 3D Buddha sculpture using basic clay and paper. This calming craft helps kids focus and create something meaningful, combining both artistic and spiritual value. A great project to introduce themes like mindfulness and creativity to young minds.
Clay Modelling Brand me 30 to 60 mins 9 to 14 years Art & Craft Class 8


Steps to Create this Activity
Login to see steps

Step - 01
To create the backdrop, take white chart paper, draw and cut out the diagram referring to the template given. Using Rangeela Tempera colours, paint the clouds using wash effect as shown with Fine Art brushes and let it dry.

Step - 02
Similarly, to create layers of backdrop, take a yellow draw paper, draw and cut out a circle in descending size referring to the template given. Using Rangeela Tempera Colours of your choice, create thangka patterns as shown with Fine Art brushes and let it dry.

Step - 03
Using Fevicol A+, stick the cut-out in the centre as shown and let it dry.

Step - 04
Similarly, following the same procedure, draw and cut out a layer of the background and create thangka patterns on it using Rangeela Tempera Colours and stick it on the backdrop as shown.

Step - 05
To create a relief figurine of Buddha, take a mount board sheet, draw and cut out the diagram of Buddha referring to the template given. Make sure the figurine is proportionate to the backdrop. Using Rangeela Creative Clay of your choice, fill up the figurine by creating an even slab with a rolling pin. Now trace each part onto the slab and cut it with a clay tool cutter. Using Fevicol MR, stick the cut-outs onto mount board as shown.

Step - 06
Similarly, following the same method, fill up the figurine using Rangeela Creative Clay of your choice. To enhance, give an outline to the figurine by creating clay coils and stick it using Fevicol MR. Similarly, create features of Buddha i.e., hair, eyebrows, nose and mouth. To give further details, take any sketch pen cap and create texture on the garment as shown.

Step - 07
Using Fevicol MR, stick the figurine in the centre as shown and let it dry. Your handmade Thangka Painting is ready! To install it onto the wall, you can use Glue Drops.

Step - 08
Design Template
Steps to Create this Activity
Login to see steps
Step - 01
To create the backdrop, take white chart paper, draw and cut out the diagram referring to the template given. Using Rangeela Tempera colours, paint the clouds using wash effect as shown with Fine Art brushes and let it dry.
Step - 02
Similarly, to create layers of backdrop, take a yellow draw paper, draw and cut out a circle in descending size referring to the template given. Using Rangeela Tempera Colours of your choice, create thangka patterns as shown with Fine Art brushes and let it dry.
Step - 03
Using Fevicol A+, stick the cut-out in the centre as shown and let it dry.
Step - 04
Similarly, following the same procedure, draw and cut out a layer of the background and create thangka patterns on it using Rangeela Tempera Colours and stick it on the backdrop as shown.
Step - 05
To create a relief figurine of Buddha, take a mount board sheet, draw and cut out the diagram of Buddha referring to the template given. Make sure the figurine is proportionate to the backdrop. Using Rangeela Creative Clay of your choice, fill up the figurine by creating an even slab with a rolling pin. Now trace each part onto the slab and cut it with a clay tool cutter. Using Fevicol MR, stick the cut-outs onto mount board as shown.
Step - 06
Similarly, following the same method, fill up the figurine using Rangeela Creative Clay of your choice. To enhance, give an outline to the figurine by creating clay coils and stick it using Fevicol MR. Similarly, create features of Buddha i.e., hair, eyebrows, nose and mouth. To give further details, take any sketch pen cap and create texture on the garment as shown.
Step - 07
Using Fevicol MR, stick the figurine in the centre as shown and let it dry. Your handmade Thangka Painting is ready! To install it onto the wall, you can use Glue Drops.
Step - 08
Design Template


