


Creative Bookend Paper Craft for Kids - Activity Single - FeviCreate
Make a Creative Bookend with Paper Craft
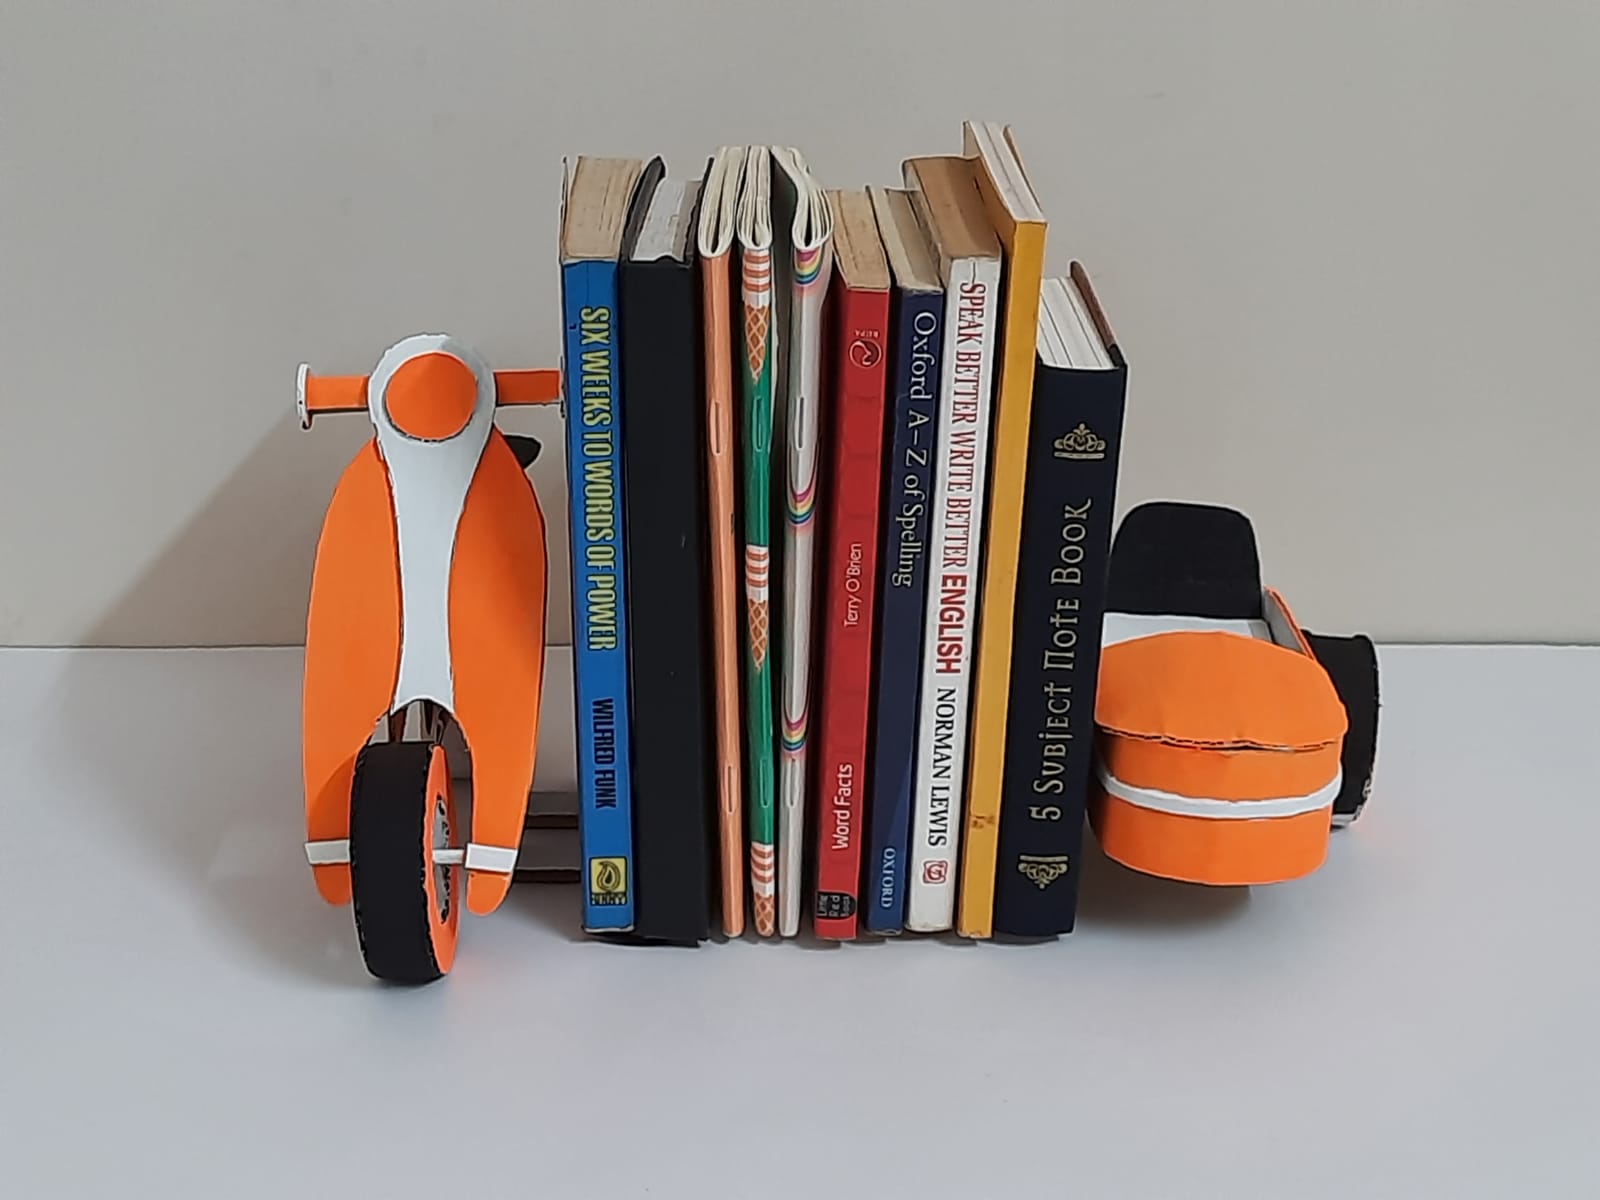
Let books stand tall with a handmade touch! This creative paper bookend craft helps kids make something useful with their hands. A great mix of fun and function.
Paper Crafting Brand me More than 60 mins 9 to 14 years Art & Craft Class 7


Steps to Create this Activity
Login to see steps

Step - 01
To create scooter bookends, draw the diagram of scooter and side seater referring to the template given with the help of pencil

Step - 02
Now cut the diagram of scooter with the help of scissors

Step - 03
To create wheels, take a sheet of corrugated sheet and cut out a strip measuring width of 1cm approx.

Step - 04
Using Fevicol A+, stick the strip cut outs to the inwards edges as well outwards edges of the circle and let it dry.

Step - 05
To give details to the wheel, draw and cut out tiny circles and create thin corrugated coils using Fevicol A+.

Step - 06
Poke a hole, to the circles and insert coils through them as shown.

Step - 07
Now take a strip of corrugated sheet create a coil using Fevicol A+ and cut the coil into tiny pieces as shown.

Step - 08
Using Fevicol A+, assemble the cut outs as shown and let it dry.

Step - 09
Following the image, assemble parts of scooter using Fevicol A+, and let it dry.

Step - 10
Using Fevicol A+, assemble the rest of parts and let it dry, scooter is ready.

Step - 11
To create side seater, draw and cut out diagram referring to the template given

Step - 12
Using Fevicol A+, assemble the parts of side seater I.e seat and wheel as shown and let it dry.

Step - 13
To create bookend holder, cut out 2 corrugated strips with width measuring 2cm approx. From each strip cut out 2 rectangles measuring approx. 1”

Step - 14
Using Fevicol A+, assemble the cut outs as shown creating a bookend holder

Step - 15
Now make sure you have all the parts ready I.e. scooter, side seater and bookend holder.

Step - 16
Using Fevicol A+, assemble all the parts together and let it dry.

Step - 17
Using Rangeela Tempera Colour of choice, paint it with the help of fine art brushes and let it dry.

Step - 18
Handmade scooter bookends is ready!
Steps to Create this Activity
Login to see steps
Step - 01
To create scooter bookends, draw the diagram of scooter and side seater referring to the template given with the help of pencil
Step - 02
Now cut the diagram of scooter with the help of scissors
Step - 03
To create wheels, take a sheet of corrugated sheet and cut out a strip measuring width of 1cm approx.
Step - 04
Using Fevicol A+, stick the strip cut outs to the inwards edges as well outwards edges of the circle and let it dry.
Step - 05
To give details to the wheel, draw and cut out tiny circles and create thin corrugated coils using Fevicol A+.
Step - 06
Poke a hole, to the circles and insert coils through them as shown.
Step - 07
Now take a strip of corrugated sheet create a coil using Fevicol A+ and cut the coil into tiny pieces as shown.
Step - 08
Using Fevicol A+, assemble the cut outs as shown and let it dry.
Step - 09
Following the image, assemble parts of scooter using Fevicol A+, and let it dry.
Step - 10
Using Fevicol A+, assemble the rest of parts and let it dry, scooter is ready.
Step - 11
To create side seater, draw and cut out diagram referring to the template given
Step - 12
Using Fevicol A+, assemble the parts of side seater I.e seat and wheel as shown and let it dry.
Step - 13
To create bookend holder, cut out 2 corrugated strips with width measuring 2cm approx. From each strip cut out 2 rectangles measuring approx. 1”
Step - 14
Using Fevicol A+, assemble the cut outs as shown creating a bookend holder
Step - 15
Now make sure you have all the parts ready I.e. scooter, side seater and bookend holder.
Step - 16
Using Fevicol A+, assemble all the parts together and let it dry.
Step - 17
Using Rangeela Tempera Colour of choice, paint it with the help of fine art brushes and let it dry.
Step - 18
Handmade scooter bookends is ready!


