


Colourful Trunk Using Kite Paper Craft - Activity Single - FeviCreate
Learn to Make Colourful Trunk using Coloured Kite Paper Craft
Fevicreate Art & Craft Activities are structured activities that involve a step by step method to create an end product. This crafting journey gives you something to show, you enjoy your journey and get a sense of achievement too. What more can one ask for!
Paper Crafting Best Out of Waste 30 to 60 mins 9 to 14 years Art & Craft Class 6


Steps to Create this Activity
Login to see steps

Step - 01
To create a trunk, take a sheet of box board or file board. Draw and cut it referring to template given. To make it more sturdy use a sheet of corrugated as well and stick it onto box board using Fevicol A+ and let it dry.

Step - 02
With the help of scissors cut the fringes of box board cover the corrugated sheet with it using Fevicol A+, now seal the edges forming a cylindrical shape as shown

Step - 03
To create lids for the trunk, take a sheet of box board and corrugated sheet, draw and cut the diagram referring to the template given.

Step - 04
Using Fevicol A+, assemble the lid cut outs as shown in the image and let it dry.

Step - 05
Using Fevicol A+, stick the circle from one end and let it dry and to other insert the lid created.

Step - 06
Similarly, create two more trunks following the same procedure.

Step - 07
To create flames, take sheets of kite paper yellow, red and orange. Draw and cut them into square shape, now fold it into half, forming triangular shape.

Step - 08
Fold it into half and fan fold it as shown.

Step - 09
Fan fold the other side as well.

Step - 10
Using Fevicol A+, stick the folds made below and let it dry. Now start opening the folds from the other end.

Step - 11
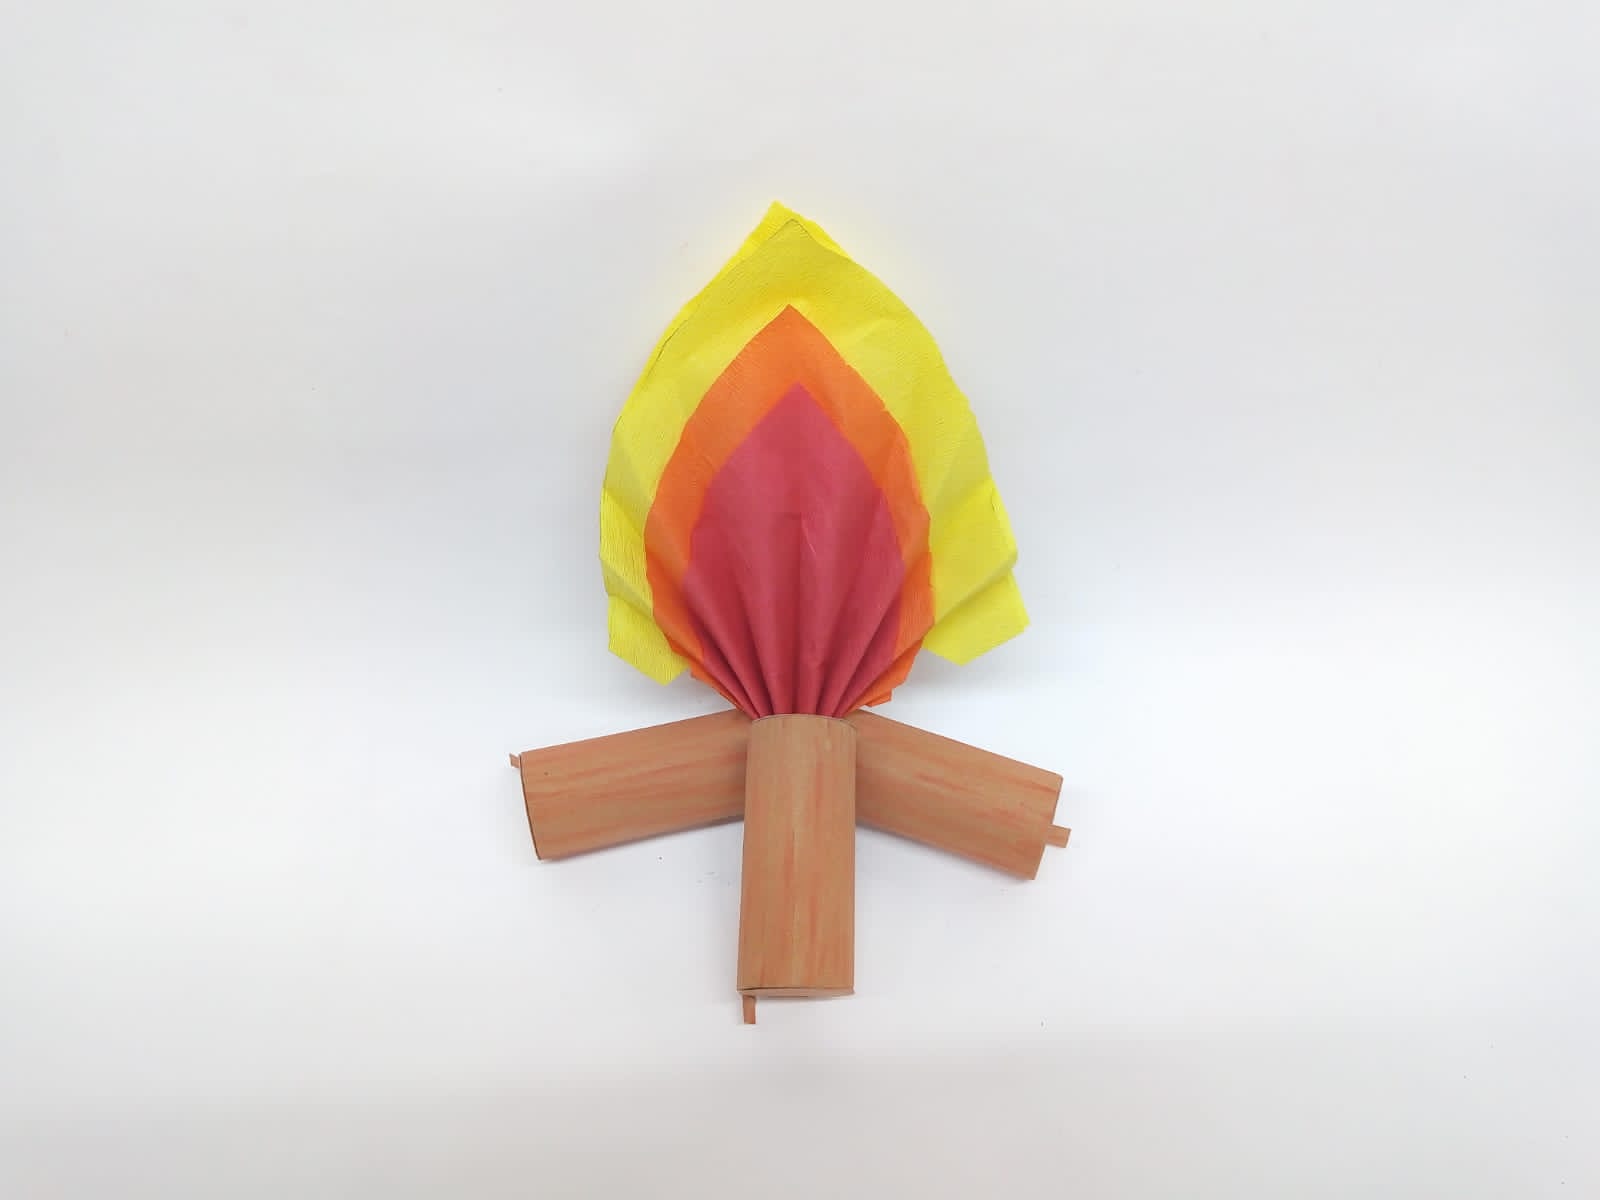
Using Rangeela Tempera Colour brown, give colour wash to trunks with the help of fine art brushes and let it dry. Now using Fevicol A+, assemble all the elements together and let it dry. Make sure to keep trunk’s opening side outwards. Handmade colour trunks are ready!
Steps to Create this Activity
Login to see steps
Step - 01
To create a trunk, take a sheet of box board or file board. Draw and cut it referring to template given. To make it more sturdy use a sheet of corrugated as well and stick it onto box board using Fevicol A+ and let it dry.
Step - 02
With the help of scissors cut the fringes of box board cover the corrugated sheet with it using Fevicol A+, now seal the edges forming a cylindrical shape as shown
Step - 03
To create lids for the trunk, take a sheet of box board and corrugated sheet, draw and cut the diagram referring to the template given.
Step - 04
Using Fevicol A+, assemble the lid cut outs as shown in the image and let it dry.
Step - 05
Using Fevicol A+, stick the circle from one end and let it dry and to other insert the lid created.
Step - 06
Similarly, create two more trunks following the same procedure.
Step - 07
To create flames, take sheets of kite paper yellow, red and orange. Draw and cut them into square shape, now fold it into half, forming triangular shape.
Step - 08
Fold it into half and fan fold it as shown.
Step - 09
Fan fold the other side as well.
Step - 10
Using Fevicol A+, stick the folds made below and let it dry. Now start opening the folds from the other end.
Step - 11
Using Rangeela Tempera Colour brown, give colour wash to trunks with the help of fine art brushes and let it dry. Now using Fevicol A+, assemble all the elements together and let it dry. Make sure to keep trunk’s opening side outwards. Handmade colour trunks are ready!


