


Clock of Opposites DIY Craft for Kids | Fevicreate - Activity Single - FeviCreate
Clock of Opposites
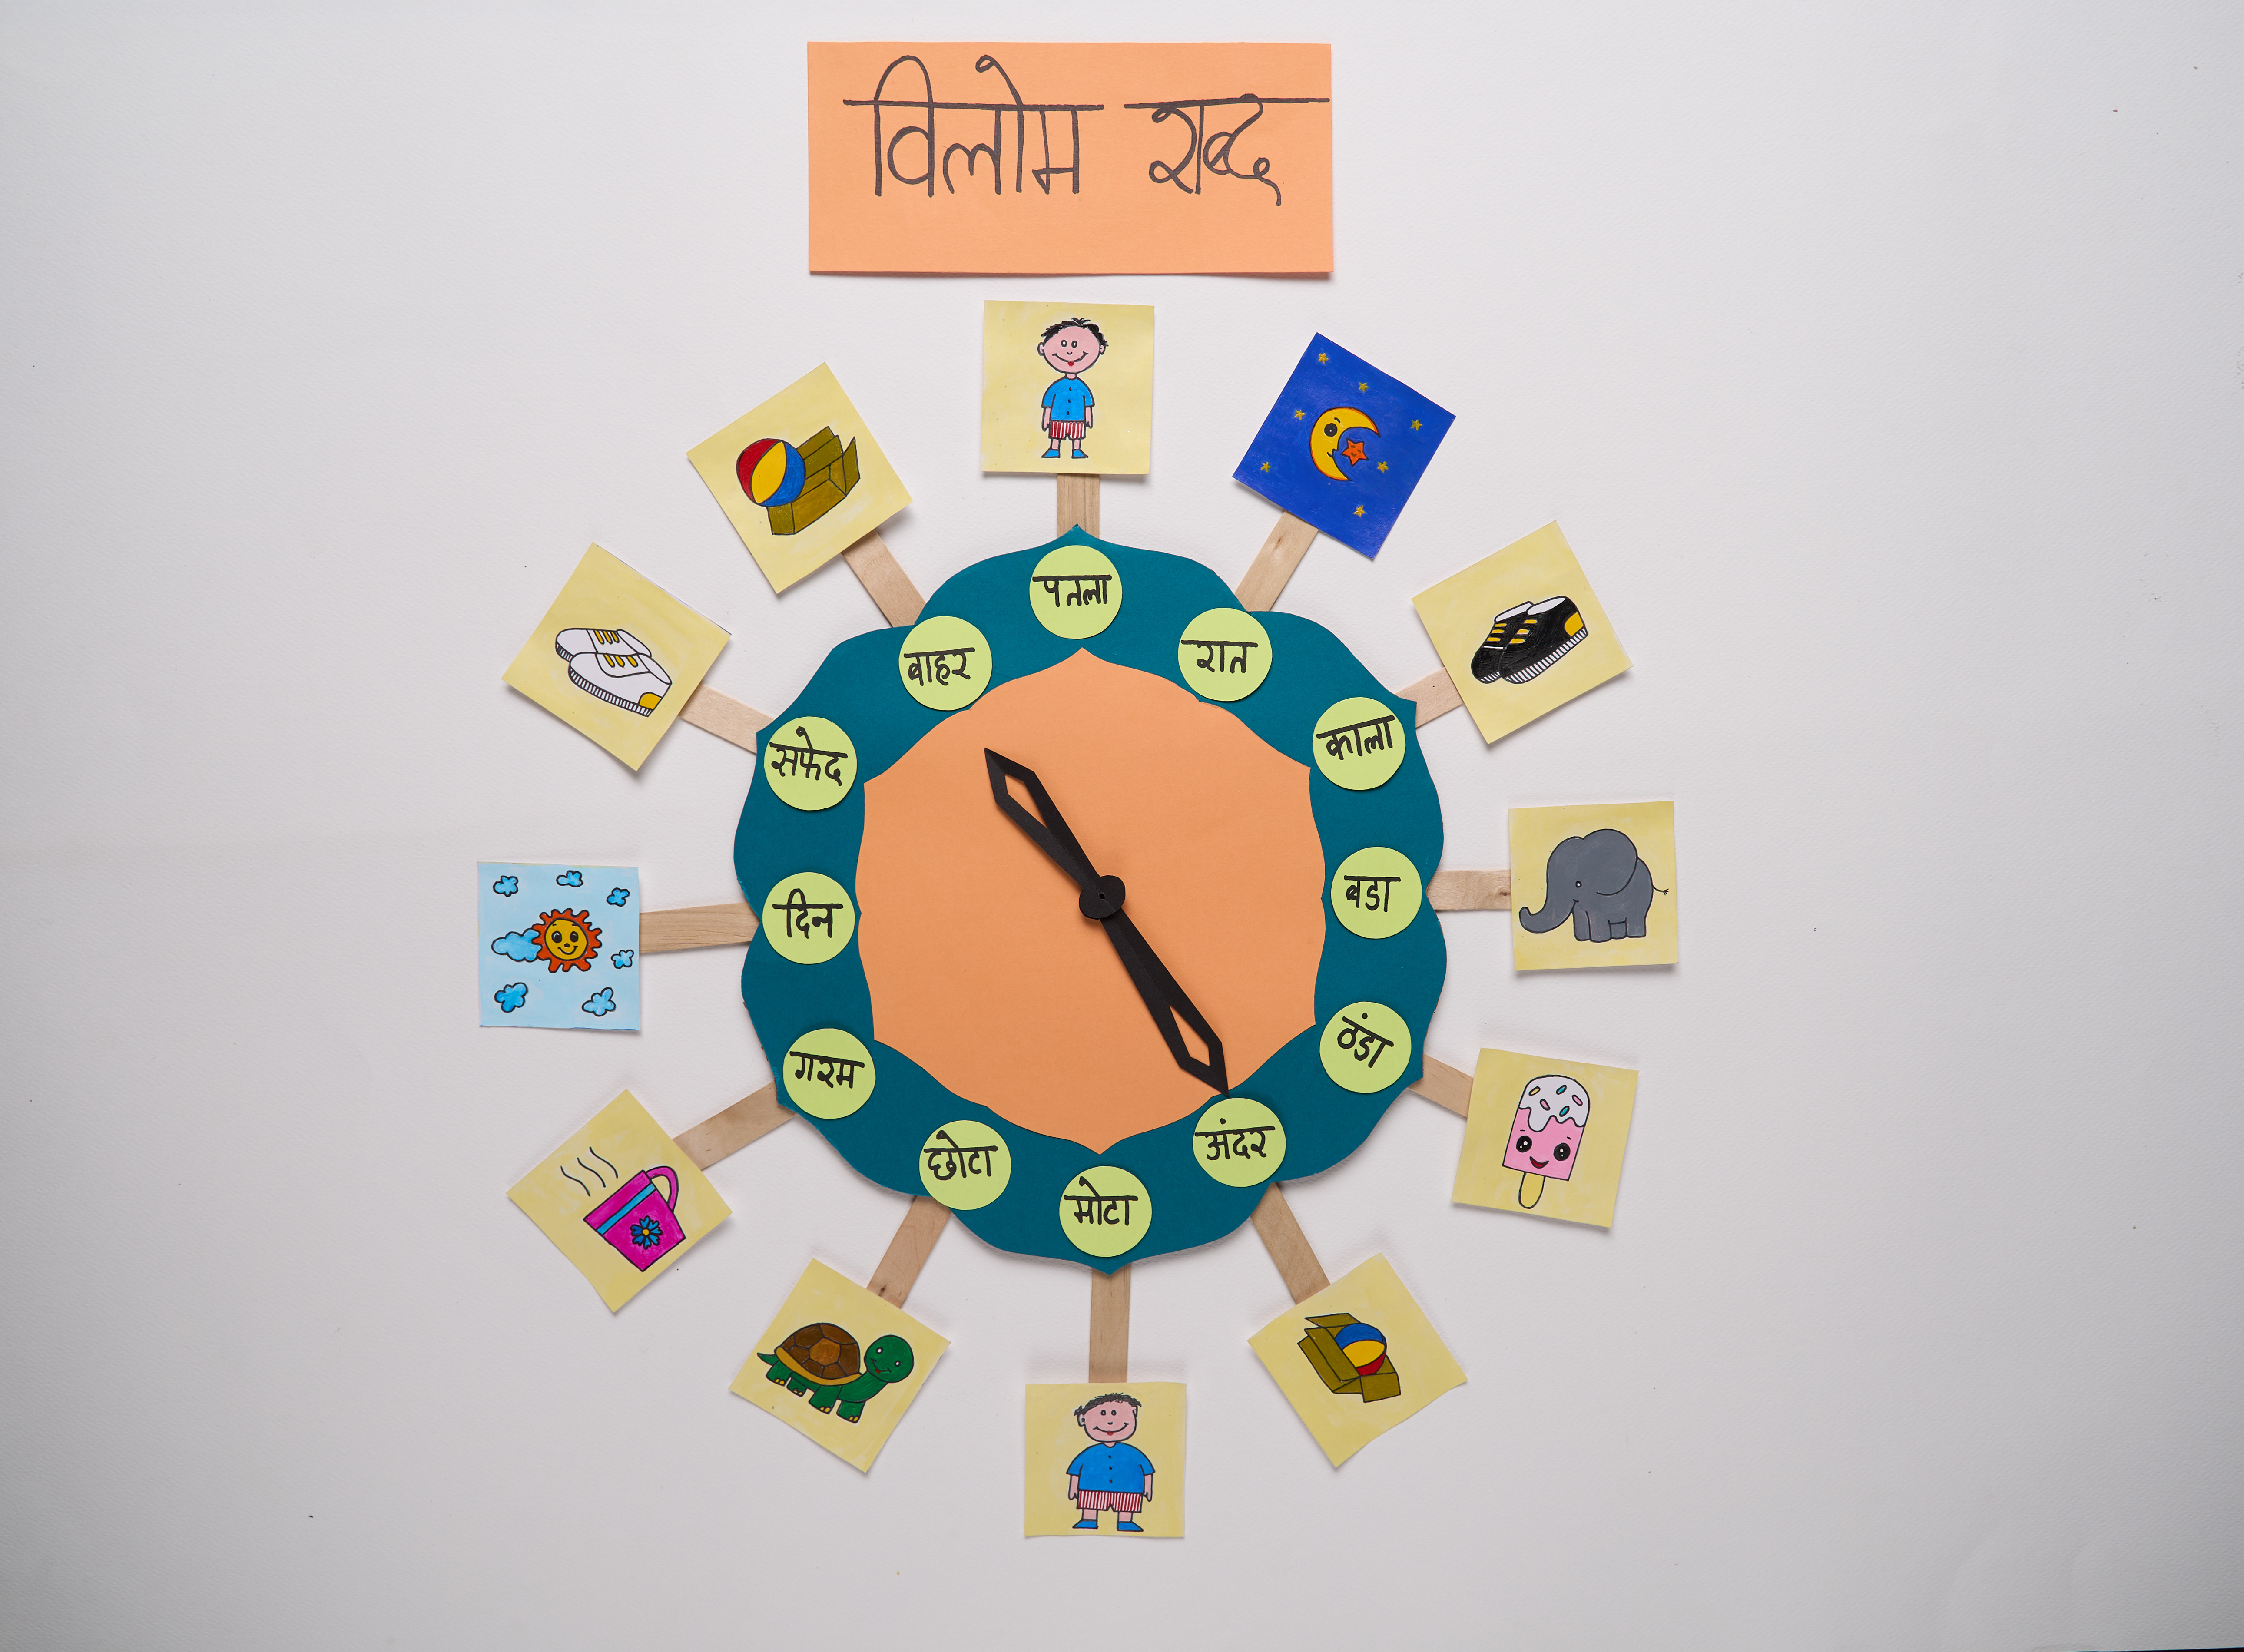
A fun, hands-on craft activity where children create a colourful clock to visually learn the concept of opposites. This project combines basic paper craft with painting to make an interactive educational tool.
Paper Crafting Celebration More than 60 mins 13 to 15 years Art & Craft Class 8


Steps to Create this Activity
Login to see steps

Assemble the papers
Take the colourful papers of your choice to make the clock.

Cut The Sheet
Cut the circuar shape from a coloured paper and one of the same shape and small size from the other. Cut 10-12 small circular strips from another coloured paper.

Create the base
Cut a large circle from the corrugated sheet and another one of the same sizes from blue paper.

Stick The Paper on The Base
Stick the blue circle on top of the corrugated one using Fevicol MR. Then, cut a smaller circle from orange paper and stick it in the center.

Add the Hour Markers
Take the 12 candy sticks and glue them evenly around the edge of the clock with Fevicol MR, just like the numbers on a real clock.

Make the Clock Hands
From a sheet of black paper, draw and cut out one long hand and one shorthand for your clock.

Attach the Hands
Carefully push the toothpick through the very center of the clock. Then, slide your two paper hands onto the toothpick.

Draw Your Figures
On a white sheet, draw pairs of opposite figures like the sun and moon, happy and sad faces, or a shoe and a sock. Paint them using Fevicryl Acrylic Carnival Colours and let them dry completely.

Label the figures
Take the small circular strips, a marker or a thin brush and mark/label the figures.

Assemble Your Learning Clock
Using Fevicol MR, stick each figure to the end of a candy stick, placing it directly opposite its pair. Label the opposites carefully and paste the circular strips below using Fevicol MR.

Final Look
Your fun learning clock is now ready to use!
Steps to Create this Activity
Login to see steps
Assemble the papers
Take the colourful papers of your choice to make the clock.
Cut The Sheet
Cut the circuar shape from a coloured paper and one of the same shape and small size from the other. Cut 10-12 small circular strips from another coloured paper.
Create the base
Cut a large circle from the corrugated sheet and another one of the same sizes from blue paper.
Stick The Paper on The Base
Stick the blue circle on top of the corrugated one using Fevicol MR. Then, cut a smaller circle from orange paper and stick it in the center.
Add the Hour Markers
Take the 12 candy sticks and glue them evenly around the edge of the clock with Fevicol MR, just like the numbers on a real clock.
Make the Clock Hands
From a sheet of black paper, draw and cut out one long hand and one shorthand for your clock.
Attach the Hands
Carefully push the toothpick through the very center of the clock. Then, slide your two paper hands onto the toothpick.
Draw Your Figures
On a white sheet, draw pairs of opposite figures like the sun and moon, happy and sad faces, or a shoe and a sock. Paint them using Fevicryl Acrylic Carnival Colours and let them dry completely.
Label the figures
Take the small circular strips, a marker or a thin brush and mark/label the figures.
Assemble Your Learning Clock
Using Fevicol MR, stick each figure to the end of a candy stick, placing it directly opposite its pair. Label the opposites carefully and paste the circular strips below using Fevicol MR.
Final Look
Your fun learning clock is now ready to use!


