


Christmas Tree Craft with Popsicle Sticks – Easy DIY Activity for Kids - Activity Single - FeviCreate
Christmas Tree
This craft is like being a little builder! You learn to compare sizes by cutting the sticks from smallest to biggest, which helps you understand how to put things in order. When you assemble the sticks to stand up, you learn about balance and structure so your tree stays firm and tall!
Mixed Media Celebration 30 to 60 mins 9 to 12 years Art & Craft Class 5
Materials Needed
- Fevicol MR
- Fevicryl Acrylic Colour Sap Green
- Candy Sticks (Popsicle sticks)
- Scissors
- Corrugated Sheet
- Golden Glitter Paper
- Red and Green Paper
- Coke Bottle Caps
- Red Ornamental Stones
- Tissue Paper Roll
- Jute Thread
- Blue Coloured Stones/Gravel
- Paper
- Scissors
- Fine Art Paint Brushes
- Colour palette
- Water Container.


Steps to Create this Activity
Login to see steps

Prepare the Tree Frame
Take several candy sticks (popsicle sticks). Use scissors to cut the sticks into different lengths, arranging them from smallest to largest (ascending order).

Assemble the Tree Structure
Take three candy sticks and paint the candy sticks with Fevicryl Acrylic Colours Sap Green. Stick three candy sticks vertically from the edges to make the center of the tree. Stick all the painted green sticks together horizontally with Fevicol MR to form a Christmas. The smallest stick goes at the top, and the broadest stick goes at the base.Let it dry completely.

Decorate the Bottle Cap Ornaments
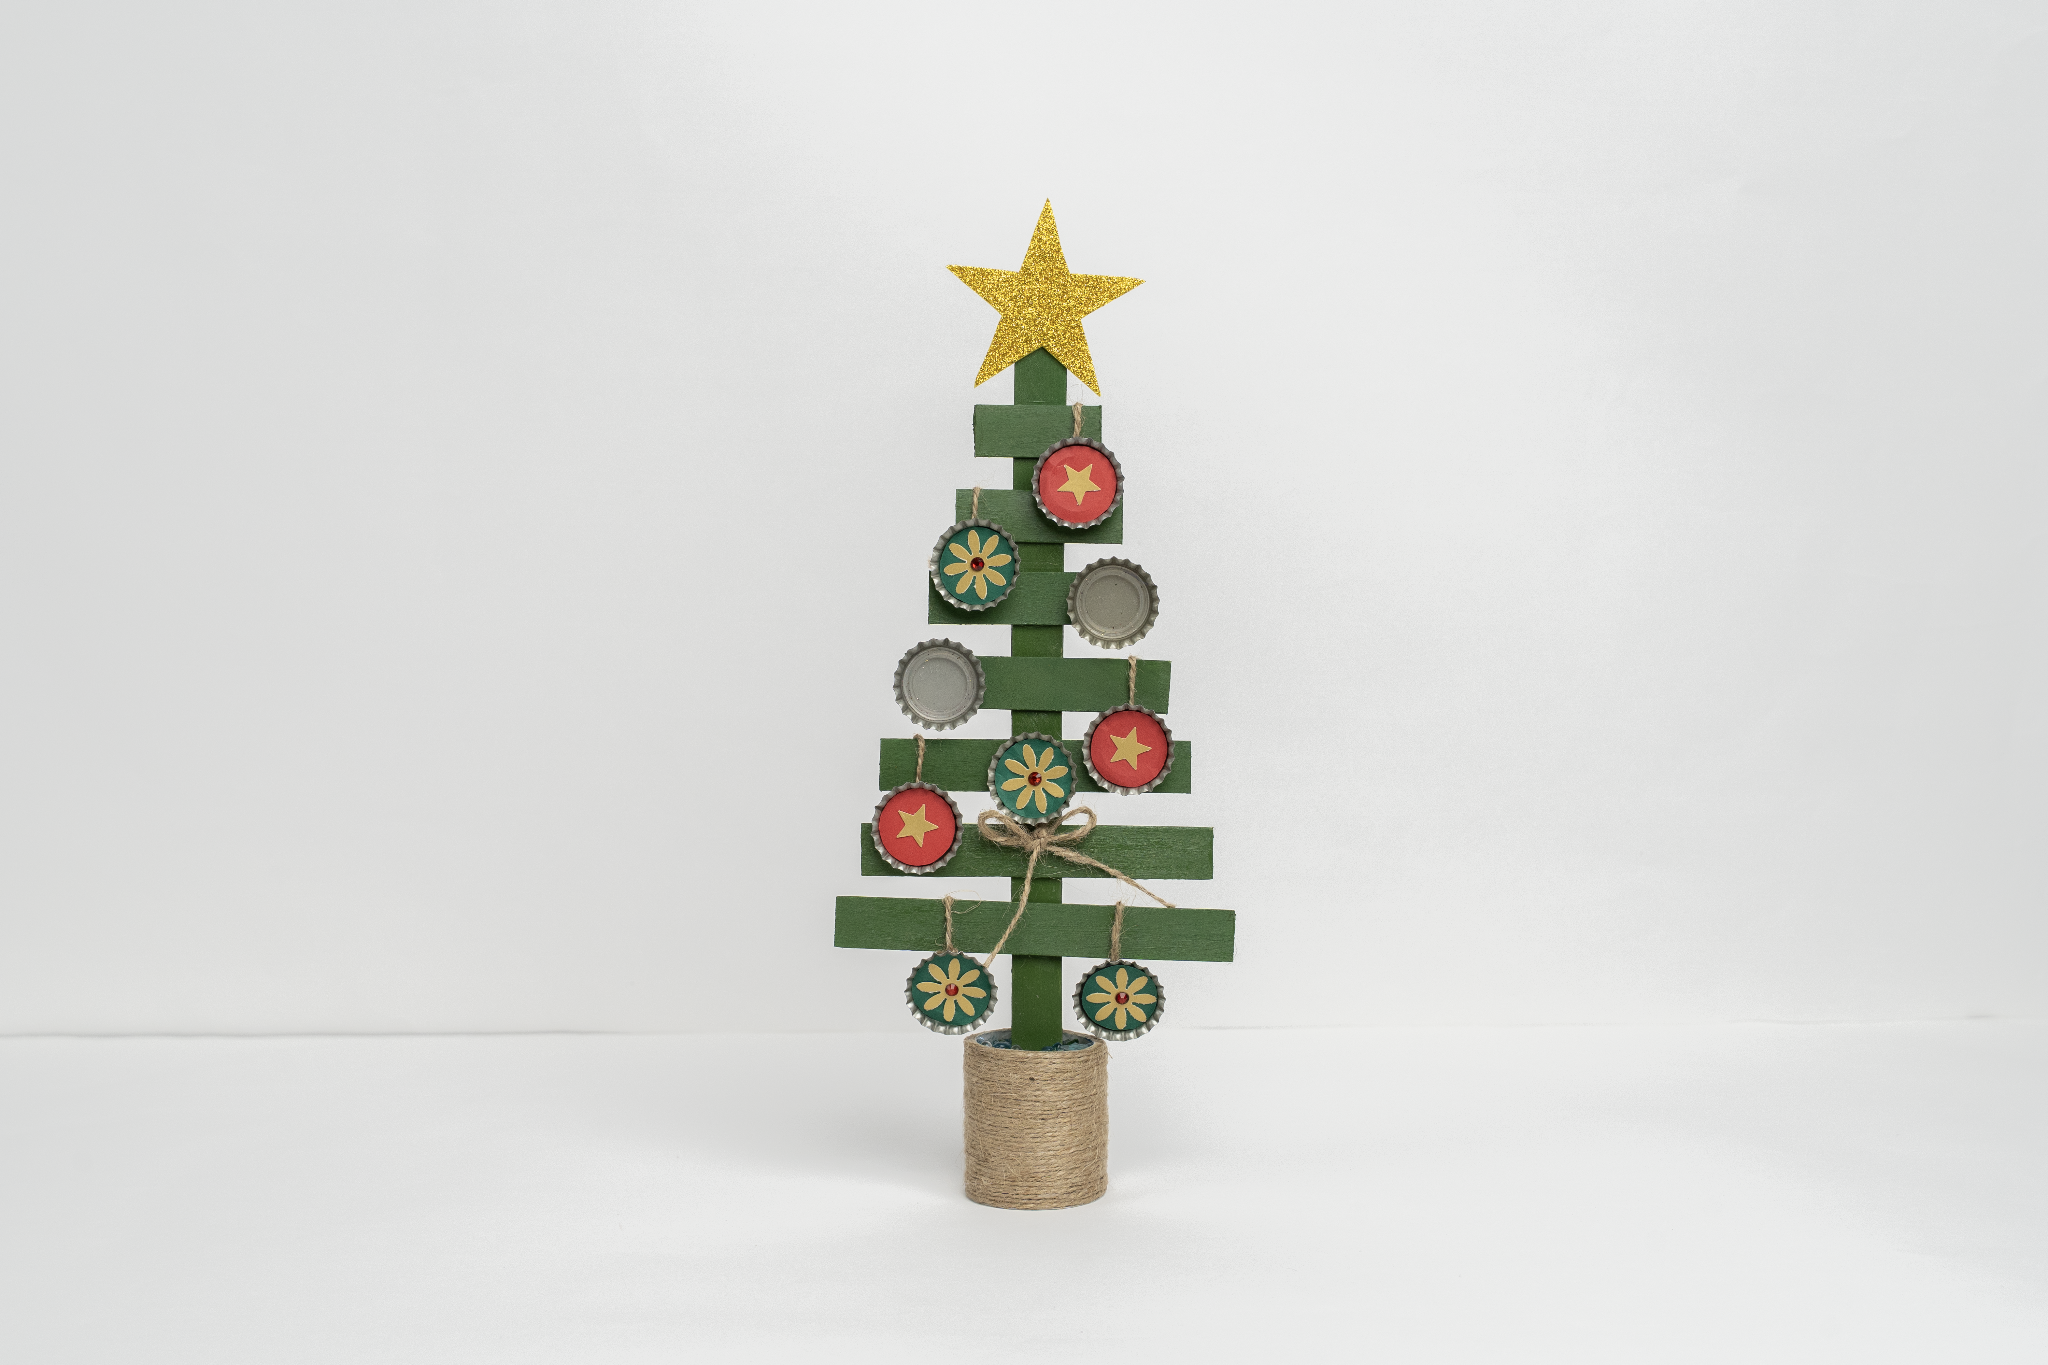
Take the corrugated sheet and draw a star shape and cut it out. Cut the same size star from golden glitter paper and stick it onto the corrugated star. Stick this golden star onto the top of your assembled Christmas tree. Take bottle caps. Cut small red and green circles from paper and stick one in the center of each bottle cap using Fevicol MR. Cut small stars and flowers from golden paper and stick them onto the red/green paper. Add a red ornamental stone to the center of the flower for extra sparkle.

Prepare the Tree Stand
Take a small tissue paper roll and cut it to the required size for a stand. Now, take a thick card paper. Draw a circle in the size of the paper roll. Wrap jute thread tightly around the entire tissue roll stand and stick it securely with Fevicol MR.

Hang the Caps
Cut pieces of jute thread and stick one end to the back of each bottle cap ornament. Hang the ornaments by sticking the other end of the thread onto the edges of the green sticks so they dangle nicely. You can also stick the caps onto the sticks using Fevicol MR

Final Assembly
Fill the tissue roll with stones, to ensure that the tree stands firmly. Carefully insert the bottom stick of your Christmas tree into the stones in the roll. Your unique and decorated Christmas tree is now ready!
Steps to Create this Activity
Login to see steps
Prepare the Tree Frame
Take several candy sticks (popsicle sticks). Use scissors to cut the sticks into different lengths, arranging them from smallest to largest (ascending order).
Assemble the Tree Structure
Take three candy sticks and paint the candy sticks with Fevicryl Acrylic Colours Sap Green. Stick three candy sticks vertically from the edges to make the center of the tree. Stick all the painted green sticks together horizontally with Fevicol MR to form a Christmas. The smallest stick goes at the top, and the broadest stick goes at the base.Let it dry completely.
Decorate the Bottle Cap Ornaments
Take the corrugated sheet and draw a star shape and cut it out. Cut the same size star from golden glitter paper and stick it onto the corrugated star. Stick this golden star onto the top of your assembled Christmas tree. Take bottle caps. Cut small red and green circles from paper and stick one in the center of each bottle cap using Fevicol MR. Cut small stars and flowers from golden paper and stick them onto the red/green paper. Add a red ornamental stone to the center of the flower for extra sparkle.
Prepare the Tree Stand
Take a small tissue paper roll and cut it to the required size for a stand. Now, take a thick card paper. Draw a circle in the size of the paper roll. Wrap jute thread tightly around the entire tissue roll stand and stick it securely with Fevicol MR.
Hang the Caps
Cut pieces of jute thread and stick one end to the back of each bottle cap ornament. Hang the ornaments by sticking the other end of the thread onto the edges of the green sticks so they dangle nicely. You can also stick the caps onto the sticks using Fevicol MR
Final Assembly
Fill the tissue roll with stones, to ensure that the tree stands firmly. Carefully insert the bottom stick of your Christmas tree into the stones in the roll. Your unique and decorated Christmas tree is now ready!


