


Christmas Stocking Craft for Kids – Easy Step-by-Step Activity Guide - Activity Single - FeviCreate
Christmas Stocking
You learn to layer the red paper on the brown paper to make it strong. Cutting out all the little shapes like Santa and snowflakes helps your fingers get stronger and more precise. You also learn how to choose and stick shapes so the whole stocking looks beautifully decorated.
Paper Crafting Celebration 30 to 60 mins 6 to 8 years Art & Craft Class 4
Materials Needed
- Fevicol MR
- Brown Corrugated Sheet
- Red Corrugated Sheet
- Green Corrugated Sheet
- Mount Board (small piece)
- Gold Paper
- Plain White Paper
- Light Cream Paper
- Red Paper
- Cotton
- Red Pom-Pom
- Snowflake Shaped Punching Machine
- Red Ornamental Stone Black Pen
- Pencil
- Scissors
- Fine Art Paint Brushes
- Colour palette
- Water Container.


Steps to Create this Activity
Login to see steps

Make the stocking base
Take the brown corrugated sheet and use a pencil to draw a large stocking shape on it. Carefully use scissors to cut out this stocking shape.

Layer the red stocking
Take the red corrugated sheet and draw the exact same stocking shape on it. Cut it out and stick the red corrugated sheet on the brown corrugated sheet using Fevicol MR.

Draw Stars and Snowflakes
Now, draw and cut out small star shapes. Take a snowflake shaped punching machine and cut out a few snowflakes from the golden paper. Draw Santa’s face and the cap too.

Cut the shapes
Cut the shape of Santa's face (light cream paper) and his red cap (red paper). Stick cotton onto the bottom edge of the red cap and his beard. Stick a red pom-pom for the nose on the face. Use a black pen to draw his eyes.

Make the cuff
To make the cuff, cut out a rectangle strip using a green corrugated sheet that is slightly larger than the width of the stocking. Take the green corrugated sheet and cut out a rectangle strip a bit larger than the stocking. Stick this green strip across the top edge of the red l stocking with Fevicol MR.

Stick Everything Together
Now, stick all your cutouts onto the red corrugated stocking part with Fevicol MR. Stick the completed Santa face near the top. Stick the stars and snowflakes around the center of the sock. Use small cutouts of gold paper flowers (stuck on green circles) to add more decoration around the design, and stick a red ornamental stone in the center.

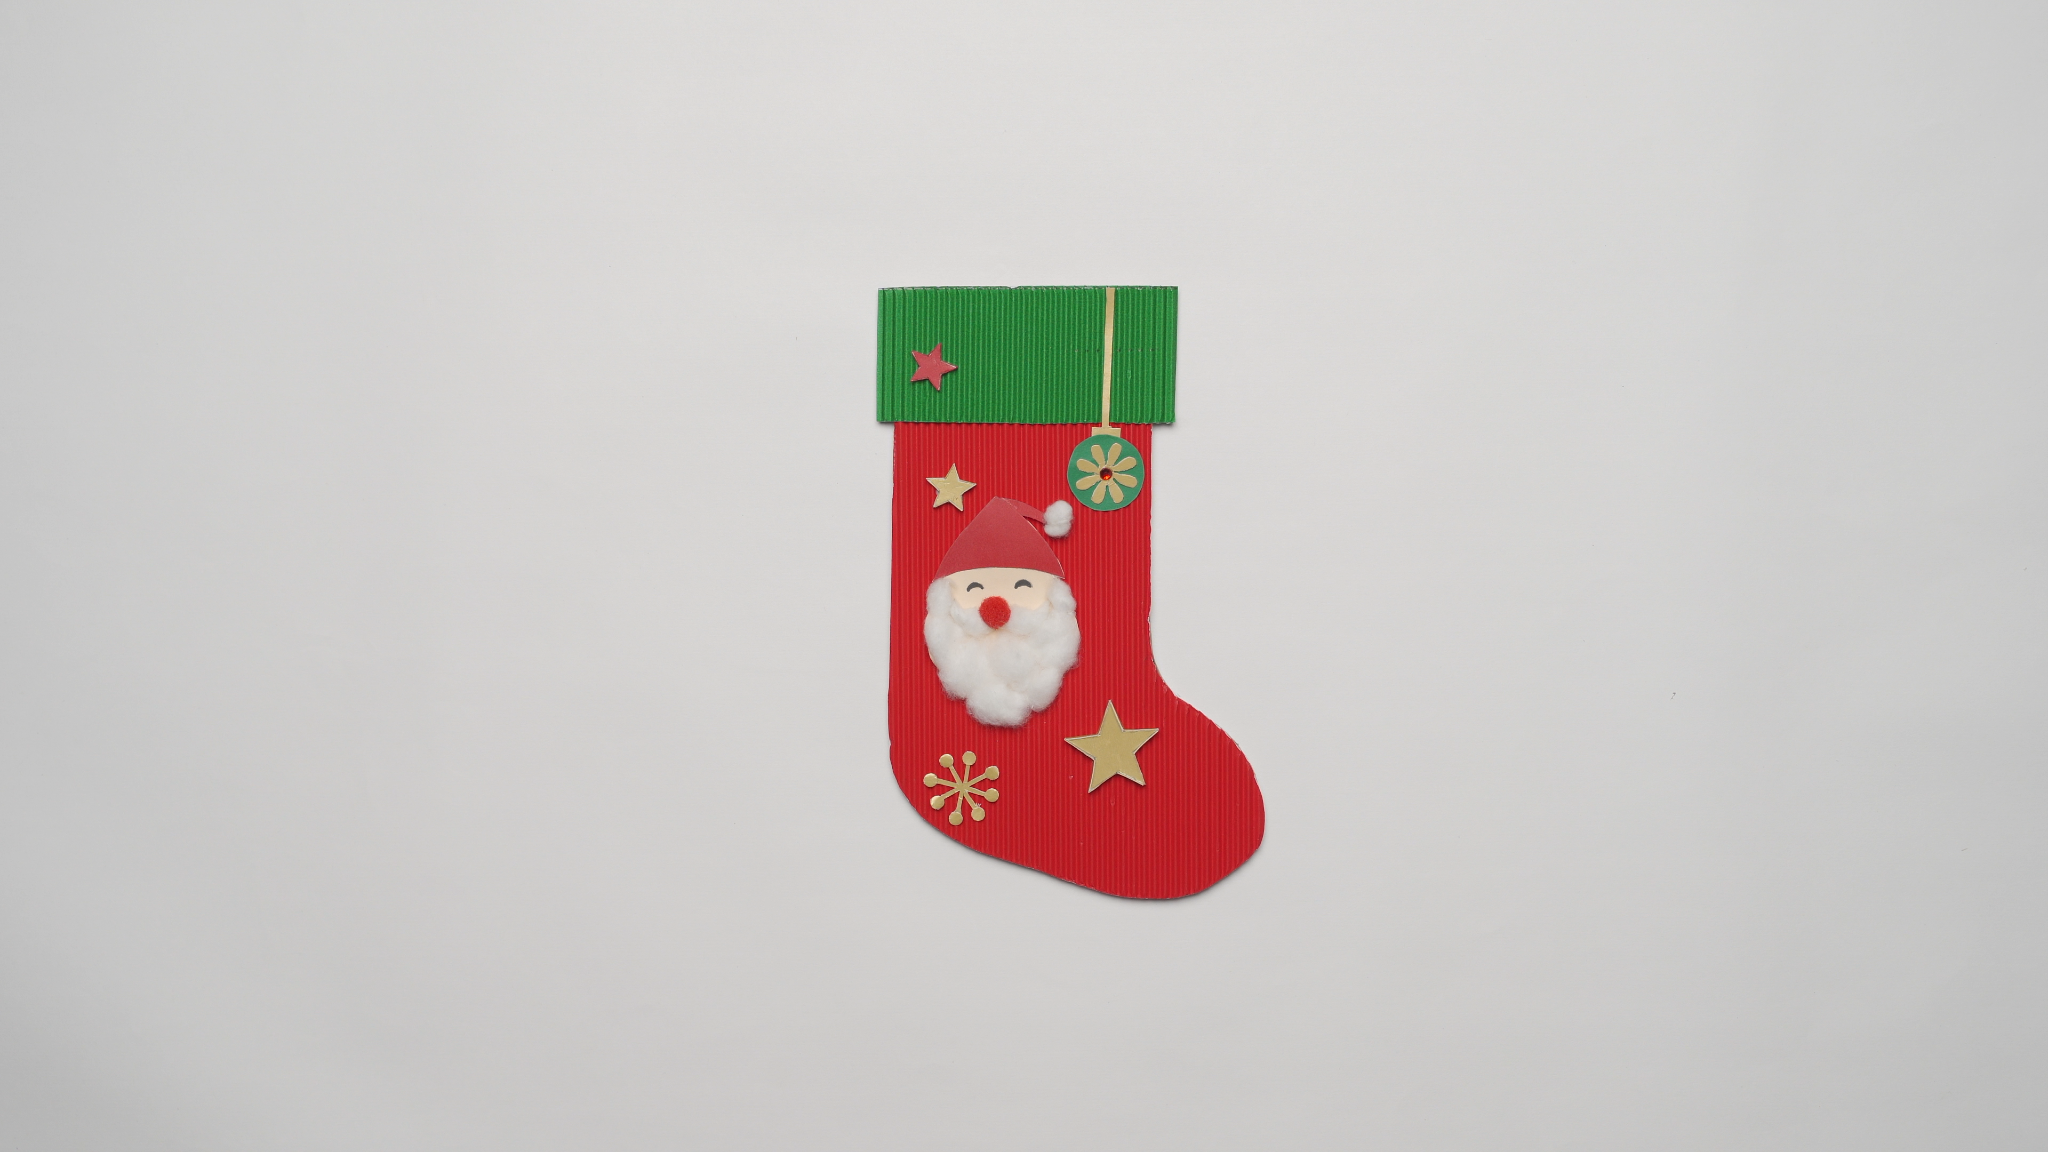
Final Look
Your layered Christmas Stocking is ready!
Steps to Create this Activity
Login to see steps
Make the stocking base
Take the brown corrugated sheet and use a pencil to draw a large stocking shape on it. Carefully use scissors to cut out this stocking shape.
Layer the red stocking
Take the red corrugated sheet and draw the exact same stocking shape on it. Cut it out and stick the red corrugated sheet on the brown corrugated sheet using Fevicol MR.
Draw Stars and Snowflakes
Now, draw and cut out small star shapes. Take a snowflake shaped punching machine and cut out a few snowflakes from the golden paper. Draw Santa’s face and the cap too.
Cut the shapes
Cut the shape of Santa's face (light cream paper) and his red cap (red paper). Stick cotton onto the bottom edge of the red cap and his beard. Stick a red pom-pom for the nose on the face. Use a black pen to draw his eyes.
Make the cuff
To make the cuff, cut out a rectangle strip using a green corrugated sheet that is slightly larger than the width of the stocking. Take the green corrugated sheet and cut out a rectangle strip a bit larger than the stocking. Stick this green strip across the top edge of the red l stocking with Fevicol MR.
Stick Everything Together
Now, stick all your cutouts onto the red corrugated stocking part with Fevicol MR. Stick the completed Santa face near the top. Stick the stars and snowflakes around the center of the sock. Use small cutouts of gold paper flowers (stuck on green circles) to add more decoration around the design, and stick a red ornamental stone in the center.
Final Look
Your layered Christmas Stocking is ready!


