


Cute Photo Frame for Children’s Day | FeviCreate - Activity Single - FeviCreate
Children’s Day Photo Frame
Celebrate Children’s Day by making a special photo frame using cardboard, colourful paper, stickers, sketch pens, and glue. Kids can add their photo and decorate with stars, balloons, or their name to make it personal and memorable.
Paper Crafting 30 to 60 mins 6 to 8 years Art & Craft Class 4


Steps to Create this Activity
Login to see steps

Step - 1
Procure the base - Let us make a simple yet creative photo frame for children’s day. Take a corrugated sheet, pencil and a ruler, and draw a square frame on it. Take another corrugated sheet of the same size.

Step - 2
Cut the frame - Take a pair of scissors and cut along the lines of the square frame on the first corrugated sheet.

Step - 3
Make the paper designs - Take the colourful paper strips and cut them into small, spiraled quills and mini flowers.

Step - 4
Paint and stick the frame - Take Rangeela Tempera Pastel Colours and paint the frame yellow colour, after which stick the first corrugated sheet over the second using Fevistik Power, leaving the top side open for you to insert the photograph.

Step - 5
Cut the strips for box - Take the corrugated sheet and cut small strips to make the extended part of the frame the same size as the frame. Stick the strips with Fevicol MR like an open box at the lower base of the frame. Take a green coloured sheet and cut it into the design of an extended grass.

Step - 6
Decorate the base - Take one corrugated strip as a base and stick all the flowers and the quilling spiraled papers using Fevistik Power. Place the strip inside the front base and stick it with Fevistik Power.

Step 7
Add the finishing touches - Take the flowers and the quilling strips and stick them on the borders of the frame in a clustered manner using Fevistik Power.

Step - 8
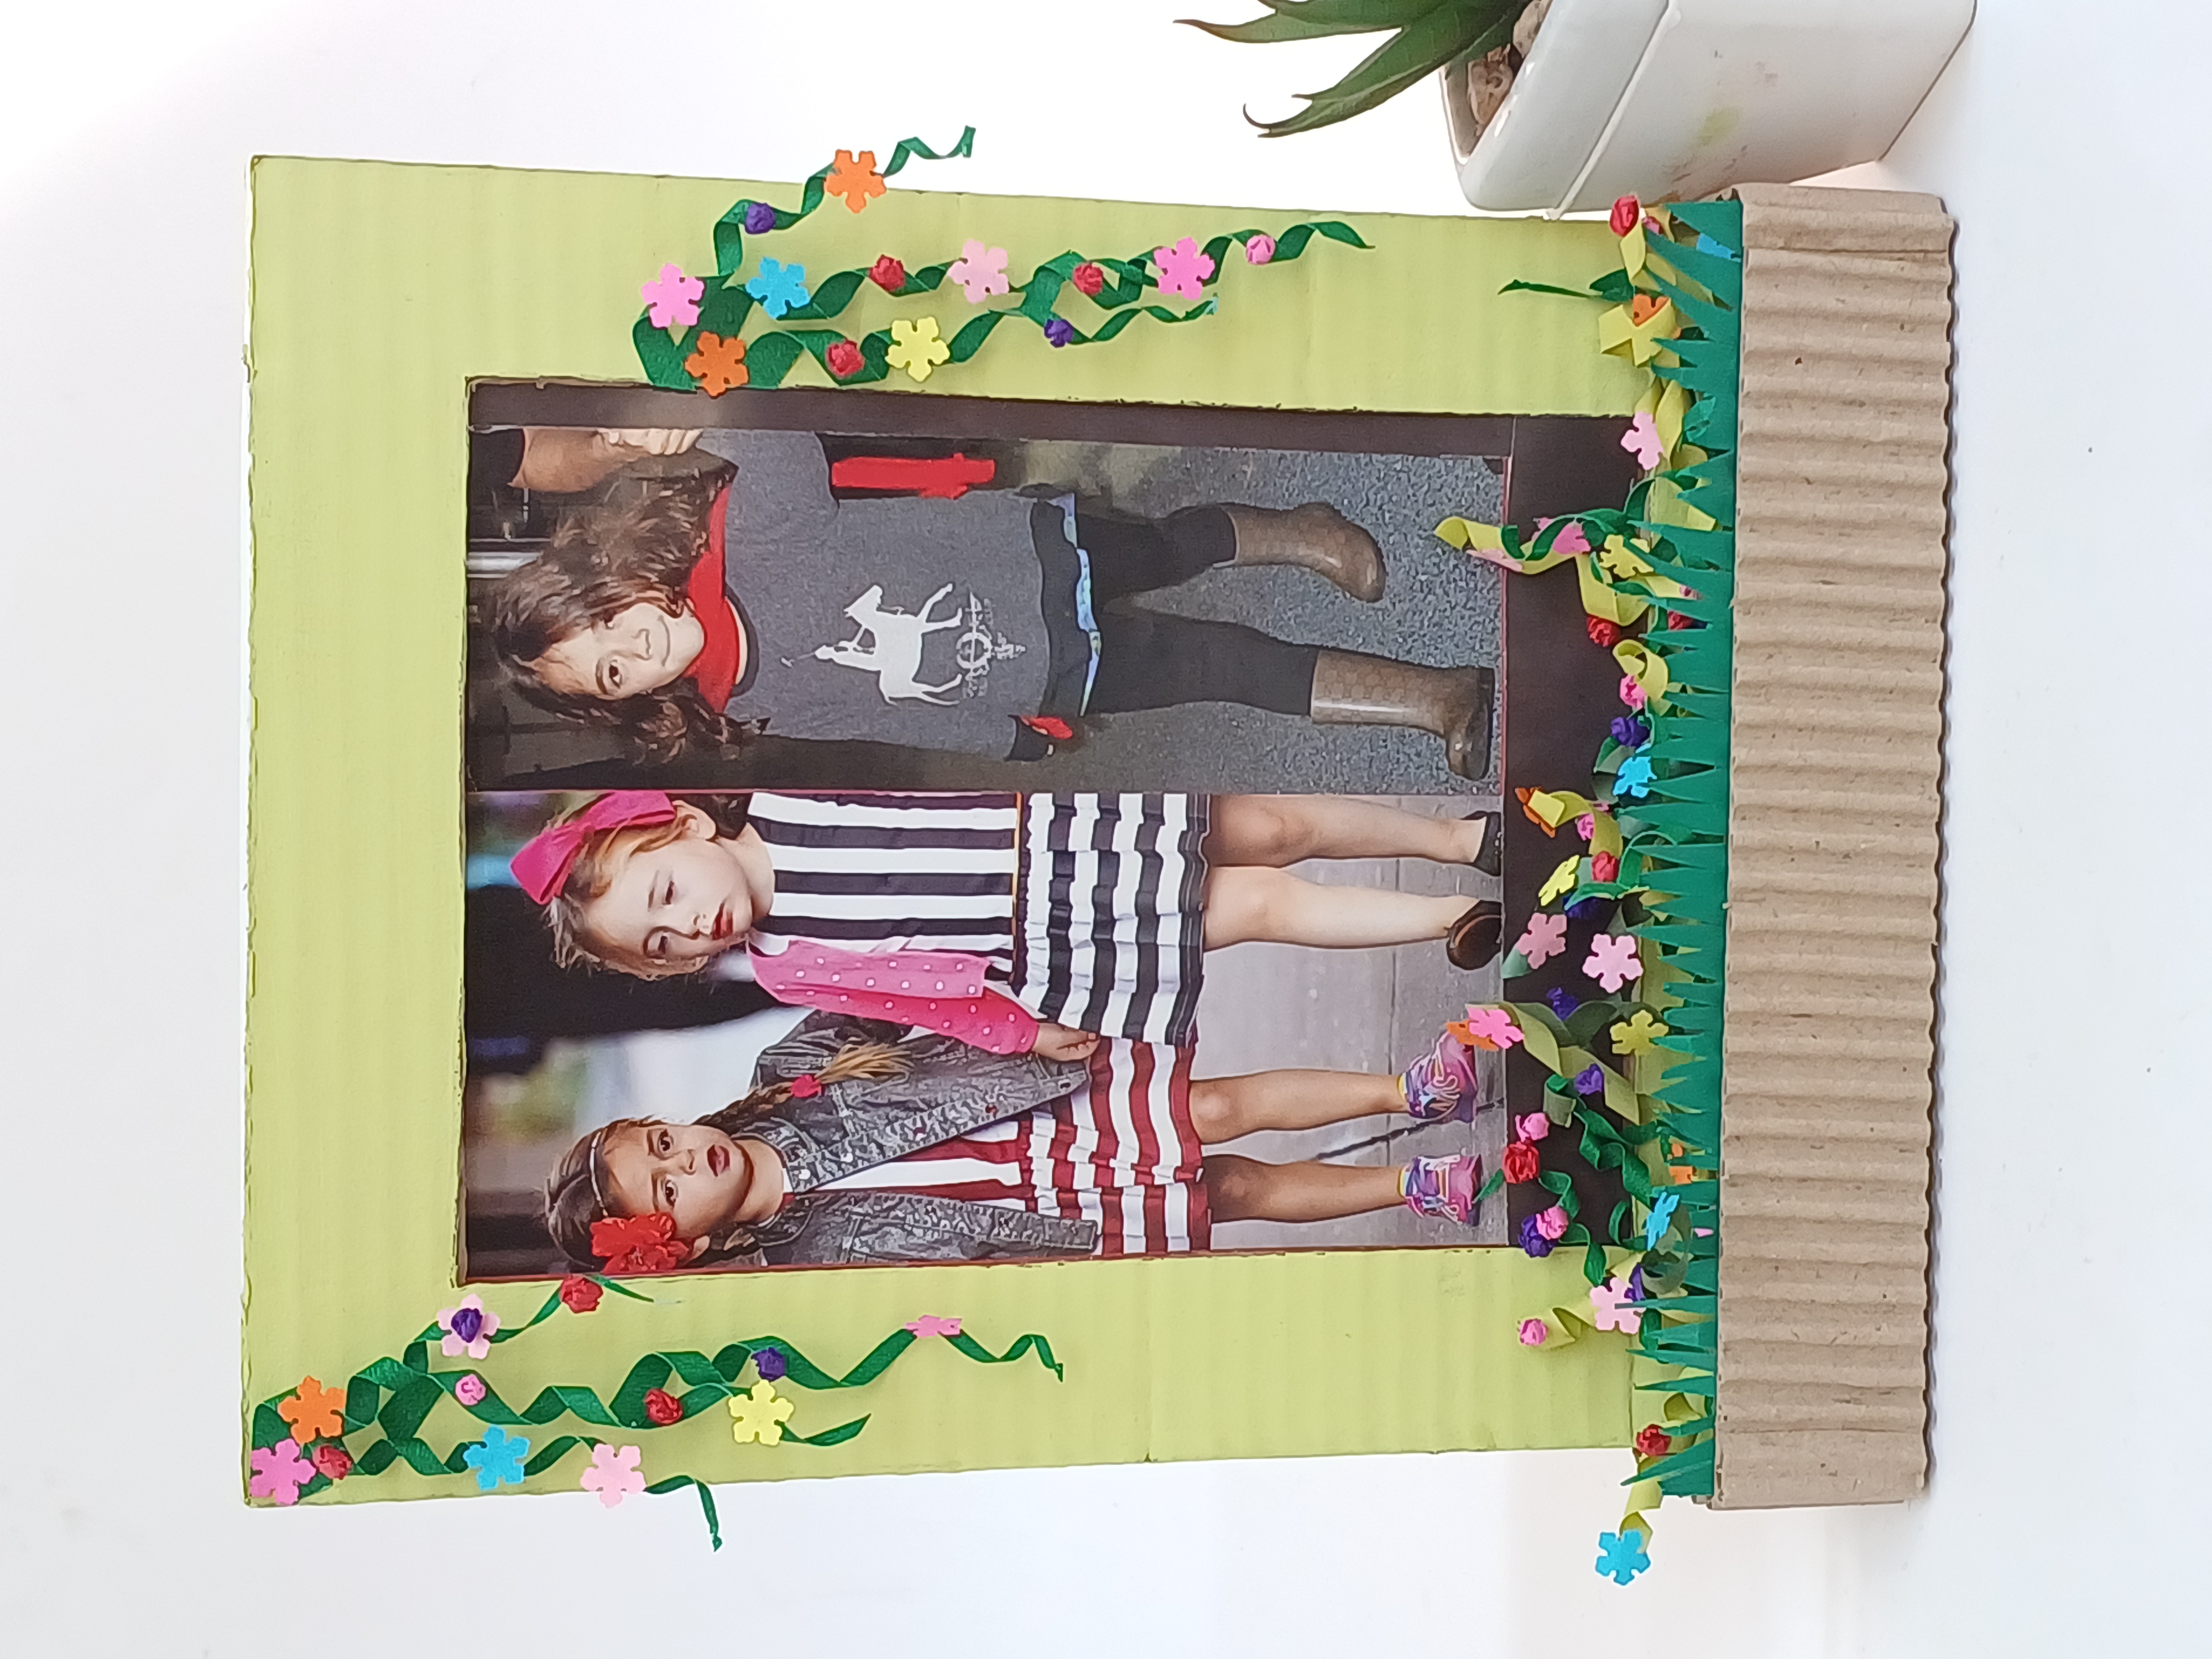
Final Look
Steps to Create this Activity
Login to see steps
Step - 1
Procure the base - Let us make a simple yet creative photo frame for children’s day. Take a corrugated sheet, pencil and a ruler, and draw a square frame on it. Take another corrugated sheet of the same size.
Step - 2
Cut the frame - Take a pair of scissors and cut along the lines of the square frame on the first corrugated sheet.
Step - 3
Make the paper designs - Take the colourful paper strips and cut them into small, spiraled quills and mini flowers.
Step - 4
Paint and stick the frame - Take Rangeela Tempera Pastel Colours and paint the frame yellow colour, after which stick the first corrugated sheet over the second using Fevistik Power, leaving the top side open for you to insert the photograph.
Step - 5
Cut the strips for box - Take the corrugated sheet and cut small strips to make the extended part of the frame the same size as the frame. Stick the strips with Fevicol MR like an open box at the lower base of the frame. Take a green coloured sheet and cut it into the design of an extended grass.
Step - 6
Decorate the base - Take one corrugated strip as a base and stick all the flowers and the quilling spiraled papers using Fevistik Power. Place the strip inside the front base and stick it with Fevistik Power.
Step 7
Add the finishing touches - Take the flowers and the quilling strips and stick them on the borders of the frame in a clustered manner using Fevistik Power.
Step - 8
Final Look


