


Chandrayaan 2 Model – Hands-On Chandrayaan 2 Model for School Project | Fevicreate - Activity Single - FeviCreate
DIY Chandrayaan 2 Model for Kids
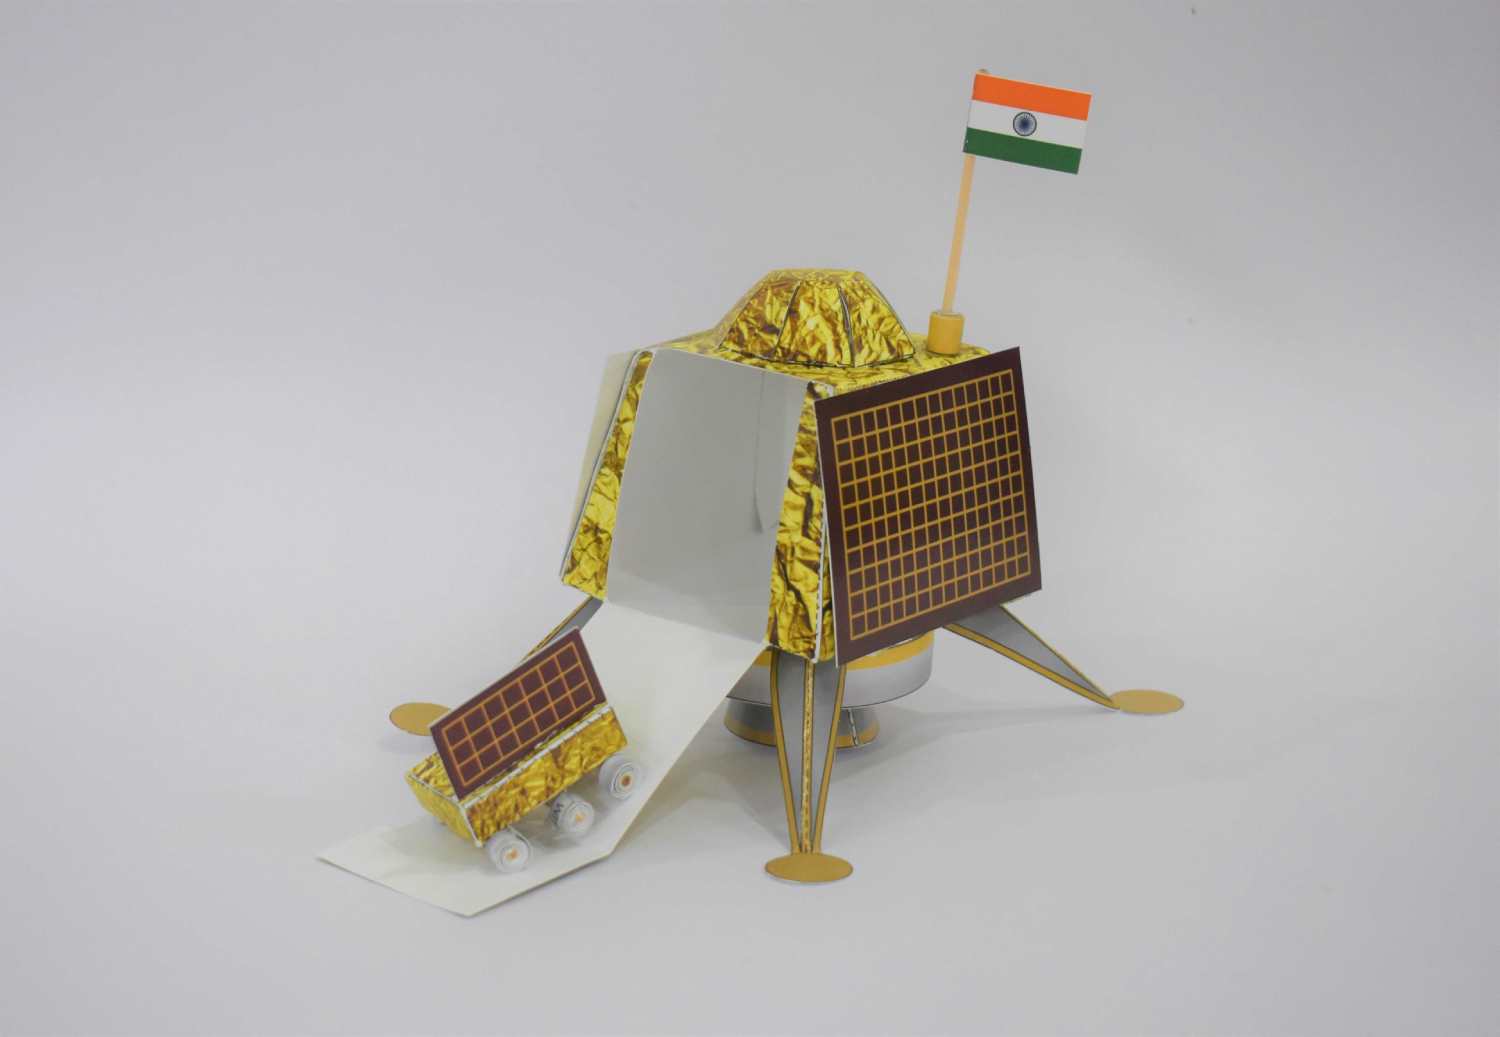
Blast off into space by building your own Chandrayaan 2 model! This fun school project lets kids dive into India’s space mission while creating something amazing. A mix of science, creativity, and excitement, this craft is perfect for young minds. Start building with our easy guide today!
Paper Crafting Science More than 60 mins 9 to 14 years Science Class 7


Steps to Create this Activity
Login to see steps

Step - 01
Refer to the labelled sheet for making the Chandrayaan model

Step - 02
Cut the part labelled as Vikram to make the main body of the lander using scissors

Step - 03
Cut along the solid lines to make the ramp using scissors

Step - 04
Paste the flaps using Fevicol A+

Step - 05
Cut the Ring using scissors, Roll It into Circle and paste it with Fevicol A+

Step - 06
Paste the Ring to the base of Vikram, let it dry.

Step - 07
Cut out the booster template from the sheet finely

Step - 08
Roll the template in a conical shape as shown in the image and paste the edges using Fevicol A+

Step - 09
Cut the 4 legs using scissors.

Step - 10
Fold and paste them using Fevicol A+

Step - 11
Paste them on the 4 triangles marked at the base of Vikram.

Step - 12
Cut the 2 Solar Panels using scissors

Step - 13
Paste them on the sides of Vikram on the marked spots using Fevicol A+

Step - 14
Cut the dome, by using scissors

Step - 15
Fold and paste it on the top of Vikram, by using Fevicol A+

Step - 16
Cut the part labelled as Pragyan to make the main body of the rover, by using scissors

Step - 17
Fold along the lines and paste it by using Fevicol A+, let it dry, Measure and cut 3 toothpicks to a length of 4cms, along with it cut the 6 wheels roll them around by using Fevicol A+,let it dry

Step - 18
Roll them around the two ends of the toothpicks,by using Fevicol A+, cut the 2 Base Strips and place them horizontally over the toothpicks,then paste them in the gap between toothpicks,by using Fevicol A+. This will allow the wheels to move

Step - 19
Cut the Solar Panel using scissors

Step - 20
Paste it on the top of Pragyan. Your rover is ready

Step - 21
Cut the flag and paste it on the toothpick, roll the Flag strip around the foot of the toothpickand paste it on the top of the Vikram lander. Your Chandrayaan 2 is now ready to land on the moon!
Steps to Create this Activity
Login to see steps
Step - 01
Refer to the labelled sheet for making the Chandrayaan model
Step - 02
Cut the part labelled as Vikram to make the main body of the lander using scissors
Step - 03
Cut along the solid lines to make the ramp using scissors
Step - 04
Paste the flaps using Fevicol A+
Step - 05
Cut the Ring using scissors, Roll It into Circle and paste it with Fevicol A+
Step - 06
Paste the Ring to the base of Vikram, let it dry.
Step - 07
Cut out the booster template from the sheet finely
Step - 08
Roll the template in a conical shape as shown in the image and paste the edges using Fevicol A+
Step - 09
Cut the 4 legs using scissors.
Step - 10
Fold and paste them using Fevicol A+
Step - 11
Paste them on the 4 triangles marked at the base of Vikram.
Step - 12
Cut the 2 Solar Panels using scissors
Step - 13
Paste them on the sides of Vikram on the marked spots using Fevicol A+
Step - 14
Cut the dome, by using scissors
Step - 15
Fold and paste it on the top of Vikram, by using Fevicol A+
Step - 16
Cut the part labelled as Pragyan to make the main body of the rover, by using scissors
Step - 17
Fold along the lines and paste it by using Fevicol A+, let it dry, Measure and cut 3 toothpicks to a length of 4cms, along with it cut the 6 wheels roll them around by using Fevicol A+,let it dry
Step - 18
Roll them around the two ends of the toothpicks,by using Fevicol A+, cut the 2 Base Strips and place them horizontally over the toothpicks,then paste them in the gap between toothpicks,by using Fevicol A+. This will allow the wheels to move
Step - 19
Cut the Solar Panel using scissors
Step - 20
Paste it on the top of Pragyan. Your rover is ready
Step - 21
Cut the flag and paste it on the toothpick, roll the Flag strip around the foot of the toothpickand paste it on the top of the Vikram lander. Your Chandrayaan 2 is now ready to land on the moon!


