


How to Make a Paper Owl Craft for Poila Baishakh - Activity Single - FeviCreate
DIY Name Plate for Baisakhi
Celebrate Baisakhi with vibrant papercraft and innovative nameplate craft ideas! Spark your creativity with our engaging craft projects, including Baisakhi paper crafts and unique name plate designs. Elevate your festive celebrations with fun and educational crafting activities by Fevicreate.
Paper Crafting Celebration 30 to 60 mins 9 to 14 years Art & Craft Class 5


Steps to Create this Activity
Login to see steps

Step - 01
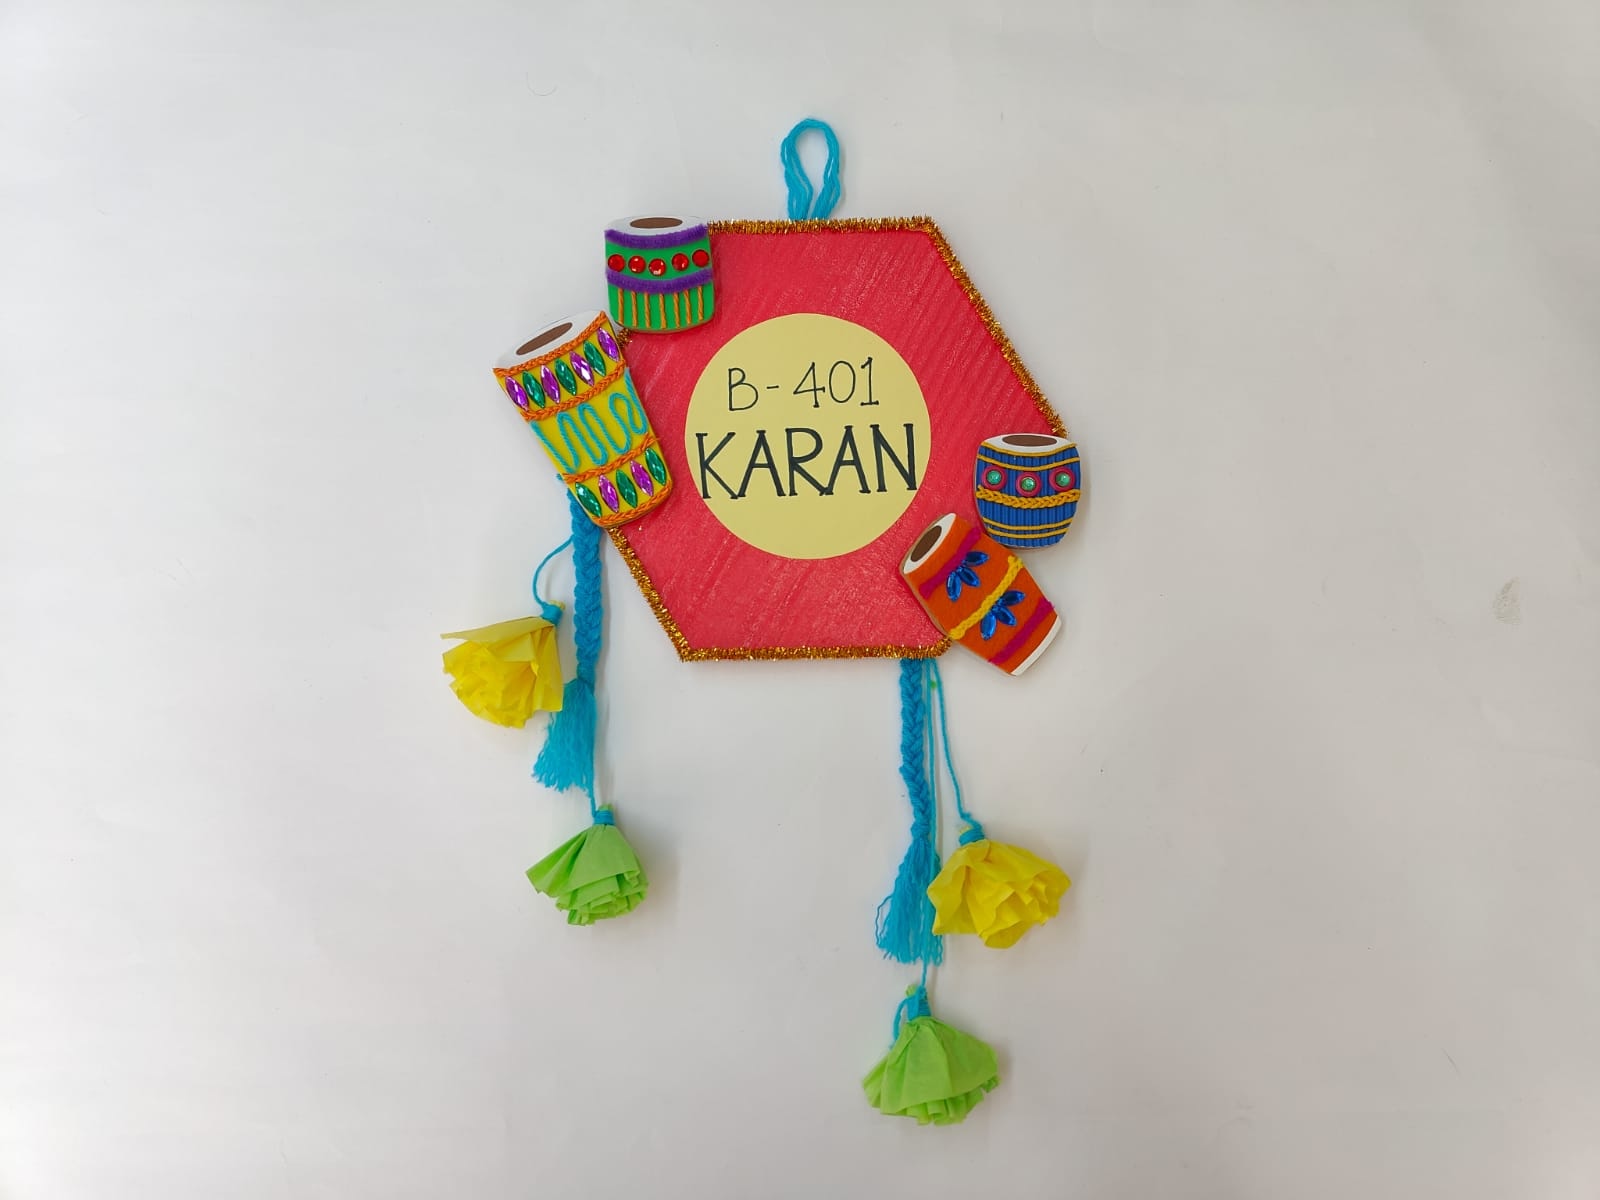
To create a nameplate for Baisakhi, take a corrugated sheet and draw the diagram referring to the provided template.

Step - 02
Cut it with scissors. To create a dhol, draw and cut out the elements of the dhol using foam sheets as shown, referring to the provided template.

Step - 03
To enhance the dhol, gather materials such as cord, ornamental stones, and pipe cleaners.

Step - 04
Using Glue Drops, assemble the cutouts of the dhol and decorate it as shown in the image, or create patterns of your choice. Similarly, create three more dhols following the same procedure, referring to the provided template.

Step - 05
Using Fevicryl Acrylic Color of your choice, paint the base with the help of paintbrushes and let it dry. To enhance the borders, gather glitter pipe cleaners.

Step - 06
Using Glue Drops, stick the pipe cleaners onto the edges of the structure as shown in the image.

Step - 07
To create the name placard, take colored chart paper of your choice. Draw and cut out any shape of your choice, making sure it's proportionate to the base structure. With the help of a felt pen, write your flat number and name.

Step - 08
To create danglers, gather materials such as wool and any two shades of kite paper.

Step - 09
Cut out strands of wool and create a braided structure as shown in the image. To create the dangler, take kite paper, draw and cut out a strip with a width of approximately 2 inches, fold it inwards, and tie a strand of wool to it as shown in the image.

Step - 10
Using Glue Drops, assemble all elements as shown. To create a holder, take a few strands of wool, tie them into a loop structure, and attach it behind. Your handmade name plate is ready!

Step - 11
Design Template.
Steps to Create this Activity
Login to see steps
Step - 01
To create a nameplate for Baisakhi, take a corrugated sheet and draw the diagram referring to the provided template.
Step - 02
Cut it with scissors. To create a dhol, draw and cut out the elements of the dhol using foam sheets as shown, referring to the provided template.
Step - 03
To enhance the dhol, gather materials such as cord, ornamental stones, and pipe cleaners.
Step - 04
Using Glue Drops, assemble the cutouts of the dhol and decorate it as shown in the image, or create patterns of your choice. Similarly, create three more dhols following the same procedure, referring to the provided template.
Step - 05
Using Fevicryl Acrylic Color of your choice, paint the base with the help of paintbrushes and let it dry. To enhance the borders, gather glitter pipe cleaners.
Step - 06
Using Glue Drops, stick the pipe cleaners onto the edges of the structure as shown in the image.
Step - 07
To create the name placard, take colored chart paper of your choice. Draw and cut out any shape of your choice, making sure it's proportionate to the base structure. With the help of a felt pen, write your flat number and name.
Step - 08
To create danglers, gather materials such as wool and any two shades of kite paper.
Step - 09
Cut out strands of wool and create a braided structure as shown in the image. To create the dangler, take kite paper, draw and cut out a strip with a width of approximately 2 inches, fold it inwards, and tie a strand of wool to it as shown in the image.
Step - 10
Using Glue Drops, assemble all elements as shown. To create a holder, take a few strands of wool, tie them into a loop structure, and attach it behind. Your handmade name plate is ready!
Step - 11
Design Template.


